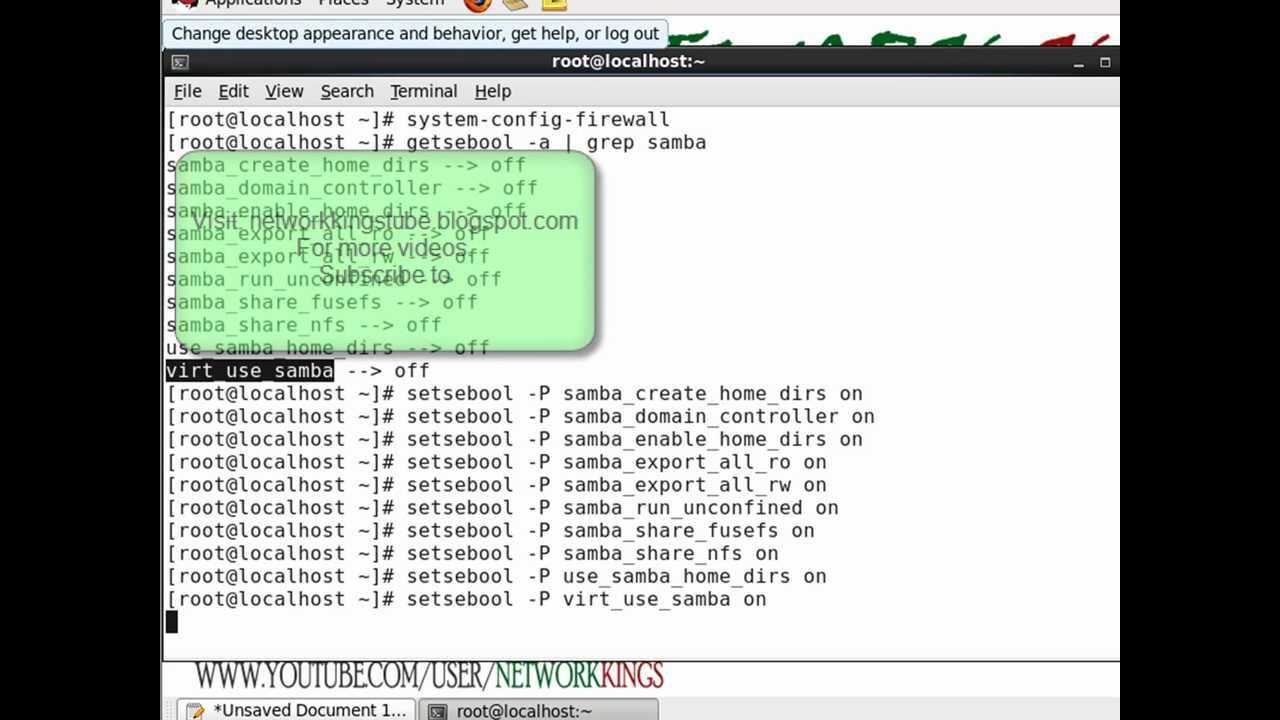
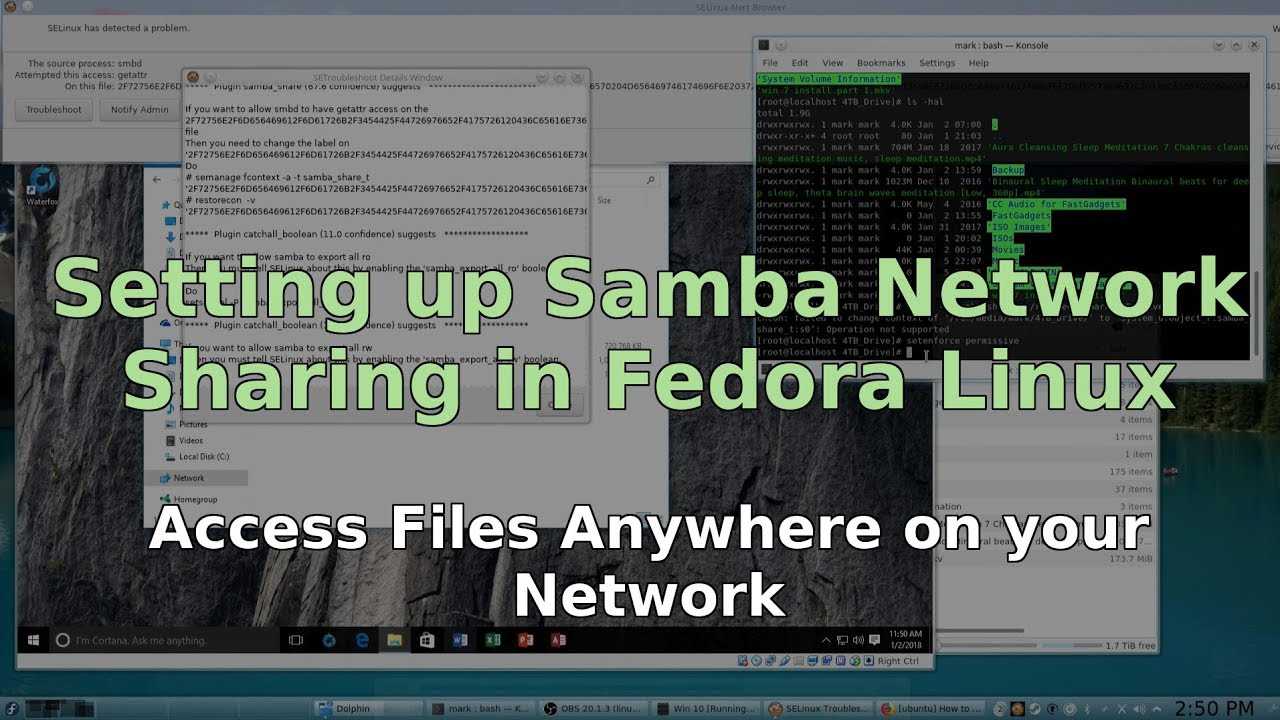
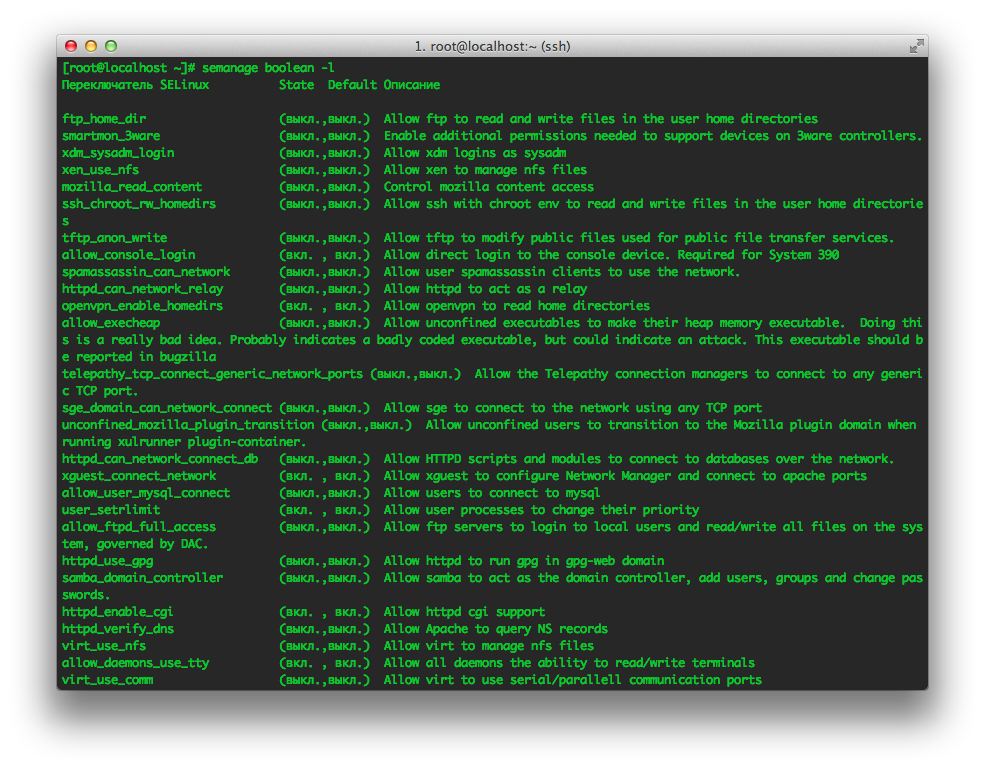
Booleans
SELinux policy is customizable based on least access required. smbd policy is extremely flexible and has several booleans that allow you to manipulate the
policy and run smbd with the tightest access possible.
If you want to allow samba to export ntfs/fusefs volumes, you must turn on the samba_share_fusefs boolean.
setsebool -P samba_share_fusefs 1
If you want to allow samba to share any file/directory read only, you must turn on the samba_export_all_ro boolean.
setsebool -P samba_export_all_ro 1
If you want to allow virt to manage cifs files, you must turn on the virt_use_samba boolean.
setsebool -P virt_use_samba 1
If you want to allow samba to create new home directories (e.g. via PAM), you must turn on the samba_create_home_dirs boolean.
setsebool -P samba_create_home_dirs 1
If you want to allow samba to share users home directories, you must turn on the samba_enable_home_dirs boolean.
setsebool -P samba_enable_home_dirs 1
If you want to allow samba to export NFS volumes, you must turn on the samba_share_nfs boolean.
setsebool -P samba_share_nfs 1
If you want to allow sanlock to manage cifs files, you must turn on the sanlock_use_samba boolean.
setsebool -P sanlock_use_samba 1
If you want to allow samba to run unconfined scripts, you must turn on the samba_run_unconfined boolean.
setsebool -P samba_run_unconfined 1
If you want to allow samba to act as the domain controller, add users, groups and change passwords, you must turn on the samba_domain_controller boolean.
setsebool -P samba_domain_controller 1
If you want to allow samba to share any file/directory read/write, you must turn on the samba_export_all_rw boolean.
setsebool -P samba_export_all_rw 1
If you want to allow samba to act as a portmapper, you must turn on the samba_portmapper boolean.
setsebool -P samba_portmapper 1
If you want to support SAMBA home directories, you must turn on the use_samba_home_dirs boolean.
setsebool -P use_samba_home_dirs 1
If you want to allow samba to modify public files used for public file transfer services. Files/Directories must be labeled public_content_rw_t, you must
turn on the allow_smbd_anon_write boolean.
setsebool -P allow_smbd_anon_write 1
Step 1 — Installing Samba
Let’s start by installing Samba using Ubuntu’s package management system.
Before installing new packages, let’s update the local package index to include the most up-to-date versions from the Ubuntu repositories:
Next, install Samba:
This command will install and start both the Samba server and the Samba NetBIOS server . is not required for this tutorial, so in the interests of security you can stop and disable it with :
The command will produce the following output when run:
This output communicates that because does not have native management configuration, it is being disabled by the older SysV init system.
To avoid security issues that can arise from running an unconfigured, network-enabled service, let’s stop the Samba server until configuration details are in place:
Samba is now installed and ready to be configured.
Conclusion
In this article, you have created cross-platform online file shares using the Samba server. You have also accessed these shares from Windows, Linux, and macOS.
Samba shares have become so common that many applications are able to access the data stored in them. These applications can extend the functionality and usefulness of your Samba shares. For example, the mobile version of the media player VLC can connect to and stream music and video from your Samba share. To access it, select open MRL and use the standard Samba URL: . You can also use a Samba share as the destination for your backups with the cross-platform backup utility BackupPC.
In addition to acting as a simple file share, Samba can work with Windows Active Directory as either a domain controller or a member of a domain. The Samba Wiki User Documentation contains more information on how to do this.
Introduction to Samba
The Samba package provides file
and print services to SMB/CIFS clients and Windows networking to
Linux clients. Samba can also be
configured as a Windows Domain Controller replacement, a file/print
server acting as a member of a Windows Active Directory domain and
a NetBIOS (rfc1001/1002) nameserver (which among other things
provides LAN browsing support).

This package is known to build and work properly using an LFS-9.1
platform.
Package Information
-
Download (HTTP): https://www.samba.org/ftp/samba/stable/samba-4.11.6.tar.gz
-
Download MD5 sum: 5a12f3506766d9260e94398c69eb3cdf
-
Download size: 18 MB
-
Estimated disk space required: 618 MB (add 314 MB for
quicktest) -
Estimated build time: 2.6 SBU (using parallelism=4; add 4.0
SBU for quicktest)
Optional
Avahi-0.7,
BIND-9.14.10, Cups-2.3.1, Cyrus SASL-2.1.27, GDB-9.1, git-2.25.0,
GnuPG-2.2.19 (required for ADS and testsuite),
libaio-0.3.112, libarchive-3.4.2, libcap-2.31
with PAM, libgcrypt-1.8.5, libnsl-1.2.0, MIT Kerberos V5-1.18, NSS-3.50, popt-1.16,
Talloc-2.3.1 (included), Vala-0.46.6,
Valgrind-3.15.0 (optionally used by the test
suite), Wireshark-3.2.1 (module installed), xfsprogs-5.4.0, cmocka, ctdb (included), cwrap, dnspython, FAM,
Gamin, GlusterFS,
Heimdal (included),
libunwind, ldb (included), M2Crypto (required
for ADS), OpenAFS, PyGPGME (recommended
for ADS), tevent (included), and tdb (included)
Optional (for the Developer Test Suite)
Install in listed order: , argparse, extras,
py,
enum34, hypothesis,
pytest, coverage,
pytest-cov,
doctools, unittest2, testtools, fixtures,
python-mimeparse,
contextlib2,
traceback2,
linecache2,
testscenarios,
testresources,
virtualenv,
pbr,
and python-subunit
Использование winbind
Сервис winbind является новым средством, предназначенным для более полной интеграции Samba в домены Windows; он появился, начиная с Samba 2.2.0. Данный сервис считывает свою конфигурацию из /etc/samba/smb.conf и динамически взаимодействует с PDC домена, автоматически синхронизируя списки пользователей и групп домена и машины Samba. Таким образом, winbind является весьма удобным средством для автоматического поддержания актуальности базы пользователей домена на рабочих станциях Samba.
Работа данного сервиса происходит без изменения содержимого каких-либо авторизационных файлов в /etc и при перезагрузке машины доменные пользователи появляются в системе только после запуска winbindd. Если во время работы остановить winbindd, то доменные пользователи и группы не исчезнут из системы до перезагрузки, однако динамического обновления списков имен и паролей происходить не будет.
Для того чтобы при рестарте компьютера (или только сервиса winbindd) не нарушались соответствия внутренних UID и доменных SID, он сохраняет текущее состояние списков в файлах /var/cache/samba/winbindd*.tdb.
Для нормального функционирования winbindd в файле /etc/samba/smb.conf обязательно должны быть обьявлены следующие директивы:
Диапазон номеров локальных пользователей, который будет использован для динамического создания пользователей домена:
winbind uid = 10000-20000
Диапазон номеров локальных групп пользователей, который будет использован для динамического создания групп пользователей домена:
winbind gid = 10000-20000
Символ-разделитель, используемый для составления доменных имен пользователей и располагающийся между именем домена и именем пользователя:
winbind separator = +
Интервал времени (в секундах) между запросами winbind к PDC в целях синхронизации списков пользователей и групп:
winbind cache time = 10
Шаблон имени домашних каталогов доменных пользователей, автоматически присваиваемых каждому пользователю. Сами каталоги, однако, динамически не создаются. Вместо переменой %D подставляется имя домена, а вместо %U подставляется имя пользователя:
template homedir = /home/%D/%U
Командный интерпретатор, назначаемый по умолчанию для пользователей, авторизованных через winbindd.
template shell = /bin/bash
Также необходимо внести изменения в файле /etc/nsswich.conf в разделы passwd и group, вписав директиву winbind — например, таким образом:
passwd: files winbind
group: files winbind
С этого момента можно использовать имена доменных пользователей в /etc/samba/smb.conf с целью разграничения доступа, в правах на файлы и каталоги, для подключения к сетевым ресурсам данного хоста со стороны других хостов.
Подключение к общему ресурсу Samba из Windows
Пользователи Windows также могут подключиться к общему ресурсу Samba как из командной строки, так и из графического интерфейса. Следующие шаги показывают, как получить доступ к общему ресурсу с помощью проводника Windows.
- Откройте проводник и на левой панели щелкните правой кнопкой мыши «Этот компьютер».
- Выберите «Выбрать другое сетевое расположение» и нажмите «Далее».
- В поле «Интернет или сетевой адрес» введите адрес общего ресурса Samba в следующем формате .
- Нажмите «Далее», и вам будет предложено ввести учетные данные для входа, как показано ниже:
- В следующем окне вы можете ввести собственное имя для сетевого расположения. По умолчанию будет выбран сервер Samba.
- Нажмите «Далее», чтобы перейти к последнему экрану мастера настройки подключения.
- Нажмите «Готово», и файлы на сервере Samba будут показаны.
Утилита net
Утилита net призвана заменить smbpasswd и обеспечивает гораздо большие возможности по получению информации о сети и управлению сетью. Формат команд утилиты очень похож на формат одноименной команды Windows NT/2000.
Основные применения команды net:
- создание и удаление пользователей: net user;
- включение машины в домен: net ads join — Active Directory; net rpc join — NT Domain;
- получение информации о домене, машине, открытых файлах, сессиях: net info, net ads status, net rpc status;
- создание и удаление разделяемых ресурсов на удаленных машинах: net share;
- синхронизация времени с windows-сервером: net time.
Step 2 — Setting Samba’s Global Options
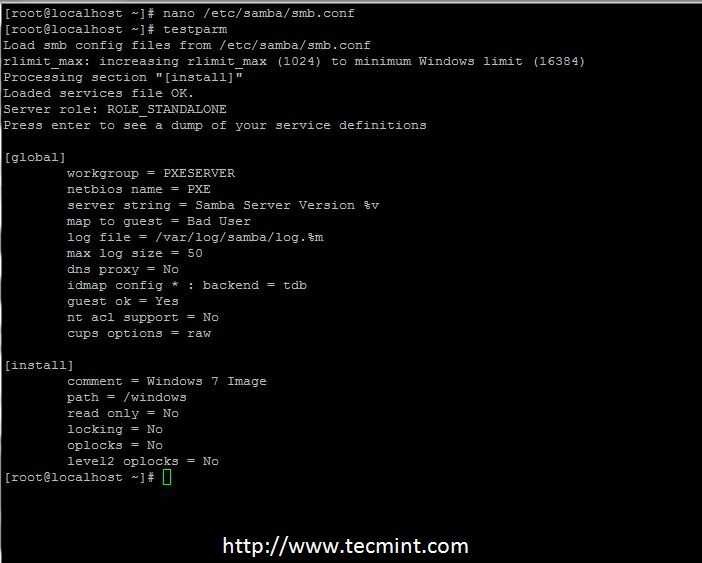
Let’s define how the Samba server will behave by modifying its configuration file, located at . This file has two parts: a section and a section. The section configures the behavior of the Samba server, and the sections configure the file shares. Let’s begin by setting directives in the section.
Rather than editing directly, rename it to and create a new file with the name :
Before editing , let’s check the available interfaces in order to tell Samba which it should recognize. Type the following:
This output indicates that is the loopback interface and is the external network interface, though your external interface may differ. Take note of both: you’ll include them with the directive in the section of the file.
Let’s begin editing this file with or your favorite editor:
The section of this file will define the server’s name, role, and other details, including network interfaces:
/etc/samba/smb.conf
These directives specify the following:
- — This is the identifying information that will be supplied to users during connections. You can use or another name that will identify your server. Throughout this tutorial, you will see the string to denote the Samba share for the organization Example.com.
- — This defines what type of Samba server will be created. In this case it is a , i.e. a file share. Other server types include domain member servers and domain controllers.
- — These are the network interfaces that Samba will bind to. is the loopback interface (127.0.0.1) and is required. You will also need to include the external network interface you outputted earlier. This is usually .
- — This ensures that Samba only binds to the interfaces listed on the line. As a security measure, this causes Samba to ignore packets that do not correspond to the specified .
- — This disables all NetBIOS functions that are not needed in a standalone server. Doing this simplifies the server name resolution process and the transport of SMB traffic.
- — This sets the port that Samba will listen on. Port is the standard port for Samba.
- — This sets the name and location of Samba’s log file.
- — This sets a size limit on the log file. The number listed is in bytes and equals 10MB. Some things to keep in mind when setting this size limit: When it is reached, Samba will generate a new log file and move the old contents to a duplicate with an extension. If the limit is exceeded again, the existing file will be destroyed. This prevents disk/partition space from being overwhelmed with the contents of a single log file. You should therefore define a file size that makes sense for your system resources.
If you want more detailed logging while you are setting up the server, append the following line to the section:
/etc/samba/smb.conf
This sets the log level to 3 (info), increasing the granularity of log information from the default setting of 1. The higher setting of 5 for the and debug classes provides more information related to user authentication.
Save and close the file when you have finished creating this section.
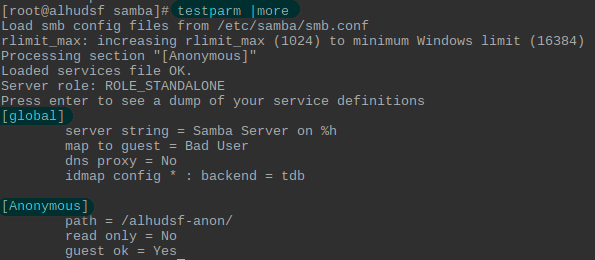
Whenever you edit , you should run the Samba utility to check that there are no syntax errors:
Running the command on the file produces the following output:
Pressing produces the following output:
If reports , then there are no syntax errors that would stop the Samba server from starting.
Configuring the section is all that’s required to start the Samba server. However, its functionality will be limited without share configurations. A share is comprised of two parts, a user and a directory, both of which must be created and configured to allow logins and testing. The next section will explain how to create users that can access the shares.


Command Explanations
: Assigns all
other file paths in a manner compliant with the Filesystem
Hierarchy Standard (FHS).
: Disable
systemd integration, since it is
not built in the System V version of LFS/BLFS.
: Disables
Active Directory Domain Controller functionality. See
Setup a Samba Active Directory Domain Controller for detailed
information. Remove this switch if you’ve installed the Python
modules needed for ADS support. Note that BLFS does not provide a
samba bootscript or systemd unit for an Active Directory domain
controller.
:
This option specifies the test suite work directory (default=./st).
mv -v /usr/lib/libnss_win{s,bind}.so*
/lib: The nss libraries are installed in
by default. Move them to
.
ln -v -sf
../../lib/libnss_winbind.so.2
/usr/lib/libnss_winbind.so and ln -v -sf ../../lib/libnss_wins.so.2
/usr/lib/libnss_wins.so: These symlinks are
required when applications build against these libraries.
install -v -m644 examples/LDAP/*
/etc/openldap/schema: These commands are used to
copy sample Samba schemas to the OpenLDAP directory.
Некоторые вопросы безопасности
Данный раздел относится в основном к серверной части Samba.
Прежде всего необходимо определить, какие интерфейсы должны прослушиваться Samba в ожидании запроса на соединение (по умолчанию прослушиваются все имеющиеся в системе).
Например, для того, чтобы ограничить прослушивание локальным хостом и первой сетевой картой, необходимо написать в /etc/samba/smb.conf:
interfaces = 127.0.0.1 eth0
bind interfaces only = Yes
Далее можно ограничить диапазоны адресов, с которых позволительно обращаться к данному серверу. Действие данных директив аналогично воздействию /etc/hosts.allow и /etc/hosts.deny на xinetd и ssh: если IP-адрес хоста не подпадает под разрешающее правило, то соединение не будет установлено вовсе. Для того, что бы ограничить доступ двумя подсетями и локальной системой, дополнительно исключив при этом один хост, можно написать:
hosts allow = 192.168.1. 192.168.2. 127.
hosts deny = 192.168.1.12
Все вышеперечисленные директивы ограничивают соединения на уровне интерфейсов и IP-адресов до какой либо авторизации. Следующие директивы управляют режимом авторизации пользователей.
Во избежание перехвата чувствительных данных при передаче их по сети открытым текстом принято шифровать пароли. Samba и все версии Windows, начиная с версии Win98, по умолчанию используют шифрование паролей. Данная директива включает его в Samba:
encrypt passwords = yes
Файл переопределений имен пользователей является весьма мощным средством управления пользовательскими акаунтами, однако при неразумном использовании это средство опасно и поэтому по умолчанию отключено. Внимательно ознакомьтесь с содержимым файла /etc/samba/smbusers прежде, чем использовать его.
username map = /etc/samba/smbusers
Решение проблем
Проблемы подключения к Windows 7 — mount error(12): cannot allocate memory
Известная ошибка Windows 7 «mount error(12): cannot allocate memory» может быть исправлена установкой пары ключей в реестре системы Windows:
- (установить значение )
- (установить значение )
В качестве альтернативы можно запустить командную строку от имени Администратора и выполнить следующее:
reg add "HKLM\SYSTEM\CurrentControlSet\Control\Session Manager\Memory Management" /v "LargeSystemCache" /t REG_DWORD /d 1 /f
reg add "HKLM\SYSTEM\CurrentControlSet\Services\LanmanServer\Parameters" /v "Size" /t REG_DWORD /d 3 /f
Выполните одно из следующих действий, чтобы изменения вступили в силу:
- Перезагрузите Windows
- Перезапустите службу на сервере через services.msc
- Выполните в командной строке и ; после остановки служба может перезапуститься автоматически
Примечание: Поиск решения в интернете подскажет другое решение, рекомендующее пользователям добавить ключ, изменяющий размер «IRPStackSize». Это неправильное решение для устранения проблемы в Windows 7. Не применяйте его
Проблемы получения доступа к ресурсам, защищенным паролем, из Windows
Обратите внимание, что это должно быть добавлено в локальный файл smb.conf, а не в файл сервера
# lanman fix
client lanman auth = yes
client ntlmv2 auth = no
Диалоговое окно появляется с большой задержкой
У меня была проблема, связанная с тем, что диалоговое окно для ввода пароля появлялось с задержкой около 30 секунд, когда я пытался установить соединение из Windows XP/Windows 7. Когда я посмотрел файл error.log на сервере, я увидел:
[2009/11/11 06:20:12,  0] printing/print_cups.c:cups_connect(103)
Unable to connect to CUPS server localhost:631 - Interrupted system call
Эта опция предотвращает поиск cups и файла /etc/printcap:
printing = bsd
printcap name = /dev/null
Ошибка: Failed to retrieve printer list: NT_STATUS_UNSUCCESSFUL
Если вы являетесь домашним пользователем, используете samba исключительно для организации общего доступа к файлам с сервера или NAS и не заинтересованы в организации общего доступа к принтерам, вы можете исправить эту ошибку, добавив следующие строки в файл /etc/samba/smb.conf:
load printers = No
printing = bsd
printcap name = /dev/null
disable spoolss = Yes
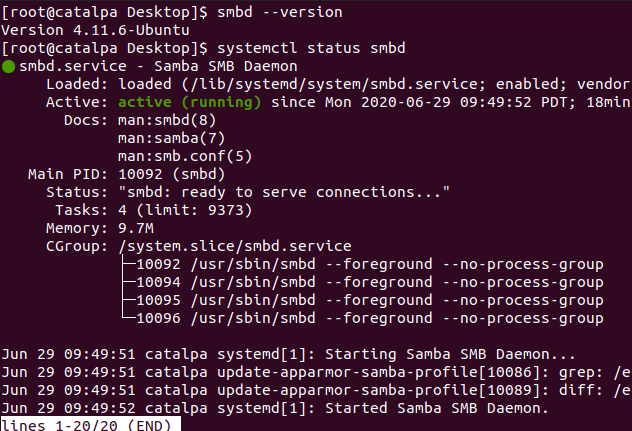
Перезапустите samba:
systemctl restart smbd
…проверьте ваши логи:
cat /var/log/samba/smbd.log
и больше ошибка не должна появляться.
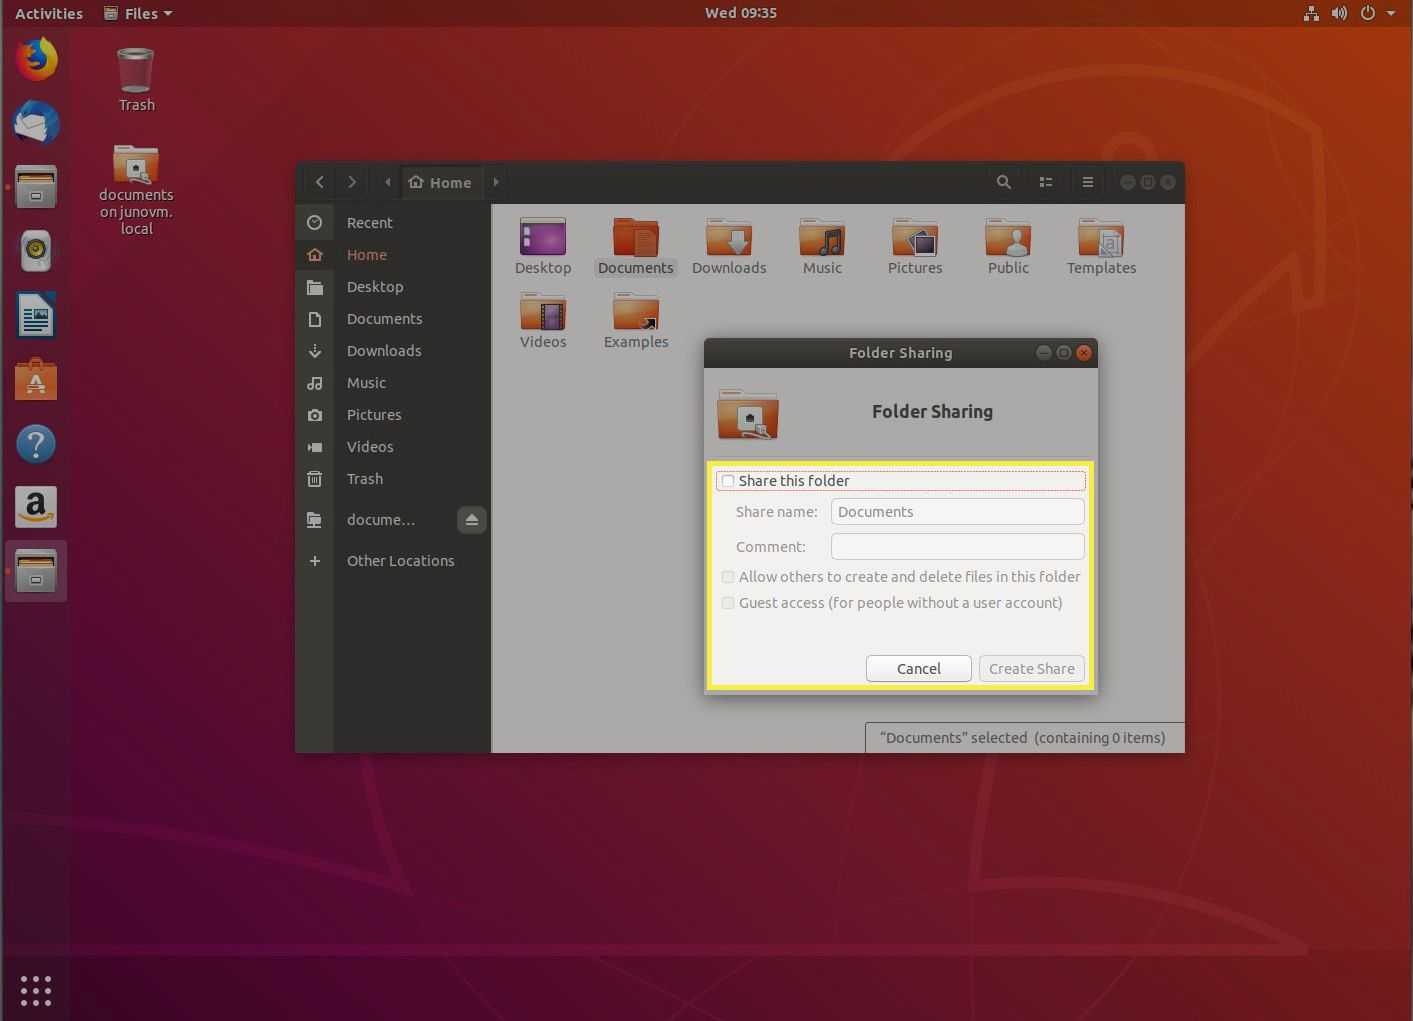
Не удается предоставить общий доступ к папке
Проблема проявляется в том, что, когда вы пытаетесь предоставить общий доступ к папке через Dolphin (файловый менеджер), и вначале, вроде бы, все работает нормально, после перезапуска Dolphin иконка ресурса исчезла из папки, а в терминале (Konsole) вы видите следующий вывод:
‘net usershare’ returned error 255: net usershare: usershares are currently disabled
Для решения проблемы включите пользовательские общие ресурсы, как это описано в разделе .
И вы используете firewall (iptables), поскольку не доверяете вашей локальной (школа, университет, отель) сети. Это может происходить по следующей причине: когда smbclient просматривает локальную сеть, он посылает широковещательный запрос на udp-порт 137. Затем серверы сети отвечают вашему клиенту, но, поскольку исходный адрес ответа отличается от адреса назначения, который видел iptables при отправке запроса, iptables не признает ответ как «установленное соединение» или «относящийся к запросу», и, следовательно, пакет отбрасывается. Возможное решение — добавление:
iptables -t raw -A OUTPUT -p udp -m udp --dport 137 -j CT --helper netbios-ns
в вашу конфигурацию iptables.
Подключение к серверу завершилось неудачей: (Error NT_STATUS_UNSUCCESSFUL)
Вероятно, вы указываете неправильное имя сервера. Чтобы узнать его, запустите на сервере команду и найдите строку «Transient hostname».
Редактирование /etc/samba/smb.conf:
Для работы в Active Directory smb.conf должен содержать следующие параметры:
# Задаёт Kerberos realm, обычно совпадает с именем домена в
# верхнем регистре, например realm = MY.FIRM.COM
realm = <REALM>

# Это обычно часть реалма до первой точки, например
# workgroup = MY
workgroup = <WORKGROUP>

# Тип домена - Active Directory.
security = ADS

# В случае Active Directory пароли всегда шифруются.
encrypt passwords = true

# Обычно этот параметр указывать не обязательно, т.к. Samba сама
# определяет адрес KDC, если в сети есть WINS-сервер и он указан
# в smb.conf
ads server = <your.kerberos.server>
The [printers] section
If a section occurs in the configuration file, users
are able to connect to any printer specified in the local host’s printcap
file.
When a connection request is made, the existing sections are
scanned. If a match is found, it is used. If no match is found, but a
section exists, it is used as described above. Otherwise, the
requested section name is treated as a printer name and the appropriate
printcap file is scanned to see if the requested section name is a valid
printer share name. If a match is found, a new printer share is created by
cloning the section.


A few modifications are then made to the newly created share:
•The share name is set to the located printer
name
•If no printer name was given, the printer name is
set to the located printer name
•If the share does not permit guest access and no
username was given, the username is set to the located printer name.
The service MUST be printable — if you specify
otherwise, the server will refuse to load the configuration file.
Typically the path specified is that of a world-writeable spool
directory with the sticky bit set on it. A typical entry looks
like this:
path = /usr/spool/public
guest ok = yes
printable = yes
All aliases given for a printer in the printcap file are
legitimate printer names as far as the server is concerned. If your printing
subsystem doesn’t work like that, you will have to set up a pseudo-printcap.
This is a file consisting of one or more lines like this:
alias|alias|alias|alias...
Each alias should be an acceptable printer name for your printing
subsystem. In the section, specify the new file as your printcap.
The server will only recognize names found in your pseudo-printcap, which of
course can contain whatever aliases you like. The same technique could be
used simply to limit access to a subset of your local printers.
An alias, by the way, is defined as any component of the first
entry of a printcap record. Records are separated by newlines, components
(if there are more than one) are separated by vertical bar symbols (|).
Note
On SYSV systems which use lpstat to determine what printers are
defined on the system you may be able to use printcap name = lpstat to
automatically obtain a list of printers. See the printcap name option for
more details.
Introduction to Samba
The Samba package provides file
and print services to SMB/CIFS clients and Windows networking to
Linux clients. Samba can also be
configured as a Windows Domain Controller replacement, a file/print
server acting as a member of a Windows Active Directory domain and
a NetBIOS (rfc1001/1002) nameserver (which among other things
provides LAN browsing support).
This package is known to build and work properly using an LFS-10.1
platform.
Package Information
-
Download (HTTP): https://www.samba.org/ftp/samba/stable/samba-4.14.2.tar.gz
-
Download MD5 sum: 2c726e392a7d36743ae0517e48db36eb
-
Download size: 18 MB
-
Estimated disk space required: 620 MB (add 380 MB for
quicktest) -
Estimated build time: 3.1 SBU (using parallelism=4; add 4.7
SBU for quicktest)
Recommended
dbus-1.12.20 (for vfs_snapper, which is
useful on systems that support Volume Shadow Copies on
Windows), Fuse-3.10.2, GPGME-1.15.1,
ICU-68.2, libxslt-1.1.34
(for documentation), Linux-PAM-1.5.1, , and OpenLDAP-2.4.58
Optional
Avahi-0.8,
BIND-9.16.13, Cups-2.3.3, Cyrus SASL-2.1.27, GDB-10.1, git-2.31.1, GnuPG-2.2.27
(required for ADS and testsuite), libaio-0.3.112,
libarchive-3.5.1, libcap-2.49
with PAM, libgcrypt-1.9.2, libnsl-1.3.0, MIT Kerberos V5-1.19.1, NSS-3.63,
popt-1.18, Talloc-2.3.2
(included), Vala-0.52.0, Valgrind-3.17.0 (optionally used by the test
suite), xfsprogs-5.11.0, cmocka, cryptography, ctdb (included),
cwrap, dnspython, FAM,
Gamin, GlusterFS, Heimdal (included),
iso8601, libunwind, ldb (included), M2Crypto
(required for ADS), OpenAFS, pyasn1, PyGPGME
(recommended for ADS), tevent (included), and tdb (included)
Optional (for the Developer Test Suite)
Install in listed order: , argparse, extras,
py,
enum34, hypothesis,
pytest, coverage,
pytest-cov,
doctools, unittest2, testtools, fixtures,
python-mimeparse,
contextlib2,
traceback2,
linecache2,
testscenarios,
testresources,
virtualenv,
pbr,
and python-subunit