4.4 Optional: Configuring Installation Parameters in the obparameters File
Oracle Secure Backup uses a parameter file called to customize the operation of the installation script.
The script (described in ) creates the file in the subdirectory of the Oracle Secure Backup home. For example, if the Oracle Secure Backup home is in the default location , the parameter file is located at .
During the installation process the program prompts you either to accept the default settings in the file or customize those settings.
In most cases, it is not necessary to change the defaults in the file. However, you should review the parameters you can control in this file as part of planning your installation, and determine whether any of them should be changed.
Reasons to change the parameters in the file include:
-
You can customize installation directories and symbolic links created during installation on different platforms.
-
If using Oracle Secure Backup to back up Oracle databases to tape, you can create an Oracle Secure Backup user named for use in RMAN backups. You can associate this user with Linux or UNIX operating system credentials by setting parameters in . (You can also configure a pre-authorized user later.)
Note:
Before electing to create an Oracle Secure Backup user, be aware that this choice involves a trade-off between convenience and security. For more information on the security issues, see Oracle Secure Backup Reference.
See Also:
for more information about the pre-authorized user and RMAN backups.
is a plain text file that can be edited using any standard UNIX text editor, such as or . Complete reference documentation for the file is contained in .
Prerequisites for Installing Oracle Secure Backup on Linux and UNIX
The prerequisites for installing Oracle Secure Backup on Linux and UNIX operating systems are:
-
Each host must have a network connection with a static IP address and run .
-
The uncompress utility must be installed on your system.
Note:
If the uncompress utility is not installed on your system, then you can create an uncompress symbolic link pointing to the gunzip utility with the following command:
ln -s /bin/gunzip uncompress
-
You must have the parameters for each and attached to your Linux or UNIX . You can determine them using the procedures described in . You need this information when creating a for each .
-
You must be able to log in to each host with privileges to perform the installation.
Prerequisites for Installation on Linux
For each Linux , ensure that the SCSI Generic (SG) driver is installed. It is required for Oracle Secure Backup to interact with a .
Kernel modules are usually loaded directly by the facility that requires them, if the correct settings are present in the /etc/modprobe.conf file. However, it is sometimes necessary to explicitly force the loading of a module at start time.
For example, on RedHat Enterprise Linux, the module for the SCSI Generic driver is named . Red Hat Enterprise Linux checks at start time for the existence of the /etc/rc.modules file, which contains various commands to load modules.
Note:
The rc.modules file should be used, and not rc.local, because rc.modules runs earlier in the start process.
On RedHat Enterprise Linux, you can use the following commands to add the sg module to the list of modules configured to load as at start time:
# echo modprobe sg >> /etc/rc.modules
# chmod +x /etc/rc.modules
An must be mapped to a Linux or UNIX user that has read/write permissions to the /dev/sg devices. One way to accomplish this is to set the permissions to 666 for the /dev/sg devices.
2.13 Uninstalling Oracle Secure Backup on Linux or UNIX
This section explains how to uninstall Oracle Secure Backup from a Linux or UNIX host. In this procedure Oracle Secure Backup is uninstalled from the administrative server. The procedure is the same when using the administrative server to uninstall Oracle Secure Backup from other hosts.
-
Log on as to the administrative server.
-
Use the following command to identify processes related to Oracle Secure Backup:
# /bin/ps -ef |grep ob
-
Shut down processes related to Oracle Secure Backup, such as the processes for the Oracle Secure Backup Web tool.
The appendix «Startup and Shutdown of Oracle Secure Backup Services» in lists operating system-specific commands for shutting down and starting Oracle Secure Backup processes on Linux and UNIX.
Alternatively, you can terminate , which stops all processes. Use the following command to end each process in the list associated with Oracle Secure Backup, where is the process ID of :
kill pid
-
Change directory to the Oracle Secure Backup home directory. For example:
# cd /usr/local/oracle/backup
Note:
If you uninstall Oracle Secure Backup from the administrative server, then the script removes the Oracle Secure Backup home directory after the uninstall process.
-
Run the script:
# ./install/uninstallob
The script displays a welcome message and then asks for the name of the host from which you want to remove Oracle Secure Backup.
-
Enter the name of a host from which you want to uninstall Oracle Secure Backup.
-
The script asks for the name of the file used for installation.
If you created an file in a location other than the default, then enter the correct path information. Otherwise, press the Enter key to accept the default value .
-
The script asks to remove the Oracle Secure Backup home directory. Select one of the following options:
-
Select this option if you do not want to remove the Oracle Secure Backup home directory.
-
Select this option to remove the Oracle Secure Backup home directory. All files in the home directory are deleted. The only exception is the directory, which you can elect to retain by answering at the next prompt.
This procedure assumes you are saving the Oracle Secure Backup home directory.
-
-
The script asks to save the Oracle Secure Backup directory, even if you have chosen not to save the entire Oracle Secure Backup home directory. Select one of these options:
-
Select this option to remove the admin directory.
-
Select this option to save the admin directory. If you keep the admin directory, then you can reinstall the Oracle Secure Backup software later without destroying your administrative domain.
This procedure assumes you are saving the Oracle Secure Backup directory.
-
-
The script displays the choices you have made and asks to continue with the uninstallation on this host. Select one of the following options:
-
If you select this option, then the script displays progress messages as it uninstalls Oracle Secure Backup. When it is finished, it displays the following message:
Oracle Secure Backup has been successfully removed from host_name.
-
If you select this option, then the script does not uninstall Oracle Secure Backup from this host.
-
4.2 Creating the Oracle Secure Backup Home
You must create the Oracle Secure Backup home before beginning the process of loading and installing the software. The Oracle Secure Backup setup program uses this directory to store installation files specific to your host.
See also:
and for more details about the Oracle Secure Backup home.
The recommended location for the Oracle Secure Backup home is . You can, however, create the directory in a different location.
Note:
Oracle recommends that you use as your Oracle Secure Backup home. If you use a different directory, then the program prompts you to confirm your selected directory.
After logging in as , create the directory for your Oracle Secure Backup home. For example:
Параметр конфигурации для. вслконфиг
Файл. вслконфиг настраивает глобальные параметры для всех дистрибутивов Linux, работающих с WSL 2. (Для конфигурации каждого распространения см. ).
Сведения о том, где хранить вслконфиг файл, см. в файле .
Примечание
глобальные параметры конфигурации доступны только для дистрибутивов, работающих как WSL 2 в Windows сборки 19041 и более поздних версий. Помните, что может потребоваться выполнить, чтобы завершить работу виртуальной машины WSL 2, а затем перезапустить экземпляр WSL, чтобы эти изменения вступили в силу.
Этот файл может содержать следующие параметры, влияющие на виртуальную машину, WSL 2 распределение.
Метка раздела:
| ключ | value | значение по умолчанию | HDInsight |
|---|---|---|---|
| ядро | строка | Входящие в состав ядра Microsoft | абсолютный путь Windows к пользовательскому ядру Linux. |
| Память | size | 50% от общей памяти на Windows или 8 гб, в зависимости от того, какое значение меньше; в сборках до 20175:80% от общего объема памяти на Windows | Объем памяти, назначаемый виртуальной машине WSL 2. |
| обработчики | number | То же число процессоров в Windows | Количество процессоров, назначаемых виртуальной машине WSL 2. |
| локалхостфорвардинг | Логическое | Логическое значение, указывающее, привязаны ли порты к подстановочным знакам или localhost на виртуальной машине WSL 2, с помощью . | |
| кернелкоммандлине | строка | Пусто | Дополнительные аргументы командной строки ядра. |
| swap | size | 25% размера памяти на Windows округлено до ближайших гб | Объем пространства подкачки для добавления в виртуальную машину WSL 2, 0 для файла подкачки. Подкачка хранилища — это дисковая память, используемая, когда потребность в памяти превышает ограничение на аппаратное устройство. |
| Файл подкачки | строка | абсолютный путь Windows к виртуальному жесткому диску для переключения. | |
| пажерепортинг | Логическое | параметр по умолчанию позволяет Windows освободить неиспользуемую память, выделенную для виртуальной машины WSL 2. | |
| гуиаппликатионс | логическая | Логическое значение, чтобы включить или отключить поддержку приложений GUI (вслг) в WSL. доступно только для Windows 11. | |
| дебугконсоле | логическая | Логическое значение, чтобы включить окно консоли вывода, в котором отображается содержимое при запуске экземпляра WSL 2 дистрибутив. доступно только для Windows 11. | |
| нестедвиртуализатион | логическая | Логическое значение, которое включает или отключает вложенную виртуализацию, позволяя другим вложенным виртуальным машинам работать в WSL 2. доступно только для Windows 11. | |
| вмидлетимеаут | Нумерация | Количество миллисекунд, в течение которых виртуальная машина бездействует до завершения работы. доступно только для Windows 11. |
записи со значением должны быть Windows путями с escape-символами обратной косой черты, например:
Записи со значением должны быть размером, за которым следует единица, например или .
записи с типом * после типа значения доступны только в Windows 11.
3. Удаление программ без пакетного менеджера
Здесь тоже есть несколько вариантов. Если вы устанавливали программу из исходников с помощью компиляции и make install, то она разложена по всей системе. А это значит, что вы не сможете просто зайти и удалить папку с ней, как в Windows. Вам придется использовать тот же скрипт, что вы использовали для установки. Откройте терминал и выполните:
Первая команда переходит в папку с исходниками, вторая — удаляет программу. Если скрипта не сохранилось, то вы можете скачать его из интернета. Иначе программу не удалить. Еще один вариант установки программ — с помощью скрипта из официального сайта. Такие программы удалить намного проще. Они устанавливаются, как правило, в одну папку, для них существует специальный каталог в файловой системе Linux. Здесь они создают новую папку, где расположены все их файлы, включая исполняемые и файлы настроек. Например, чтобы удалить браузер Google Chrome, установленный, таким образом, нужно набрать:
Возможно, после удаления программы, вам стоит проверить папку /etc, так как там обязательно должны были остаться файлы настроек пути к библиотекам этой программы, исполняемым файлам и файлы сервисов. Также после удаления программ рекомендуется делать очистку системы Ubuntu.
2.5 Creating the Oracle Secure Backup Home
You must create an Oracle Secure Backup home. The Oracle Secure Backup program uses this directory to store installation files specific to your host.
Note:
Oracle recommends that you use as your Oracle Secure Backup home. If you use a different directory, then the setup program prompts you to confirm your selected directory.
Note:
To enable users other than to use or the Oracle Secure Backup Web tool, install Oracle Secure Backup to a file system that can use the mechanism. You can do this by excluding the option from the file entry for that file system.
See also:
and for more details about the Oracle Secure Backup home.
To create the Oracle Secure Backup home:
4.3 Loading Oracle Secure Backup Software on Solaris or Linux Using setup Script
Loading the Oracle Secure Backup software is the process by which packages of files required to install Oracle Secure Backup on one or more platforms are extracted from the installation media and staged in the Oracle Secure Backup home for later use by the installation script. The script is used to perform this loading process.
Note:
Network administrators may find it convenient to load Oracle Secure Backup installation files for multiple platforms on the administrative server. You can hold these binaries in reserve for installation to various hosts in their administrative domain at a later time. It is not, however, required that you load the installation files for all platforms on the administrative server. You can also extract installation files and run setup and install separately on each host.
This example illustrates the loading process on a Solaris 64-bit host called . However, these instructions apply to all Linux and UNIX operating systems.
To load Oracle Secure Backup into an Oracle Secure Backup home directory for later installation on one or more platforms:
-
Log into your Linux or UNIX operating system as .
-
Change to the Oracle Secure Backup home directory created in . For example:
# cd /usr/local/oracle/backup
-
Run the script from your installation media or extracted archive directory. Enter the following command:
#/media_dir/setup
where / is the CD-ROM mount point or the directory containing the files extracted from the downloaded archive.
For example, if you downloaded an archive from Oracle Technology Network (OTN) and extracted the setup software to the directory, then you would run the program as follows:
# /tmp/osbdownload/OB/setup
The program displays output similar to the following for Linux x86 and Solaris Operating System (SPARC 64-Bit):
Welcome to Oracle's setup program for Oracle Secure Backup.  This
program loads Oracle Secure Backup software from the CD-ROM to a filesystem
directory of your choosing.

This CD-ROM contains Oracle Secure Backup version 10.1.0.1.0.

Please wait a moment while I learn about this host... done.

-  -  -  -  -  -  -  -  -  -  -  -  -  -  -  -  -  -  -  -  -  -  -  -  -  -  -
You may load any of the following Oracle Secure Backup packages:
    1. linux32 (RH 2.1, RHEL 3, RHEL 4, SuSE 8, SuSE 9)
       administrative server, media server, client
    2. solaris64 (Solaris 2.8 and later, SPARC)
       administrative server, media server, client

Enter a space-separated list of packages you'd like to load.  To load all
packages, enter 'all' :
Note:
The output for the program varies for Linux Itanium, Linux x86-64, and HP-UX PA-RISC (64-Bit).
-
Each package contains the binaries and other files required to install Oracle Secure Backup on that platform. Enter the number or numbers that identify the installation packages that you want to load, so that they will be staged for later installation on Linux or Unix hosts in your administrative domain.
Note:
You can run again in the future if necessary, to load packages for more platforms into the Oracle Secure Backup home, without affecting existing installations of Oracle Secure Backup.
To load the Oracle Secure Backup installation package for a single host, enter the appropriate number for that platform. For this example, enter to load only the package of Oracle Secure Backup for a Solaris 64 host. The following output is displayed:
-  -  -  -  -  -  -  -  -  -  -  -  -  -  -  -  -  -  -  -  -  -  -  -  -  -  -
Loading Oracle Secure Backup installation tools ... done.
Loading solaris64 administrative server, media server, client ... done.

-  -  -  -  -  -  -  -  -  -  -  -  -  -  -  -  -  -  -  -  -  -  -  -  -  -  -
Loading of Oracle Secure Backup software from CD-ROM is complete.  You may
unmount and remove the CD-ROM.
Note:
At this point the setup process is complete. The files required to install Oracle Secure Backup on the platforms you specified are stored in the Oracle Secure Backup home on this host.
Starting the Oracle Secure Backup installob Script From setup
now displays the following question:
Would you like to continue Oracle Secure Backup installation with 'installob'
now? (The Oracle Secure Backup Installation Guide
contains complete information about installob.)
Please answer 'yes' or 'no' :
At this point the setup script can start the script to install Oracle Secure Backup on the local host or, using a push installation, deploy it on other Linux or UNIX hosts on your network. You can also defer this task until later.
Choose one of the following:
-
Enter if you want to run later, or if you need to customize some aspect of your installation process using the file, as described in .
In this case, the following message displays:
When you are ready to continue:
 1. log in as (or 'su' to) root
 2. cd to /usr/local/oracle/backup
 3. run install/installob
The script then exits.
-
Enter to start the script. The steps for running installob are described in .
Дополнительные настройки безопасности
Есть и другие рекомендуемые конфигурации, чтобы избежать нежелательных подключений к нашему SSH-серверу. Эти соединения:
- Войти : Мы установим время, необходимое для ввода пароля, чтобы злоумышленнику не приходилось «много думать».
- MaxAuthTries : Количество разрешенных попыток при вводе пароля перед отключением.
- MaxStartups : Количество одновременных входов в систему с IP-адреса, чтобы избежать использования грубой силы в нескольких сеансах одновременно.
- AllowUsers : Это для создания белого списка пользователей. Этот параметр позволяет нам настроить пользователей, которые смогут подключиться. Это очень ограничительная мера, но в то же время очень безопасная, поскольку она блокирует все подключения пользователей, которых нет в списке. Пользователи, которые у нас здесь, смогут подключиться, а остальные — нет.
- DenyUsers : Аналогично предыдущему, но теперь мы создаем черный список. Пользователи, которые у нас здесь, не смогут подключиться, а остальные подключатся.
- AllowGroups / DenyUsers : Точно так же, как указано выше, но вместо создания черного / белого списка пользователей это группы пользователей.
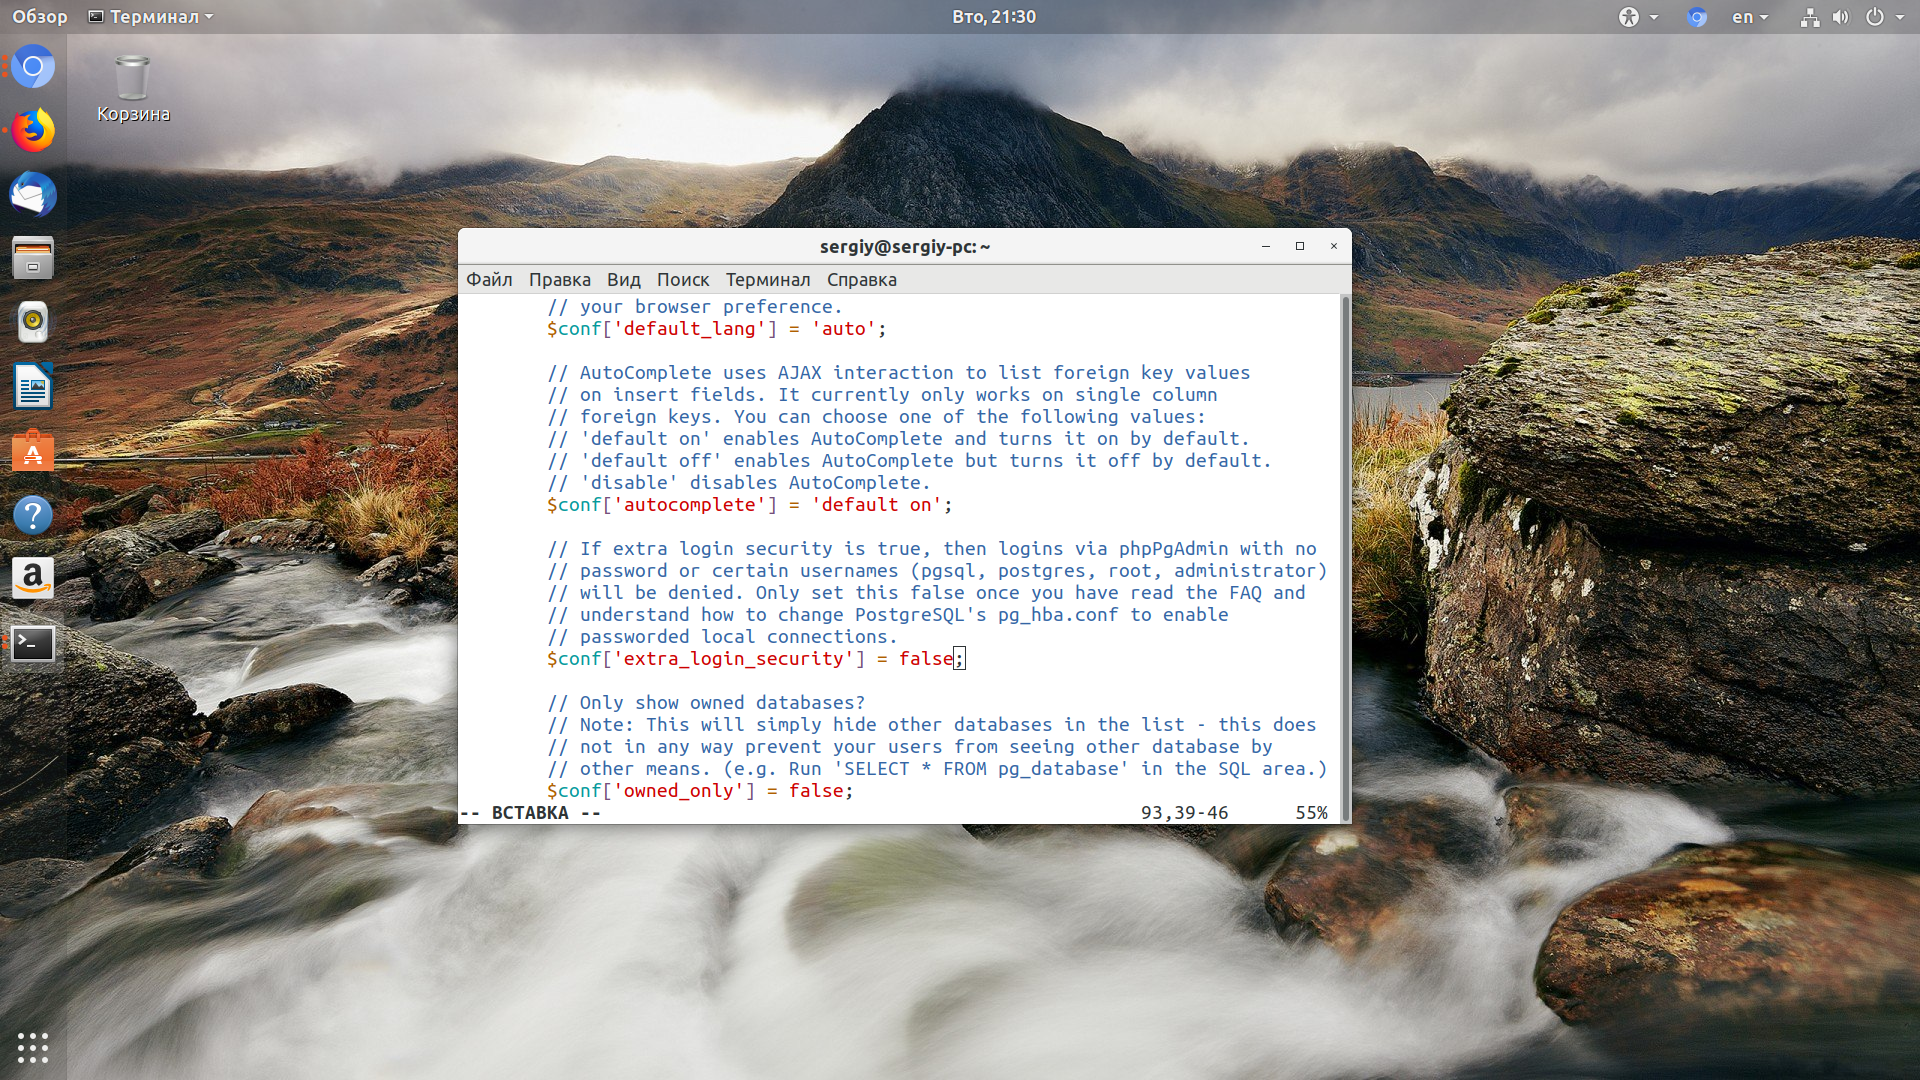
Например, файл конфигурации для sshd_config будет следующим:
Дополнительной мерой безопасности является настройка алгоритмов обмена ключами, симметричного шифрования, а также конфигурации HMAC для проверки целостности. В настоящее время рекомендуется применять следующую конфигурацию для обеспечения очень высокой безопасности:
С этой конфигурацией у нас будут лучшие криптографические наборы для сервера, однако старые клиенты могут не иметь возможности подключиться, поскольку они не поддерживают эти алгоритмы
Мы должны принять во внимание эту деталь и проверить, какие алгоритмы совместимы, а какие нет
Если мы создали новые ключи RSA или DSA для ключей с большей битовой длиной, мы должны поместить их в файл конфигурации (или заменить предыдущие, и, таким образом, нам не придется трогать файл конфигурации), таким образом мы получим дополнительная безопасность, если, например, мы используем ключи RSA длиной 4096 бит или выше.
Чтобы сгенерировать новые 4096-битные ключи RSA, нам просто нужно выполнить следующую команду:
Если мы хотим сгенерировать новые ключи ECDSA (с максимальной длиной 512 бит) или ED25519, нам нужно будет ввести следующие команды:
Команда chmod
Права устанавливаются командой chmod. Команда chmod поддерживает установку прав как в восьмеричном представлении, так и в символьном (маска режима доступа).
Синтаксис команды прост:
chmod <опции> <права> <объект или регулярное выражение>
Опции
Из самых полезных и часто используемых опций можно выделить одну:
-R — рекурсивное назначение прав. Т.е. назначить права всем объектам, руководствуясь регулярным выражением.
Например:
- chmod -R 755 * — Назначение прав всем объектам текущего каталога, включая подкаталоги.
- chmod -R 700 z* — Назначить полные права для владельца и исключить права для группы и всех остальных для всех объектов, которые начинаются именоваться на z, находящиеся в текущем каталоге и его подкаталогах.
Права
Права можно записывать как в восьмеричном представлении так и в символьном. В восьмеричном представлении, для стандартных прав, указываются 3 восьмеричные цифры (1-я для владельца, 2-я для группы, 3-я для всех остальных. См. таблицу выше).
Например:
- chmod 744 koshka.txt — установит права для файла koshka.txt — (r w x r — — r — -);
- chmod -R 775 sobaki — установит права на каталог sobaki и на все объекты, что внутри этого каталога, включая содержимое подкаталогов (r w x r w x r — x);
- chmod 700 * — установит права только для владельца на все файлы и каталоги в текущем каталоге, включая подкаталоги и их объекты (rwx — — — — — -).
Другой способ назначения прав — это использование маски режима доступа (символьное представление). Помимо прав задается еще кому мы собираемся эти права выставлять:
- u — владельцу объекта;
- g — группе объекта;
- o — пользователю «все остальные»;
- a — все вышеперечисленное.
Для назначения прав используются три знака: минус, плюс или равно:
- — — убрать указанные права с объекта;
- + — добавить указанные права к существующим правам объекта;
- = — заменить права объекта на указанные.
Пример:
chmod g+w koshki.txt — Добавить пользователям группы файла koshki.txt права на запись в этот файл;
chmod a=rwx sobaki.doc — Заменит существующие права на файле sobaki.doc на полные права всем;
chmod o-w test.cgi — Уберет права на запись для пользователя «Все остальные».
chmod ug=rw spisok.doc — Выставить права на чтение и запись файлу spisok.doc для владельца и группы
Обратите внимание, что если у пользователя «все остальные» были какие-либо права, они сохранятся в неизменном виде.. Использование символьного представления позволяет редактировать права файлов более гибко:
Использование символьного представления позволяет редактировать права файлов более гибко:
- chmod u+x,g+w-x koshki.txt — Добавить владельцу файла koshki.txt права на его выполнение, пользователям группы разрешить запись и запретить выполнение и оставить права остальных пользователей без изменений;
- chmod u=rwx,g+w,go-x sobaki.doc — Установить полные права для владельца файла, разрешить пользователям группы запись и запретить выполнение всем пользователям, кроме владельца файла.
Символьное назначение окажет неоценимую услугу, если требуется добавить права на объект к уже существующим правам.
Массовое назначение прав
Иногда, бывает, нужно массово установить права на определенный тип объектов, например, только на каталоги или только на файлы. Простое использование опции -R (рекурсия) здесь не поможет т.к. chmod будет проходить по всем объектам удовлетворяющим маске, что иногда вовсе не то, что нужно.

Итак, чтобы массово установить права на определенный тип объектов можно использовать один из вариантов (вообще, их очень много):
chmod -R 770 $(find . -type d)
где -type d — каталоги, -type f — файлы. В данном примере chmod установит, начиная от текущего каталога, права на все каталоги (включая подкаталоги) разрешения 770 (rwx rwx- — -) при этом не трогая права на другие объекты.
Более длинный вариант аналогичной операции:
find ./ -type f -exec sudo chmod 775 {} \;
где -type d — каталоги, -type f — файлы. В данном варианте chmod установит разрешения 775 на все файлы включая файлы в подкаталогах начиная от текущего.
Linux, MacOS, Windows 10
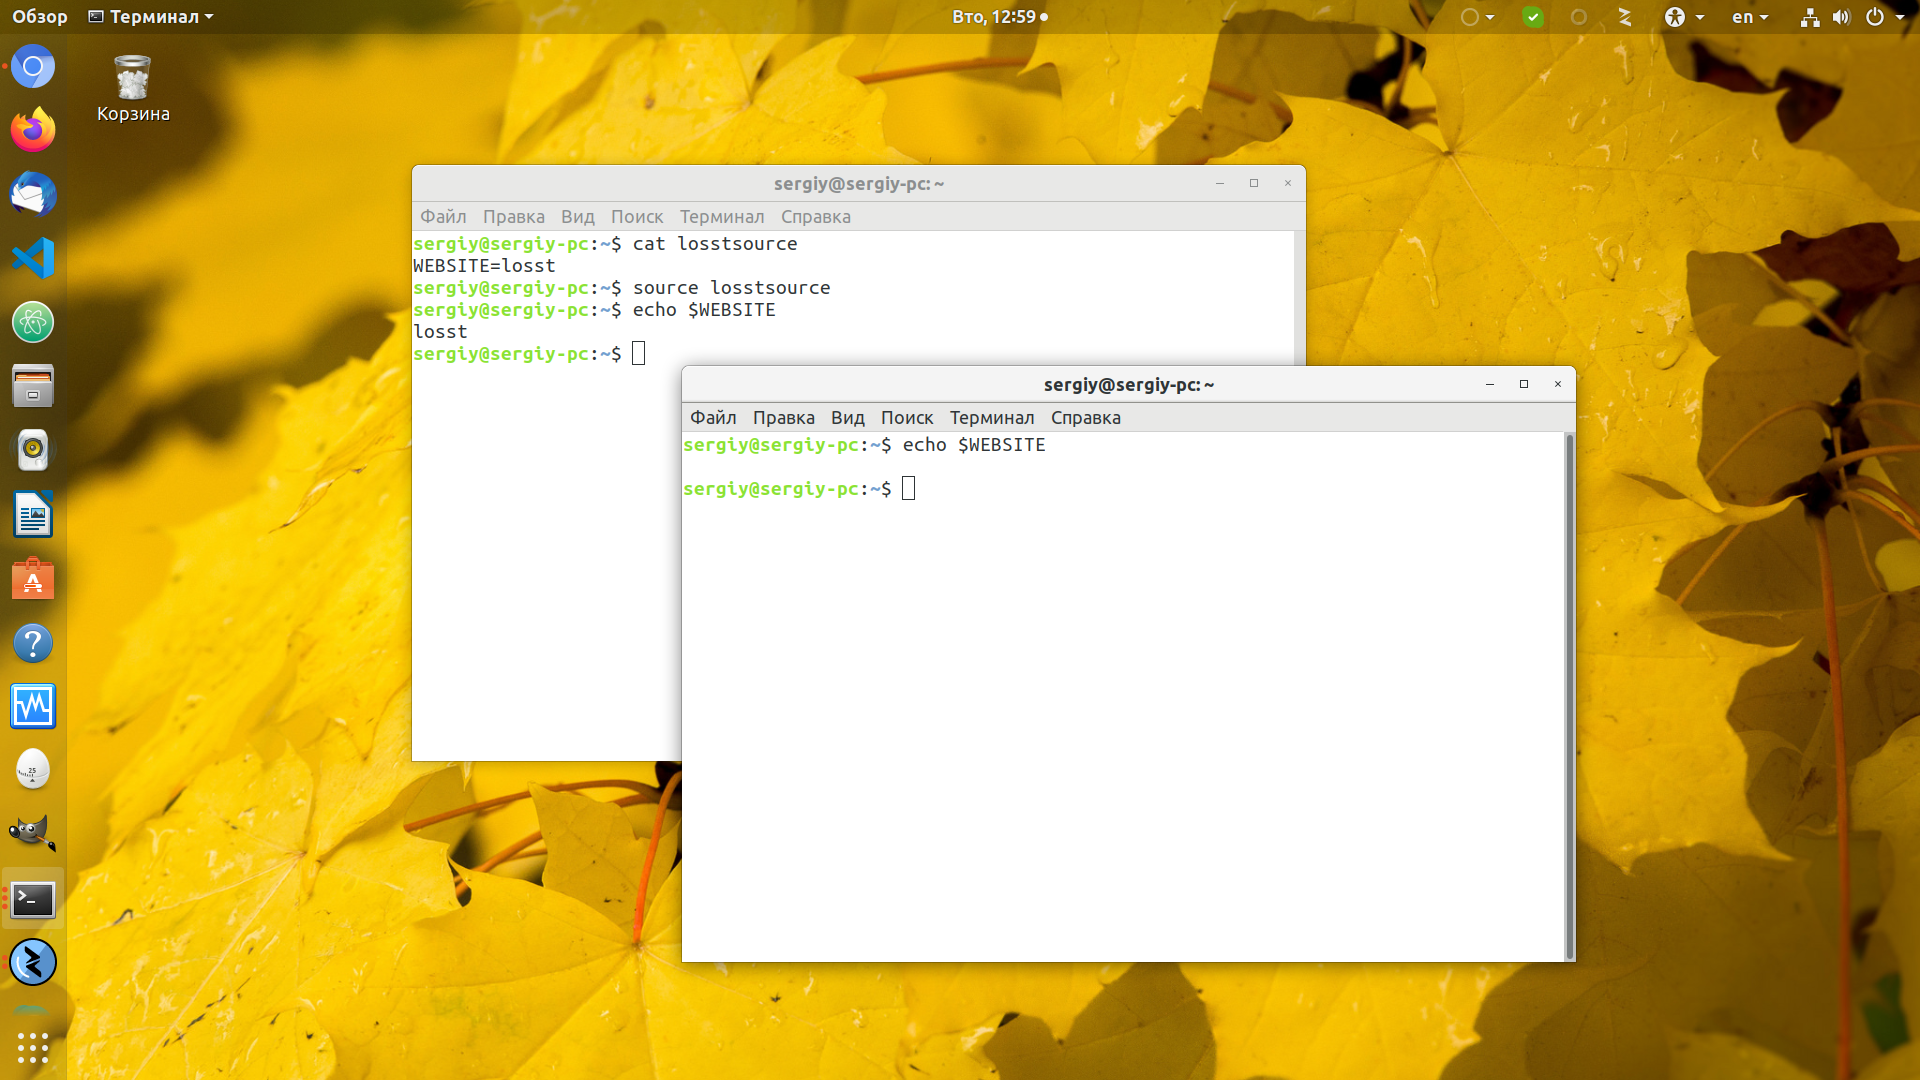
Создание SSH-ключей
Запустите терминал или Windows PowerShell на вашем компьютере и выполните команду:
ssh-keygen
Вы увидите примерно следующее сообщение:
Generating public/private rsa key pair.
Enter file in which to save the key (/home/user/.ssh/id_rsa):
Нажмите Enter — ключ будет сохранен в указанную директорию по умолчанию.
Далее вам будет предложено задать пароль (кодовую фразу) для ключа. Вы можете задать ее или оставить пустой, просто нажав Enter
Обратите внимание, что если вы зададите кодовую фразу, ее потребуется вводить при каждой авторизации по ключу.
Процедура создания ключей завершена, ключи сохранены в директории ~/.ssh/ в файлах id_rsa и id_rsa.pub. Теперь их необходимо скопировать на сервер.
Копирование ключей на сервер
-
Выполните в терминале следующую команду, указав вместо user имя пользователя, созданного на сервере, а вместо server — IP-адрес вашего сервера:
ssh-copy-id user@server

#Например:
ssh-copy-id admin@2.59.43.145
-
В результате содержимое файла с публичным ключом id_rsa.pub будет скопировано в файл ~/.ssh/authorized_keys на сервере, и в дальнейшем вы сможете устанавливать соединение с сервером, используя команду:
ssh user@server

#Например:
ssh admin@2.59.43.145
Общие понятия:
У каждого объекта в Linux есть свой идентификатор, а так же права доступа, применяемые к данному идентификатору. Идентификатор есть у пользователя — UID, у группы — GID, у файла — inod. Собственно inode является, как идентификатором файла/каталога, так и сущностью, которая содержит в себе информацию о файле/каталоге. Например такую, как: принадлежность к владельцу/группе, тип файла и права доступа к файлу.
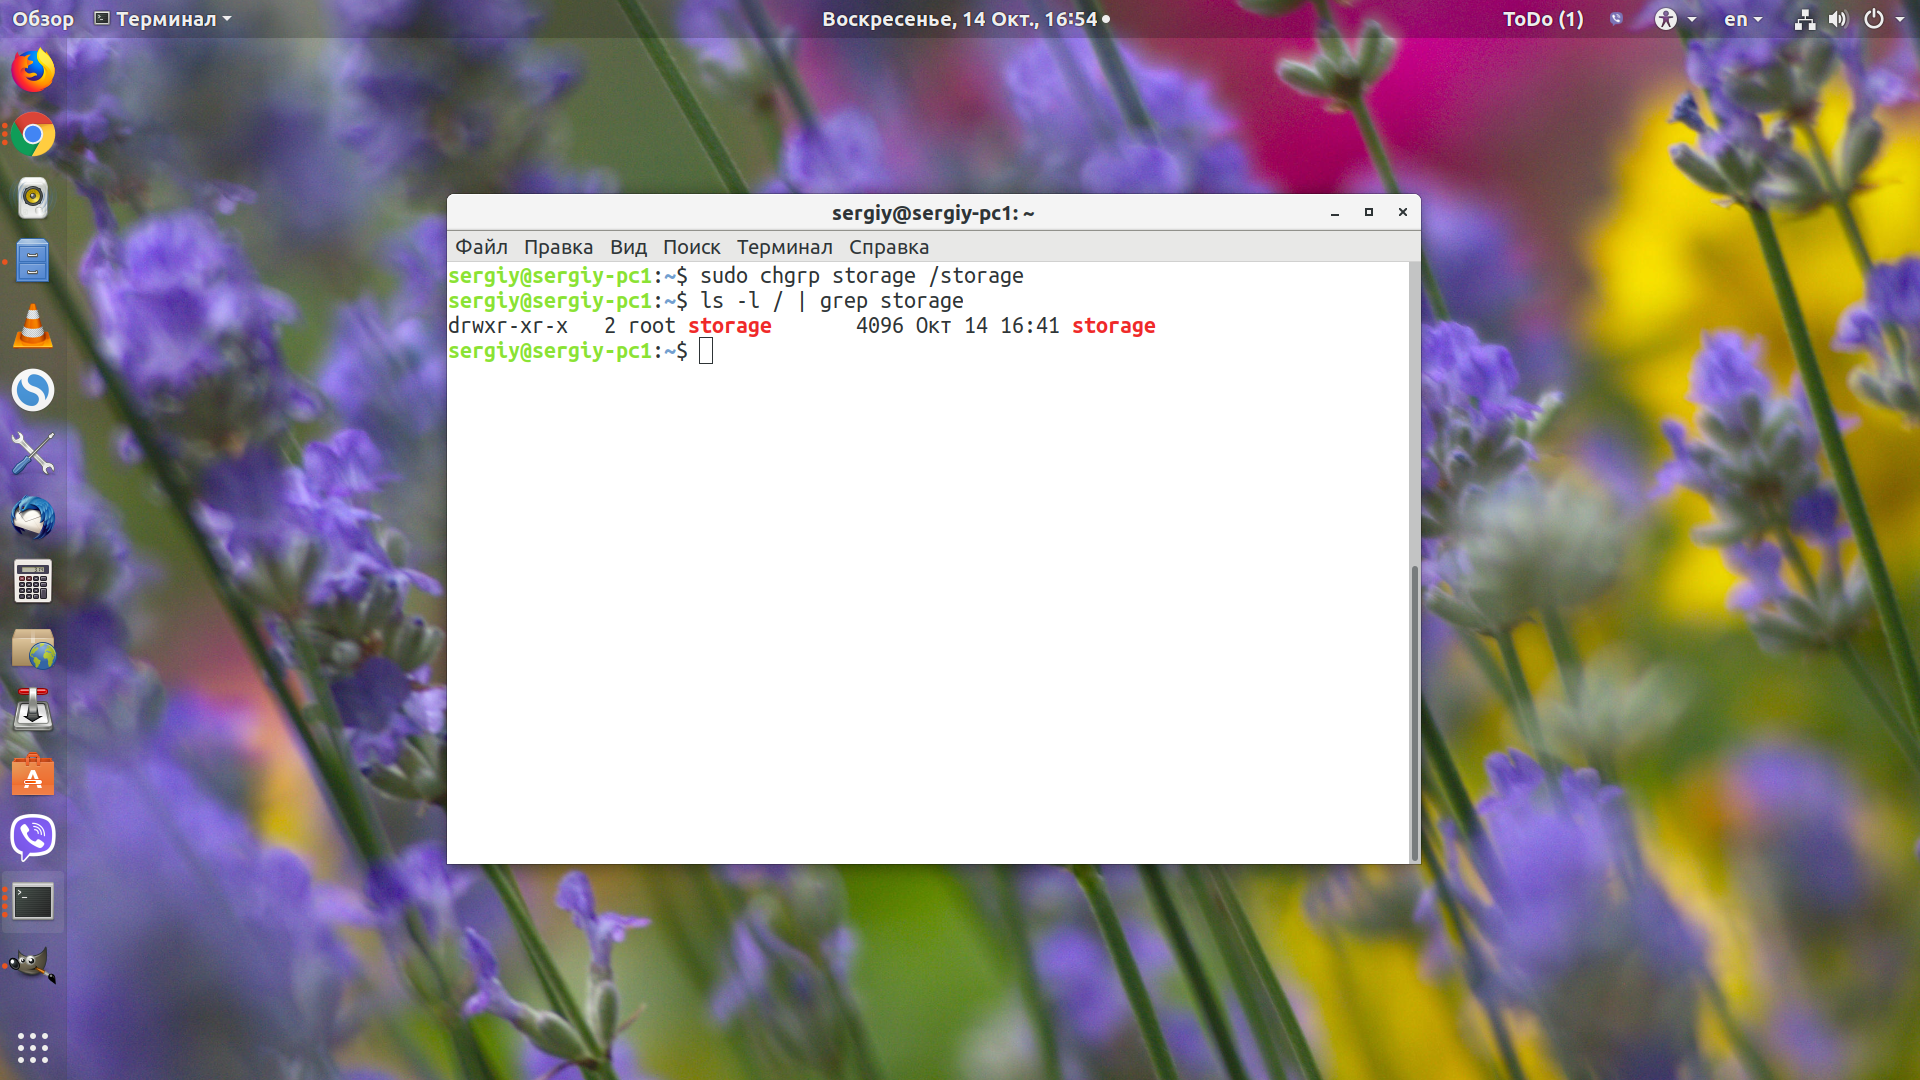
Чтобы визуально лицезреть права доступа к файлу или каталогу, его тип и владельцев, а так же, если необходимо, и сам номер inode, необходимо выполнить следующую команду:
Print-server:/# ls -li
итого 50
22089 drwxr-xr-x  2 root root  3072 Ноя 15 14:15 bin
32129 drwxr-xr-x  3 root root  1024 Окт  1 18:03 boot
12 lrwxrwxrwx  1 root root    11 Окт  1 15:36 cdrom -> media/cdrom
557 drwxr-xr-x 13 root root  3340 Ноя 17 06:25 dev
30121 drwxr-xr-x 50 root root  4096 Ноя 15 14:46 etc
....
Из вывода команды видно (рассмотрим первую строку):
22089
это есть номер inode
drwxr-xr-x
это есть те самые права доступа и тип файла (об этом ниже)
2
количество жестких ссылок на файл
root
имя владельца файла
root
имя группы владельца файла
3072
размер файла
Ноя 15 14:15
дата создания файла
bin
имя файла/каталога
Для каждого объекта файловой системы в модели полномочий Linux есть три типа полномочий: полномочия чтения (r от read), записи (w от write) и выполнения (x от execution). В полномочия записи входят также возможности удаления и изменения объекта. Право выполнения можно установить для любого файла. Потенциально, любой файл в системе можно запустить на выполнение, как программу в Windows. В Linux является ли файл исполняемым или нет, определяется не по его расширению, а по правам доступа. Кроме того, эти полномочия указываются отдельно для владельца файла, членов группы файла и для всех остальных.
Собрав вышесказанное в кучу, то есть представив 3 правила (rwx) для трех групп (владелец, группа, остальные) запись прав доступа будет выглядеть вот так: rwx rwx rwx(то есть владельцу разрешено чтение, выполнение и запись, группе разрешено то же самое и остальным). Рассмотрев права на папку /bin в выше приведенном листинге, можно представить такую картину:
drwxr-xr-x+
||||||||||+наличие дополнительных прав (ACL)
|||||||||+-исполнение для всех остальных - разрешено
||||||||+--запись для всех остальных - НЕ разрешено
|||||||+---чтение для всех остальных - разрешено
||||||+----исполнение для группы владельца - разрешено
|||||+-----запись для группы владельца - НЕ разрешено
||||+------чтение для группы владельца - разрешено
|||+-------исполнение для владельца - разрешено
||+--------запись для владельца - разрешено
|+---------чтение для владельца - разрешено
+----------тип файла (об этом ниже...)
Кроме указанного представления полномочий доступа (символьного), существует так же и числовое представление. Для общего понимания, приведу таблицу соответствия числового (двоичного и десятичного) значения прав доступа и буквенного:
| владелец | группа | остальные | |
| буквенное | rwx | r-x | r— |
| числовое (десятичное) | 421 | 401 | 400 |
| итоговое | 7 | 5 | 4 |
В приведенной таблице показано, что право чтения, соответствует значению 4, право записи — 2, право выполнения — 1, отсутствие права — 0, складывая данные показатели, можно представлять и назначать права в числовом виде. Для примера, права rwx r-x r— будут соответствовать значению 754, потому что: rwx (4+2+1=7) r-x (4+0+1=5) r— (4+0+0=4). Так же, довольно распространена комбинация rw- (4+2+0=6). Думаю данный пример достаточно нагляден.
2.1 Overview of Oracle Secure Backup Linux and UNIX Installation
There are three steps to installing Oracle Secure Backup on a Linux or UNIX host:
-
Files required for installing Oracle Secure Backup are staged on the , in a directory called the . This step is performed by a script named .
-
Installing
Oracle Secure Backup executables are deployed correctly for use on the host. This step is performed by a script named .
Note:
On a Solaris , also performs some configuration tasks, including installation of a required device driver, and, optionally, creation required for Oracle Secure Backup to access tape devices.
-
Creating attach points on each media server
This step is required for the Oracle Secure Backup device driver to access tape devices. You need the device parameters to perform this task.
Uninstalling Oracle Secure Backup on Linux or UNIX
This section explains how to uninstall Oracle Secure Backup from a Linux or UNIX host. In this procedure Oracle Secure Backup is uninstalled from the . The procedure is the same when using the administrative server to uninstall Oracle Secure Backup from other hosts.
-
Log on as to the administrative server.
-
Shut down processes related to Oracle Secure Backup, such as the http processes for the Oracle Secure Backup . Use the following command to identify processes related to Oracle Secure Backup:
# /bin/ps -ef |grep ob
Use the following command to kill each process in the list associated with Oracle Secure Backup, where is the process ID:
kill -9 pid
-
Change directory to the parent directory of the directory. For example:
# cd /usr/local/oracle
Note:
If you uninstall Oracle Secure Backup from the administrative server, then the uninstallob script removes the Oracle Secure Backup home directory at the end of the uninstall process.
-
Run the uninstallob script:
# backup/install/uninstallob
The uninstallob script displays a welcome message and then asks for the name of the host from which you want to remove Oracle Secure Backup.
-
Enter the name of a host from which you want to uninstall Oracle Secure Backup.
-
The uninstallob script asks for the name of the obparameters file used for installation.
If you created an obparameters file in a location other than the default, then enter the correct path information. Otherwise, press the Enter key to accept the default value .
-
The uninstallob script asks if you want to remove the directory. Select one of the following:
-
Select this option if you do not want to remove the Oracle Secure Backup home directory.
-
Select this option if you want to remove the Oracle Secure Backup home directory. All files in the home directory will be deleted. The only exception is the admin directory, which you can elect to retain by answering at the next prompt.
This procedure assumes you are saving the Oracle Secure Backup home directory.
-
-
The uninstallob script asks if you want to save the Oracle Secure Backup admin directory, even if you have chosen not to save the entire Oracle Secure Backup home directory. Select one of the following:
-
Select this option to remove the admin directory.
-
Select this option to save the admin directory. If you keep the admin directory, then you can reinstall the Oracle Secure Backup software later without destroying your .
This procedure assumes you are saving the Oracle Secure Backup admin directory.
-
-
The uninstallob script displays the choices you have made and asks if you want to continue with the uninstallation on this host. Select one of the following:
-
If you select this option, then the uninstallob script displays progress messages as it uninstalls Oracle Secure Backup. When it is finished, it displays the following message:
Oracle Secure Backup has been successfully removed from host_name.
-
If you select this option, then the uninstallob script does not uninstall Oracle Secure Backup from this host.
-
-
If you entered in the previous step, then the uninstallob script asks if you want to uninstall Oracle Secure Backup from another host. Select one of the following:
-
If you select this option, then the uninstallob script repeats steps through for a different host
-
If you select this option, then the uninstallob script exits.
-
Note:
-
If you uninstall Oracle Secure Backup from the local computer, then the uninstallob script removes the directory /usr/local/oracle/backup when it completes.
-
On UNIX it might be necessary to remove the driver for Oracle Secure Backup manually from each after uninstalling the rest of the product. See for details.
-


2.7 Configuring Installation Parameters in the obparameters File
The setup script creates a file called in the install subdirectory of the Oracle Secure Backup home. For example, if the Oracle Secure Backup home is in the default location , then the file is located at .
During the installation process the setup script gives you the choice of accepting the default settings in the file or customizing those settings. In most cases, it is not necessary to change the defaults in the file. However, you should review the parameters you can control in this file as part of planning your installation, and determine whether any of them should be changed.
The file is plain text that can be edited using any standard text editor.
Reasons to change the parameters in the file include:
2.3 Extracting Oracle Secure Backup from OTN Download on Linux or UNIX
This section explains how to download the Oracle Secure Backup software.
To download and extract the Oracle Secure Backup installation software:
-
Log in to your host as a user with privileges.
-
Create a directory called on a file system with enough free space to hold the downloaded installation file:
mkdir /tmp/osbdownload
-
Open a Web browser and go to the Oracle Secure Backup Web site on Oracle Technology Network (OTN):
-
Click the Downloads tab.
The displayed page contains the following sections: Oracle Secure Backup Downloads and Oracle Secure Backup Express Downloads.
-
Click the version of Oracle Secure Backup that you want to download.
The Oracle Secure Backup Downloads page is displayed.
-
Click OTN License Agreement.
The Oracle Technology Network Developer License Terms page is displayed is a separate browser window.
-
Read the Export Controls on the Programs and close the window.
You must accept the OTN License Agreement to download the Oracle Secure Backup software.
-
Select the Accept License Agreement option, and click the link for the version of Oracle Secure Backup release 10.4 specific to your operating system.
Note:
If you have multiple operating systems in your environment, then you must perform multiple downloads of the Oracle Secure Backup release 10.4 software.
-
Save the Oracle Secure Backup release 10.4 installation software to a temporary directory.
-
Expand the compressed installation software to the directory you created in step .
1. Удалить программу через GUI
В Ubuntu и многих других дистрибутивах необязательно использовать консоль для удаления программ, существуют центры приложений и графические интерфейсы. Здесь достаточно запустить утилиту, выбрать нужную программу или пакет и удалить ее. Например, во многих дистрибутивах применяется Gnome Software. Сначала запустите его из главного меню:
Затем найдите нужную программу, например, Gimp:
Откройте ее и нажмите кнопку «Удалить»:
Далее, подтвердите что ее нужно удалить и введите пароль суперпользователя:
После завершения работы, программа будет полностью удалена с вашего компьютера.


