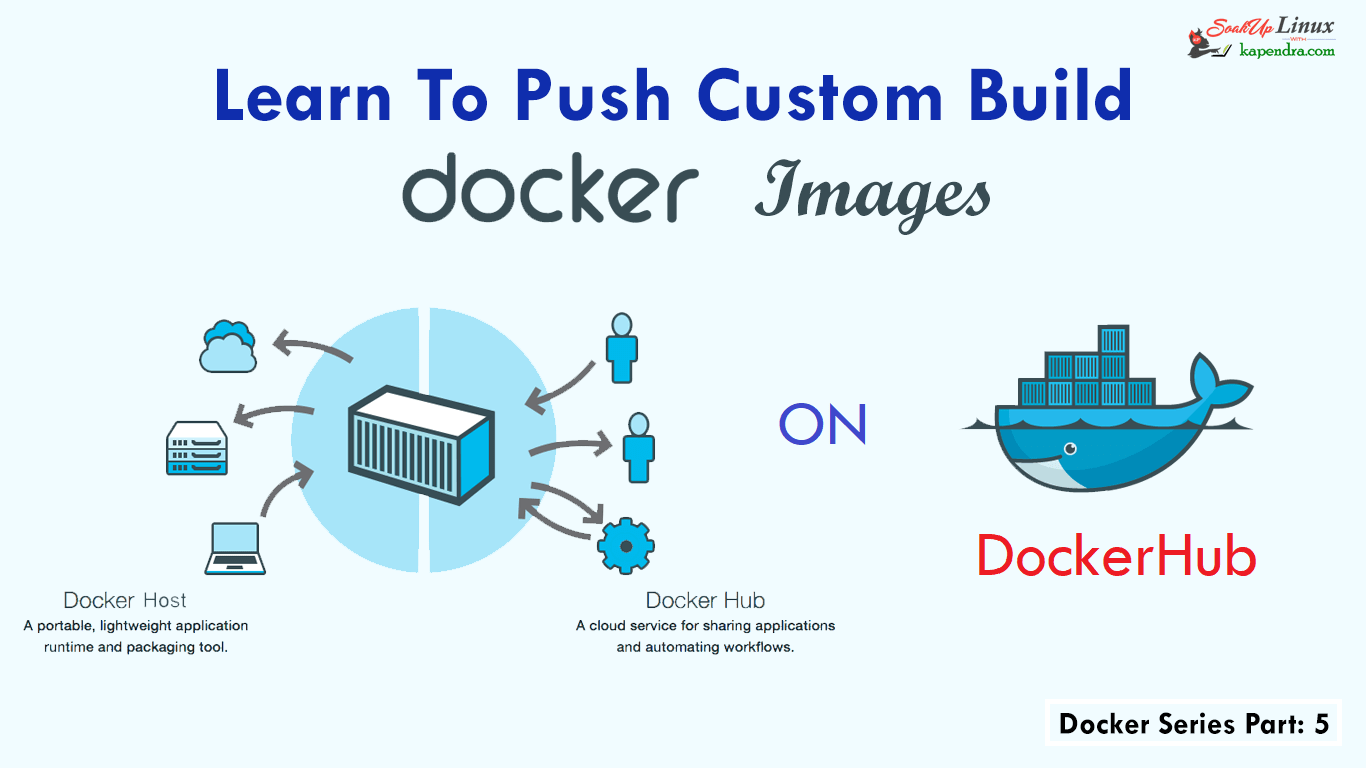
Загрузка образа на Docker Hub
Заходим на Docker Hub страницу регистрации. Создаем пользователя:
Переходим на страницу Repositories и создаем свой репозиторий, например, dmosk. Теперь можно загрузить наши образы в репозиторий.
Сначала авторизуемся в Linux под нашим зарегистрированным пользователем:
docker login —username dmosk
Задаем тег для одного из образов и загружаем его в репозиторий:
docker tag centos:my dmosk/dmosk:centos
docker push dmosk/dmosk:centos
Загрузим второй образ:
docker tag dmosk/nginx:v1 dmosk/dmosk:nginx
docker push dmosk/dmosk:nginx
В Docker Hub должны появиться наш образы:
Чтобы воспользоваться образом на другом компьютере, также авторизуемся под зарегистрированным пользователем docker:
docker login —username dmosk
Загружаем образ:
docker pull dmosk/dmosk:nginx
Запускаем его:
docker run -d -p 8080:80 dmosk/dmosk:nginx
3 ответа
Лучший ответ
Из комментариев видно, что служба докеров не была настроена для автоматического запуска при загрузке. Docker — это клиент-серверное приложение, и сервер запускается из systemd с отдельной службой для сокета докера, используемого клиентом для связи с сервером. Следовательно, любой вызов с помощью команды docker может вызвать запуск сервера путем нажатия на сокет докера.
Состояние службы в systemd можно проверить с помощью:
Или вы можете проверить:
Его можно запустить вручную с помощью:
И его можно включить для начала:
Все вышеперечисленные команды необходимо запускать от имени пользователя root.
BMitch
16 Ноя 2020 в 23:41
Это политика перезапуска контейнера. перезапустите контейнер, если он остановится. Если он остановлен вручную, он будет перезапущен только при перезапуске демона Docker или при перезапуске самого контейнера вручную. Проверьте эту ссылку .
-1
Taybur Rahaman
2 Ноя 2020 в 11:28
Всегда перезапускайте контейнер, если он останавливается. Если он остановлен вручную, он перезапускается только при перезапуске демона Docker или при перезапуске самого контейнера вручную.
Аналогично , за исключением того, что когда контейнер останавливается (вручную или иначе), он не перезапускается даже после перезапуска демона Docker.
Если у вас уже был запущенный контейнер, для которого вы хотели изменить политику перезапуска, вы можете использовать , чтобы изменить это, и приведенная ниже команда гарантирует, что все запущенные в данный момент контейнеры будут перезапущены, если они не остановлены.
ПРИМЕЧАНИЕ. При использовании политик перезапуска помните следующее .
-
Политика перезапуска вступает в силу только после успешного запуска контейнера. В этом случае успешный запуск означает, что контейнер работает не менее 10 секунд и Docker начал его мониторинг. Это предотвращает переход контейнера, который вообще не запускается, в цикл перезапуска.
-
Если вы остановите контейнер вручную, его политика перезапуска игнорируется до перезапуска демона Docker или до перезапуска контейнера вручную. Это еще одна попытка предотвратить цикл перезапуска.
-
Политики перезапуска применяются только к контейнерам. Политики перезапуска для служб Swarm настроены иначе
Ashok
16 Ноя 2020 в 17:45
Building the image yourself
If for whatever reason you want to build the image yourself instead of downloading it from the Docker registry, follow these instructions.
Clone this repository:
Start a virtual machine with Docker in it. You can use the Vagrantfile that we’ve already provided.
Build the image:
If you want to call the resulting image something else, pass the NAME variable, like this:
The default baseimage-docker installs , and services during the build process.
In case you don’t need one or more of these services in your image, you can disable its installation.
As shown in the following example, to prevent from being installed into your image, set to the variable in the file.
Then you can proceed with command.
What’s inside the image?
Overview
Looking for a more complete base image, one that is ideal for Ruby, Python, Node.js and Meteor web apps? Take a look at passenger-docker.
| Component | Why is it included? / Remarks |
|---|---|
| Ubuntu 18.04 LTS | The base system. |
| A correct init process | |
| Fixes APT incompatibilities with Docker | See https://github.com/dotcloud/docker/issues/1024. |
| syslog-ng | A syslog daemon is necessary so that many services — including the kernel itself — can correctly log to /var/log/syslog. If no syslog daemon is running, a lot of important messages are silently swallowed. Only listens locally. All syslog messages are forwarded to «docker logs».Why syslog-ng?I’ve had bad experience with rsyslog. I regularly run into bugs with rsyslog, and once in a while it takes my log host down by entering a 100% CPU loop in which it can’t do anything. Syslog-ng seems to be much more stable. |
| logrotate | Rotates and compresses logs on a regular basis. |
| SSH server | Allows you to easily login to your container to things. SSH is disabled by default and is only one of the methods provided by baseimage-docker for this purpose. The other method is through . SSH is also provided as an alternative because comes with several caveats.Password and challenge-response authentication are disabled by default. Only key authentication is allowed. |
| cron | The cron daemon must be running for cron jobs to work. |
| Replaces Ubuntu’s Upstart. Used for service supervision and management. Much easier to use than SysV init and supports restarting daemons when they crash. Much easier to use and more lightweight than Upstart. | |
| A tool for running a command as another user. Easier to use than , has a smaller attack vector than , and unlike this tool sets correctly. Available as . | |
| A tool for installing packages that automatically cleans up after itself. All arguments are passed to and after installation the apt caches are cleared. To include recommended packages, add . |
Baseimage-docker is very lightweight: it only consumes 8.3 MB of memory.
Wait, I thought Docker is about running a single process in a container?
The Docker developers advocate the philosophy of running a single logical service per container. A logical service can consist of multiple OS processes.
Splitting your logical service into multiple OS processes also makes sense from a security standpoint. By running processes as different users, you can limit the impact of vulnerabilities. Baseimage-docker provides tools to encourage running processes as different users, e.g. the tool.
Do we advocate running multiple logical services in a single container? Not necessarily, but we do not prohibit it either. While the Docker developers are very opinionated and have very rigid philosophies about how containers should be built, Baseimage-docker is completely unopinionated. We believe in freedom: sometimes it makes sense to run multiple services in a single container, and sometimes it doesn’t. It is up to you to decide what makes sense, not the Docker developers.

Does Baseimage-docker advocate «fat containers» or «treating containers as VMs»?
There are people who think that Baseimage-docker advocates treating containers as VMs because Baseimage-docker advocates the use of multiple processes. Therefore, they also think that Baseimage-docker does not follow the Docker philosophy. Neither of these impressions are true.
The Docker developers advocate running a single logical service inside a single container. But we are not disputing that. Baseimage-docker advocates running multiple OS processes inside a single container, and a single logical service can consist of multiple OS processes.
It follows that Baseimage-docker also does not deny the Docker philosophy. In fact, many of the modifications we introduce are explicitly in line with the Docker philosophy. For example, using environment variables to pass parameters to containers is very much the «Docker way», and providing in the presence of multiple processes that may run as different users.
Описание инструкций Dockerfile
| Инструкция | Описание | Пример |
|---|---|---|
| FROM | Указывает, какой базовый образ нужно использовать. Обязательная инструкция для Dockerfile | FROM ubuntu:16.04 |
| MAINTAINER | Автор образа. | MAINTAINER DMosk <master@dmosk.ru> |
| RUN | Выполняет команду в новом слое при построении образа. | RUN apt-get install python |
| CMD | Запускает команду каждый раз при запуске контейнера. Может быть вызвана только один раз. Если в Dockerfile указать несколько таких инструкций, то выполнена будет последняя. | CMD |
| LABEL | Добавляет метаданные. | LABEL version=»2″ |
| EXPOSE | Указывает, какой порт должно использовать приложение внутри контейнера. | EXPOSE 8080 |
| ENV | Задает переменные окружения в образе. | ENV PGPASSWORD pass |
| ADD | Добавляет файлы/папки из текущего окружения в образ. Если в качестве копируемого файла указать архив, то он будет добавлен в образ в распакованном виде. Также в качестве источника принимает URL. | ADD /root/.ssh/{id_rsa,id_rsa.pub} /root/.ssh/ |
| COPY | Также как и ADD добавляет файлы в образ, но обладает меньшими функциями — не принимает URL и не распаковывает архивы. Рекомендован для использования в случаях, где не требуются возможности ADD или когда нужно перенести архив, как архив. | COPY ./mypasswd /root/ |
| ENTRYPOINT | Указывает команду, которой будет передаваться параметр при запуске контейнера. | ENTRYPOINT [«/sbin/apache2»] |
| VOLUME | Добавляет том в контейнер. | VOLUME [«/opt/myapp»] |
| USER | Задает пользователя, от которого будет запущен образ. | USER user:group |
| WORKDIR | Можно задать каталог, откуда будут запускаться команды ENTRYPOINT и CMD. | WORKDIR /opt/apps |
| ARG | Создает переменную, которую может использовать сборщик. | ARG folder=/opt/apps WORKDIR $folder |
| ONBUILD | Действия, которые выполняются, если наш образ используется как базовый для другой сборки. | ONBUILD ADD . /app/src |
| STOPSIGNAL | Переопределяет сигнал SIGTERM для завершения контейнера. | STOPSIGNAL SIGINT |
| HEALTHCHECK | Команда, которая будет проверять работоспособность контейнера. | HEALTHCHECK —interval=5m —timeout=3s CMD curl -f http://localhost/ || exit 1 |
| SHELL | Позволяет заменить стандартную оболочку для выполнения команд на пользовательскую. | SHELL [«/bin/sh», «-c»] |
What’s inside the image?
| Component | Why is it included? / Remarks |
|---|---|
| Ubuntu 16.04 LTS | The base system. |
| A correct init process | |
| Fixes APT incompatibilities with Docker | |
| syslog-ng | A syslog daemon is necessary so that many services — including the kernel itself — can correctly log to /var/log/syslog. If no syslog daemon is running, a lot of important messages are silently swallowed. Only listens locally. All syslog messages are forwarded to «docker logs».Why syslog-ng?I’ve had bad experience with rsyslog. I regularly run into bugs with rsyslog, and once in a while it takes my log host down by entering a 100% CPU loop in which it can’t do anything. Syslog-ng seems to be much more stable. |
| logrotate | Rotates and compresses logs on a regular basis. |
| SSH server | |
| cron | The cron daemon must be running for cron jobs to work. |
| Replaces Ubuntu’s Upstart. Used for service supervision and management. Much easier to use than SysV init and supports restarting daemons when they crash. Much easier to use and more lightweight than Upstart. | |
| A tool for running a command as another user. Easier to use than , has a smaller attack vector than , and unlike this tool sets correctly. Available as . |
Baseimage-docker is very lightweight: it only consumes 6 MB of memory.
The Docker developers advocate the philosophy of running a single logical service per container. A logical service can consist of multiple OS processes.
Splitting your logical service into multiple OS processes also makes sense from a security standpoint. By running processes as different users, you can limit the impact of vulnerabilities. Baseimage-docker provides tools to encourage running processes as different users, e.g. the tool.
Do we advocate running multiple logical services in a single container? Not necessarily, but we do not prohibit it either. While the Docker developers are very opinionated and have very rigid philosophies about how containers should be built, Baseimage-docker is completely unopinionated. We believe in freedom: sometimes it makes sense to run multiple services in a single container, and sometimes it doesn’t. It is up to you to decide what makes sense, not the Docker developers.
There are people who think that Baseimage-docker advocates treating containers as VMs because Baseimage-docker advocates the use of multiple processes. Therefore, they also think that Baseimage-docker does not follow the Docker philosophy. Neither of these impressions are true.
The Docker developers advocate running a single logical service inside a single container. But we are not disputing that. Baseimage-docker advocates running multiple OS processes inside a single container, and a single logical service can consist of multiple OS processes.
Install
Ensure you have completed the steps described in the Prerequisites section before installing the Docker Desktop Stable 2.3.0.2 release.
- Follow the usual installation instructions to install Docker Desktop. If you are running a supported system, Docker Desktop prompts you to enable WSL 2 during installation. Read the information displayed on the screen and enable WSL 2 to continue.
- Start Docker Desktop from the Windows Start menu.
-
From the Docker menu, select Settings > General.
-
Select the Use WSL 2 based engine check box.
If you have installed Docker Desktop on a system that supports WSL 2, this option will be enabled by default.
- Click Apply & Restart.
-
Ensure the distribution runs in WSL 2 mode. WSL can run distributions in both v1 or v2 mode.
To check the WSL mode, run:
To upgrade your existing Linux distro to v2, run:
To set v2 as the default version for future installations, run:
-
When Docker Desktop restarts, go to Settings > Resources > WSL Integration.
The Docker-WSL integration will be enabled on your default WSL distribution. To change your default WSL distro, run .
For example, to set Ubuntu as your default WSL distro, run .
Optionally, select any additional distributions you would like to enable the Docker-WSL integration on.
- Click Apply & Restart.
Создание нового образа и контейнера
Теперь, когда у нас есть все необходимые файлы конфигурации, можно собрать новый образ Docker на основе Ubuntu 18.04, используя наш Dockerfile. Для этого нужно выполнить следующую команду Docker:
docker build -t nginx_image .
Обратите внимание на точку, если вы находитесь в каталоге в котором создан Dockerfile. Если вы находитесь не в корне каталога, то вместо точки укажите директорию с докфайлом. Если создание образа прошло без ошибок вы должны увидеть примерно следующее
.........

---> b0e31aed27a4
Removing intermediate container 5e610e002c60
Step 12/14 : VOLUME /etc/nginx/sites-enabled /etc/nginx/certs /etc/nginx/conf.d /var/log/nginx /var/www/html
---> Running in 1ad1d4030221
---> 2dd234e209ba
Removing intermediate container 1ad1d4030221
Step 13/14 : COPY start.sh /start.sh
---> 55bf3c632539
Removing intermediate container 61bec9b748b9
Step 14/14 : CMD ./start.sh
---> Running in d7a0eff0a3ee
---> e7e5dc3d6cd1
Removing intermediate container d7a0eff0a3ee
Successfully built e7e5dc3d6cd1
Successfully built e7e5dc3d6cd1, говорит о том что образ создан. После успешного выполнения команды можно проверить наличие нового образа при помощи команды images:
docker images
![]()
Попробуем создать на основе этого образа новый контейнер. Предварительно создадим на хосте новую директорию для данных корня документов:
mkdir -p /webroot
Запустим новый контейнер командой run:
docker run -d -v /webroot:/var/www/html -p 80:80 --name my_container nginx_image
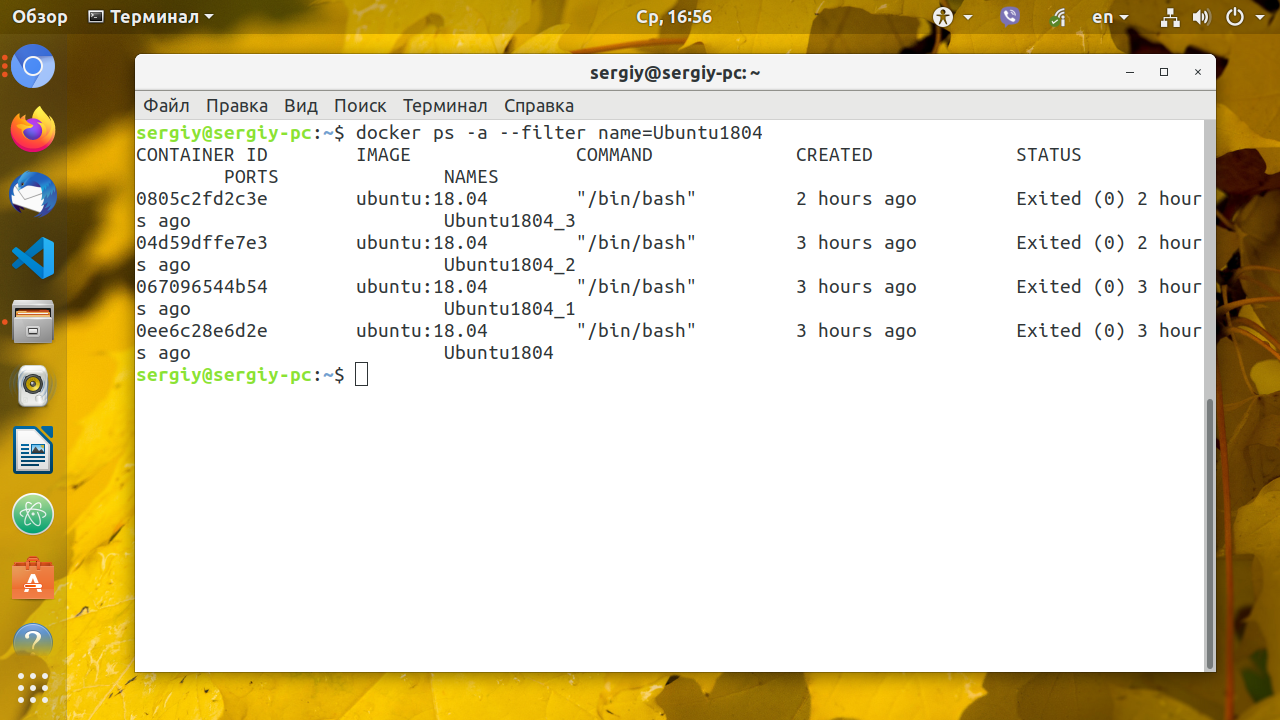
И командой ps проверим, запустился ли новый контейнер под названием my_container:
docker ps
![]()
Разберем команду run более подробно:
—name my_container nginx_image — на основе образа «nginx_images» создаем новый контейнер с именем «my_container».-p 80:80 — контейнер запускаетcя на 80 порте хоста.-v /webroot:/var/www/html — содержимое директории хоста /webroot перезаписывает директорию /var/www/html в контейнере.
Новый контейнер на основе образа nginx_image должен работать без ошибок.
Building the image yourself
If for whatever reason you want to build the image yourself instead of downloading it from the Docker registry, follow these instructions.
Clone this repository:
Start a virtual machine with Docker in it. You can use the Vagrantfile that we’ve already provided.
Build the image:
If you want to call the resulting image something else, pass the NAME variable, like this:
Removing optional services
The default baseimage-docker-centos installs , and services during the build process.
In case you don’t need one or more of these services in your image, you can disable its installation.
As shown in the following example, to prevent from being installed into your image, set to the variable in the file.
Then you can proceed with command.
Building the image yourself
If for whatever reason you want to build the image yourself instead of downloading it from the Docker registry, follow these instructions.
Clone this repository:
Start a virtual machine with Docker in it. You can use the Vagrantfile that we’ve already provided.
Build the image:
If you want to call the resulting image something else, pass the NAME variable, like this:
Removing optional services
The default baseimage-docker installs , and services during the build process.
In case you don’t need one or more of these services in your image, you can disable its installation.
As shown in the following example, to prevent from being installed into your image, set to the variable in the file.
Then you can proceed with command.
What’s inside the image?
Overview
Looking for a more complete base image, one that is ideal for Ruby, Python, Node.js and Meteor web apps? Take a look at passenger-docker.


| Component | Why is it included? / Remarks |
|---|---|
| Ubuntu 16.04 LTS | The base system. |
| A correct init process | |
| Fixes APT incompatibilities with Docker | See https://github.com/dotcloud/docker/issues/1024. |
| syslog-ng | A syslog daemon is necessary so that many services — including the kernel itself — can correctly log to /var/log/syslog. If no syslog daemon is running, a lot of important messages are silently swallowed. Only listens locally. All syslog messages are forwarded to «docker logs». |
| logrotate | Rotates and compresses logs on a regular basis. |
| SSH server | Allows you to easily login to your container to things. SSH is disabled by default and is only one of the methods provided by baseimage-docker for this purpose. The other method is through . SSH is also provided as an alternative because comes with several caveats.Password and challenge-response authentication are disabled by default. Only key authentication is allowed. |
| cron | The cron daemon must be running for cron jobs to work. |
| Replaces Ubuntu’s Upstart. Used for service supervision and management. Much easier to use than SysV init and supports restarting daemons when they crash. Much easier to use and more lightweight than Upstart. | |
| A tool for running a command as another user. Easier to use than , has a smaller attack vector than , and unlike this tool sets correctly. Available as . |
Baseimage-docker is very lightweight: it only consumes 6 MB of memory.
Wait, I thought Docker is about running a single process in a container?
The Docker developers advocate the philosophy of running a single logical service per container. A logical service can consist of multiple OS processes.
Splitting your logical service into multiple OS processes also makes sense from a security standpoint. By running processes as different users, you can limit the impact of vulnerabilities. Baseimage-docker provides tools to encourage running processes as different users, e.g. the tool.
Do we advocate running multiple logical services in a single container? Not necessarily, but we do not prohibit it either. While the Docker developers are very opinionated and have very rigid philosophies about how containers should be built, Baseimage-docker is completely unopinionated. We believe in freedom: sometimes it makes sense to run multiple services in a single container, and sometimes it doesn’t. It is up to you to decide what makes sense, not the Docker developers.
Does Baseimage-docker advocate «fat containers» or «treating containers as VMs»?
There are people who are under the impression that Baseimage-docker advocates treating containers as VMs, because of the fact that Baseimage-docker advocates the use of multiple processes. Therefore they are also under the impression that Baseimage-docker does not follow the Docker philosophy. Neither of these impressions are true.
The Docker developers advocate running a single logical service inside a single container. But we are not disputing that. Baseimage-docker advocates running multiple OS processes inside a single container, and a single logical service can consist of multiple OS processes.
It follows from this that Baseimage-docker also does not deny the Docker philosophy. In fact, many of the modifications we introduce are explicitly in line with the Docker philosophy. For example, using environment variables to pass parameters to containers is very much the «Docker way», and provide in the presence of multiple processes that may run as different users.
Удаление Docker и образов
Если вы хотите полностью удалить Docker, вам следует выполнить следующие шаги:
Примечание: Не копируйте бездумно эти команды, не убедившись, что вы знаете, что делаете.
Выдать список работающих контейнеров:
# docker ps
Выдать список всех контейнеров, запущенных на хосте для удаления:
# docker ps -a
Остановить работающий контейнер:
# docker stop <CONTAINER ID>
Выполнить команду kill для всё ещё работающих контейнеров:
# docker kill <CONTAINER ID>
Удалить все контейнеры, перечисленные по ID:
# docker rm <CONTAINER ID>
Выдать список всех образов Docker:
# docker images
Удалить все образы Docker по ID:
# docker rmi <IMAGE ID>
Удалить все данные Docker (очистить каталог):
The factual accuracy of this article or section is disputed.
# rm -R /var/lib/docker
What’s inside the image?
Overview
Looking for a more complete base image, one that is ideal for Ruby, Python, Node.js and Meteor web apps? Take a look at passenger-docker.
| Component | Why is it included? / Remarks |
|---|---|
| Centos 7.3 | The base system. |
| A correct init process | |
| Fixes APT incompatibilities with Docker | See https://github.com/dotcloud/docker/issues/1024. |
| syslog-ng | A syslog daemon is necessary so that many services — including the kernel itself — can correctly log to /var/log/syslog. If no syslog daemon is running, a lot of important messages are silently swallowed. Only listens locally. All syslog messages are forwarded to «docker logs».Why syslog-ng?I’ve had bad experience with rsyslog. I regularly run into bugs with rsyslog, and once in a while it takes my log host down by entering a 100% CPU loop in which it can’t do anything. Syslog-ng seems to be much more stable. |
| logrotate | Rotates and compresses logs on a regular basis. |
| SSH server | Allows you to easily login to your container to things. SSH is disabled by default and is only one of the methods provided by baseimage-docker-centos for this purpose. The other method is through . SSH is also provided as an alternative because comes with several caveats.Password and challenge-response authentication are disabled by default. Only key authentication is allowed. |
| cron | The cron daemon must be running for cron jobs to work. |
| Replaces centos 7’s systemd. Used for service supervision and management. Much easier to use than SysV init and supports restarting daemons when they crash. Much easier to use and more lightweight than Upstart. | |
| A tool for running a command as another user. Easier to use than , has a smaller attack vector than , and unlike this tool sets correctly. Available as . |
Baseimage-docker is very lightweight: it only consumes 6 MB of memory.
Wait, I thought Docker is about running a single process in a container?
The Docker developers advocate the philosophy of running a single logical service per container. A logical service can consist of multiple OS processes.
Splitting your logical service into multiple OS processes also makes sense from a security standpoint. By running processes as different users, you can limit the impact of vulnerabilities. Baseimage-docker provides tools to encourage running processes as different users, e.g. the tool.
Do we advocate running multiple logical services in a single container? Not necessarily, but we do not prohibit it either. While the Docker developers are very opinionated and have very rigid philosophies about how containers should be built, Baseimage-docker is completely unopinionated. We believe in freedom: sometimes it makes sense to run multiple services in a single container, and sometimes it doesn’t. It is up to you to decide what makes sense, not the Docker developers.
Does Baseimage-docker advocate «fat containers» or «treating containers as VMs»?
There are people who think that Baseimage-docker advocates treating containers as VMs because Baseimage-docker advocates the use of multiple processes. Therefore, they also think that Baseimage-docker does not follow the Docker philosophy. Neither of these impressions are true.
The Docker developers advocate running a single logical service inside a single container. But we are not disputing that. Baseimage-docker advocates running multiple OS processes inside a single container, and a single logical service can consist of multiple OS processes.
It follows that Baseimage-docker also does not deny the Docker philosophy. In fact, many of the modifications we introduce are explicitly in line with the Docker philosophy. For example, using environment variables to pass parameters to containers is very much the «Docker way», and providing in the presence of multiple processes that may run as different users.
Configure where the Docker daemon listens for connections
By default, the Docker daemon listens for connections on a UNIX socket to accept
requests from local clients. It is possible to allow Docker to accept requests
from remote hosts by configuring it to listen on an IP address and port as well
as the UNIX socket. For more detailed information on this configuration option
take a look at “Bind Docker to another host/port or a unix socket” section of
the Docker CLI Reference article.
Configuring Docker to accept remote connections can be done with the
systemd unit file for Linux distributions using systemd, such as recent versions
of RedHat, CentOS, Ubuntu and SLES, or with the file which is
recommended for Linux distributions that do not use systemd.
Configuring remote access with unit file
-
Use the command to open an override file for in a text editor.
-
Add or modify the following lines, substituting your own values.
-
Save the file.
-
Reload the configuration.
-
Restart Docker.
-
Check to see whether the change was honored by reviewing the output of to confirm is listening on the configured port.
Configuring remote access with
-
Set the array in the to connect to the UNIX socket and an IP address, as follows:
-
Restart Docker.
-
Check to see whether the change was honored by reviewing the output of to confirm is listening on the configured port.
Сборка нового образа
Сборка начинается с создания файла Dockerfile — он содержит инструкции того, что должно быть в контейнере. В качестве примера, соберем свой веб-сервер nginx.
И так, чтобы создать свой образ с нуля, создаем каталог для размещения Dockerfile:
mkdir -p /opt/docker/mynginx
* где /opt/docker/mynginx — полный путь до каталога, где будем создавать образ.
… переходим в данный каталог:
cd /opt/docker/mynginx
… и создаем Dockerfile:
vi Dockerfile
FROM centos:7
MAINTAINER Dmitriy Mosk <master@dmosk.ru>
ENV TZ=Europe/Moscow
RUN yum install -y epel-release && yum install -y nginx
RUN yum clean all
RUN echo «daemon off;» >> /etc/nginx/nginx.conf
RUN sed -i «0,/nginx/s/nginx/docker-nginx/i» /usr/share/nginx/html/index.html
CMD
* в данном файле мы:
- используем базовый образ centos 7;
- в качестве автора образа указываем Dmitriy Mosk;
- задаем временную зону внутри контейнера Europe/Moscow.
- устанавливаем epel-release и nginx;
- чистим систему от метаданных и кэша пакетов после установки;
- указываем nginx запускаться на переднем плане (daemon off);
- в индексном файле меняем первое вхождение nginx на docker-nginx;
- запускаем nginx.
* подробное описание инструкций Dockerfile смотрите .
Запускаем сборку:
docker build -t dmosk/nginx:v1 .
* где dmosk — имя автора; nginx — название для сборки; v1 — тег с указанием версии. Точка на конце указывает, что поиск Dockerfile выполняем в текущей директории.
… начнется процесс сборки образа — после его завершения мы должны увидеть что-то на подобие:
Successfully built eae801eaeff2
Successfully tagged dmosk/nginx:v1
Посмотреть список образов можно командой:
docker images
Создаем и запускаем контейнер из образа:
docker run -d -p 8080:80 dmosk/nginx:v1
* в данном примере мы запустим контейнер из образа dmosk/nginx:v1 и укажем, что необходимо опубликовать внешний порт 8080, который будет перенаправлять трафик на порт 80 внутри контейнера.
Открываем браузер и переходим по адресу http://<IP-адрес нашего докера>:8080 — мы должны увидеть страницу приветствия с нашим docker-nginx:
![]()
Посмотреть созданные контейнеры можно командой:
docker ps -a
Запустить или остановить контейнеры можно командами:
docker stop 5fe78aca2e1d
docker start 5fe78aca2e1d
* где 5fe78aca2e1d — идентификатор контейнера.
Building the image yourself
If for whatever reason you want to build the image yourself instead of downloading it from the Docker registry, follow these instructions.
Clone this repository:
Start a virtual machine with Docker in it. You can use the Vagrantfile that we’ve already provided.
First, install plug-in:
Then, start the virtual machine
Build the image:
If you want to call the resulting image something else, pass the NAME variable, like this:
You can also change the base-image to as these distributions are quite similar.
The image will be: . Use the variable in combination with the one to call it .
To verify that the various services are started, when the image is run as a container, add to the end of your make invocations, e.g.:
Removing optional services
The default baseimage-docker installs , and services during the build process.
In case you don’t need one or more of these services in your image, you can disable its installation through the that is sourced within . Do this at build time by passing a variable in with as in , or you may set the variable in with an ENV setting above the RUN directive.
These represent build-time configuration, so setting them in the shell env at build-time . Setting them in child images’ Dockerfiles will also not have any effect.)
You can also set them directly as shown in the following example, to prevent from being installed into your image, set to the variable in the file.
Then you can proceed with command.


