Configure Database Security for MariaDB Server:
We can optionally remove the test databases and restrict the remote logins by root user.
For this purpose, we can use new mariadb-secure-installation command.
# mariadb-secure-installation

NOTE: RUNNING ALL PARTS OF THIS SCRIPT IS RECOMMENDED FOR ALL MariaDB
      SERVERS IN PRODUCTION USE!  PLEASE READ EACH STEP CAREFULLY!

In order to log into MariaDB to secure it, we'll need the current
password for the root user. If you've just installed MariaDB, and
haven't set the root password yet, you should just press enter here.

Enter current password for root (enter for none):
OK, successfully used password, moving on...

Setting the root password or using the unix_socket ensures that nobody
can log into the MariaDB root user without the proper authorisation.

You already have your root account protected, so you can safely answer 'n'.

Switch to unix_socket authentication [Y/n] n
 ... skipping.

You already have your root account protected, so you can safely answer 'n'.

Change the root password? [Y/n] n
 ... skipping.

By default, a MariaDB installation has an anonymous user, allowing anyone
to log into MariaDB without having to have a user account created for
them.  This is intended only for testing, and to make the installation
go a bit smoother.  You should remove them before moving into a
production environment.

Remove anonymous users? [Y/n] Y
 ... Success!

Normally, root should only be allowed to connect from 'localhost'.  This
ensures that someone cannot guess at the root password from the network.

Disallow root login remotely? [Y/n] Y
 ... Success!

By default, MariaDB comes with a database named 'test' that anyone can
access.  This is also intended only for testing, and should be removed
before moving into a production environment.

Remove test database and access to it? [Y/n] Y
 - Dropping test database...
 ... Success!
 - Removing privileges on test database...
 ... Success!

Reloading the privilege tables will ensure that all changes made so far
will take effect immediately.

Reload privilege tables now? [Y/n] Y
 ... Success!

Cleaning up...

All done!  If you've completed all of the above steps, your MariaDB
installation should now be secure.

Thanks for using MariaDB!
We have successfully installed and configured MariaDB Server 10.5 on CentOS 8.
Добавление базы в MariaDB
Для работы с базой необходимо после создания добавить пользователя к этой базе и назначить права.
Добавление базы с параметрами
MariаDB > CREATE DATABASE `base` CHARACTER SET utf8 COLLATE utf8_general_ci;
= вывод команды =
Query OK, 1 row affected (0.00 sec)
Просмотр пользователей с выводом их прав
MariaDB > SELECT User,Host FROM mysql.user;
= вывод команды =
+--------+-----------+
| User   | Host      |
+--------+-----------+
| root   | localhost         |
| mysql  | localhost |
+--------+-----------+
2 rows in set (0.005 sec)
Права пользователя баз данных MariaDB
В случае необходимости подключатся к базе с других компьютеров необходимо создать пользователя с нужным параметром и дать права на доступ в настройках сервера MariaDB!
Права на доступ к серверу баз данных делается в двух местах:
- Параметр bind-address=0.0.0.0 в конфигурационном файле самого сервера баз MariaDB разрешающий подключатся с любого адреса (или укажите конкретный IP) в разделе ;
- Права пользователя на возможность удаленного подключения к базе данных.
Для работы с базами мне удобно использовать и эта программа позволяет настроить доступ к базам работающих на разных серверах.
Менять права пользователя root не желательно, но можно создать пользователя и дать ему полные права. Держать ещё одного пользователя с полными правами не разумно, но иногда необходимо. Добавляются пользователю полные права командой:
MariaDB > GRANT ALL PRIVILEGES ON *.* to 'имя пользователя'@'%';
После добавления пользователя с полными правами и имеющегося PhpMyAdmin настроенного для подключения к другим серверам баз данных, можно зайти и создать все необходимые базы и пользователей.
Например, ниже представлена полная версия команд после выполнения которых будет создан пользователь sevo44 с полными правами:
mysql -u root -p
Enter password:
Welcome to the MariaDB monitor.  Commands end with ; or \g.
Your MariaDB connection id is 8
Server version: 10.4.8-MariaDB MariaDB Server

Copyright (c) 2000, 2018, Oracle, MariaDB Corporation Ab and others.

Type 'help;' or '\h' for help. Type '\c' to clear the current input statement.

MariaDB > CREATE USER `sevo44`@`%` IDENTIFIED BY 'ПАРОЛЬ';
Query OK, 0 rows affected (0.008 sec)

MariaDB > GRANT ALL PRIVILEGES ON *.* to 'sevo44'@'%';
Query OK, 0 rows affected (0.017 sec)

MariaDB > FLUSH PRIVILEGES;
Query OK, 0 rows affected (0.001 sec)

MariaDB > exit
Bye
Для безопасности я никогда не создаю пользователя с полными правами который может подключатся с удаленных мест. Для каждой базы свой пользователь!
В случае если надо поменять права имеющемуся пользователю это делается следующей командой, после подключения к серверу баз данных:
# Команда смены прав доступа пользователя на подключение с любого адреса (параметр %)
MariaDB > UPDATE mysql.user SET Host='%' WHERE Host='localhost' AND User='имя_пользователя';
Query OK, 1 row affected (0.00 sec)
Rows matched: 1 Changed: 1 Warnings: 0

# Команда смены прав доступа на базы
MariaDB > UPDATE mysql.db SET Host='%' WHERE Host='localhost' AND User='имя_пользователя';
Query OK, 0 rows affected (0.03 sec)
Rows matched: 0 Changed: 0 Warnings: 0
Добавление пользователя
# Права на доступ только с localhost
MariаDB > CREATE USER `base_user`@localhost IDENTIFIED BY 'ПАРОЛЬ';

# Права на доступ с любого адреса (при использовании знаков в названиях код заключается в кавычки!
MariаDB > CREATE USER `base_user`@`%` IDENTIFIED BY 'ПАРОЛЬ';

# Права на доступ с адреса 10.10.0.2 (при использовании знаков в названиях код заключается в кавычки!
MariаDB > CREATE USER `base_user`@`10.10.0.2` IDENTIFIED BY 'ПАРОЛЬ';

= правильный вывод команды для любой команды =
Query OK, 0 rows affected (0.10 sec)
Назначение пользователя базе
# При назначении прав выставляем пользователя с нужными правами!
MariaDB > GRANT ALL PRIVILEGES ON base.* to base_user@localhost;
= вывод команды =
Query OK, 0 rows affected (0.04 sec)
После всех манипуляция с базами необходимо обновить права доступа
MariаDB > FLUSH PRIVILEGES;
= вывод команды =
Query OK, 0 rows affected (0.02 sec)
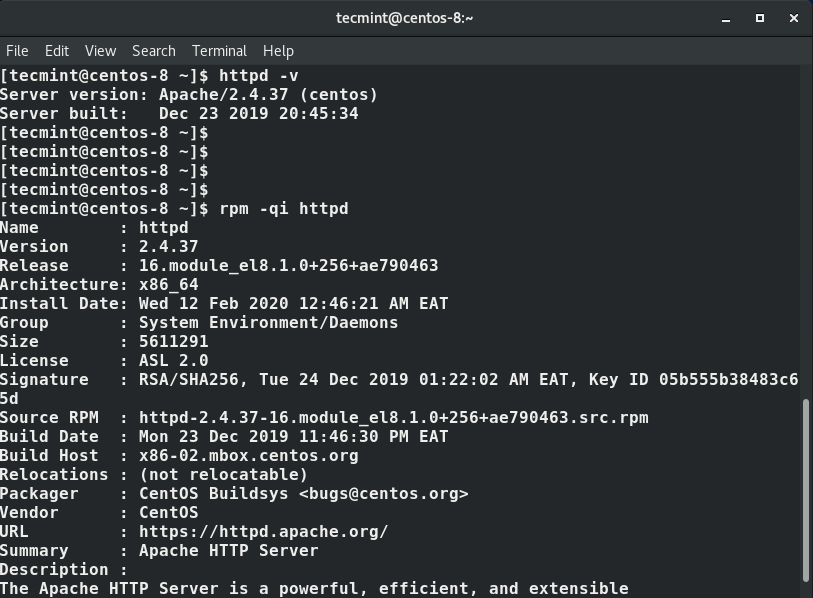
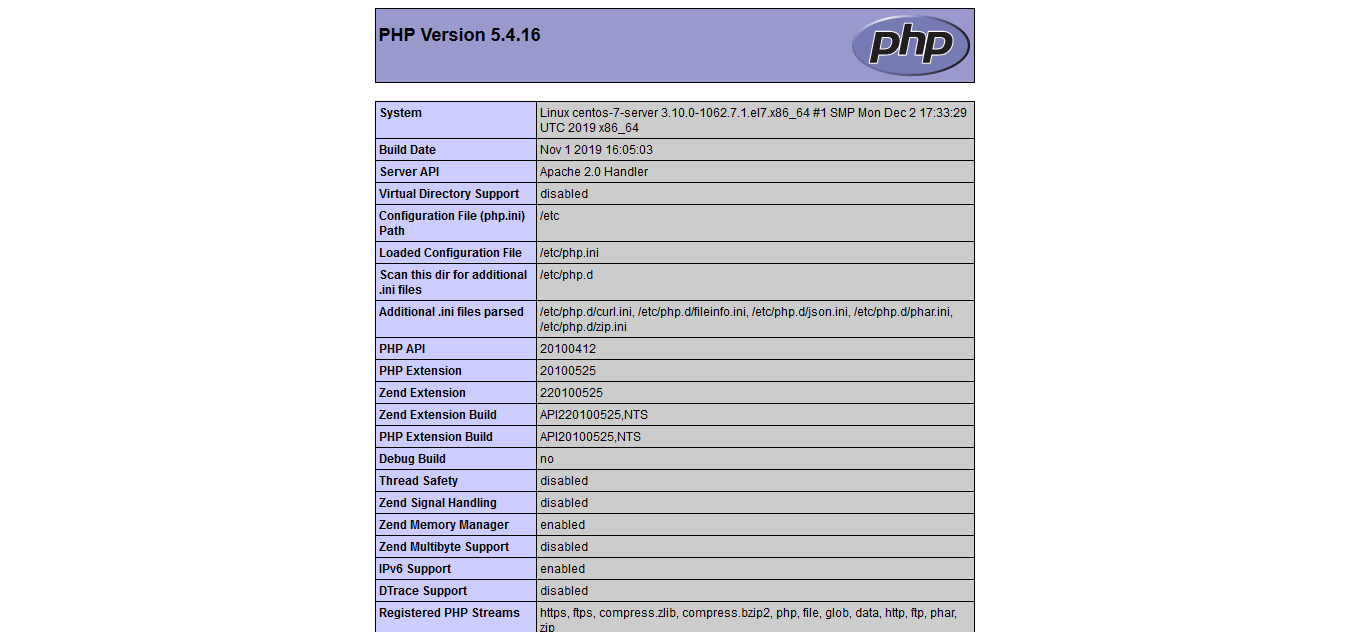
Что такое LAMP?
LAMP — комплект программного обеспечения на ОС, состоящей из операционной системы Linux, веб-сервера Apache, сервера базы данных MySQL и языка программирования PHP (или Perl / Python) . LAMP используется для работы тяжелых динамических веб-сайтов полностью состоящий из свободного программного обеспечения с открытым исходным кодом. В этой статье я собираюсь объяснить, как Linux, Apache, MySQL / MariaDB (замена для MySQL), PHP (LAMP) устанавливаются на CentOS 7 или RHEL 7.
- Устанавливаем RHEL 7 или CentOS 7 сервер. Открываем терминал к серверу по ssh, у Вас должны быть права суперпользователя root.
- Вам также понадобятся знания команд yum
- Вам понадобится IP адрес вашего сервера, используйте следующую комманду, что бы определить IP адрес для интерфейса eth0
Shell
ifconfig eth0
или
ip a show eth0
или
ip addr list eth0 | awk ‘/inet /{sub(/\/+/,»»,$2); print $2}’
или
ifconfig eth0 | awk ‘/inet /{print $2}’
10.180.10.10
|
1 |
ifconfig eth0 или ipashow eth0 или ip addr list eth0|awk’/inet /{sub(/\/+/,»»,$2); print $2}’ или ifconfig eth0|awk’/inet /{print $2}’ 10.180.10.10 |
Полученный IP 10.180.10.10 адрес будем использовать для тестирования установки
Итак приступим
Установите MariaDB 10.3 на CentOS 7
Чтобы установить MariaDB 10.3 на CentOS 7, выполните следующие действия:
-
Первый шаг — включить репозиторий MariaDB. Создайте файл репозитория с именем и добавьте следующий контент:
/etc/yum.repos.d/MariaDB.repo -
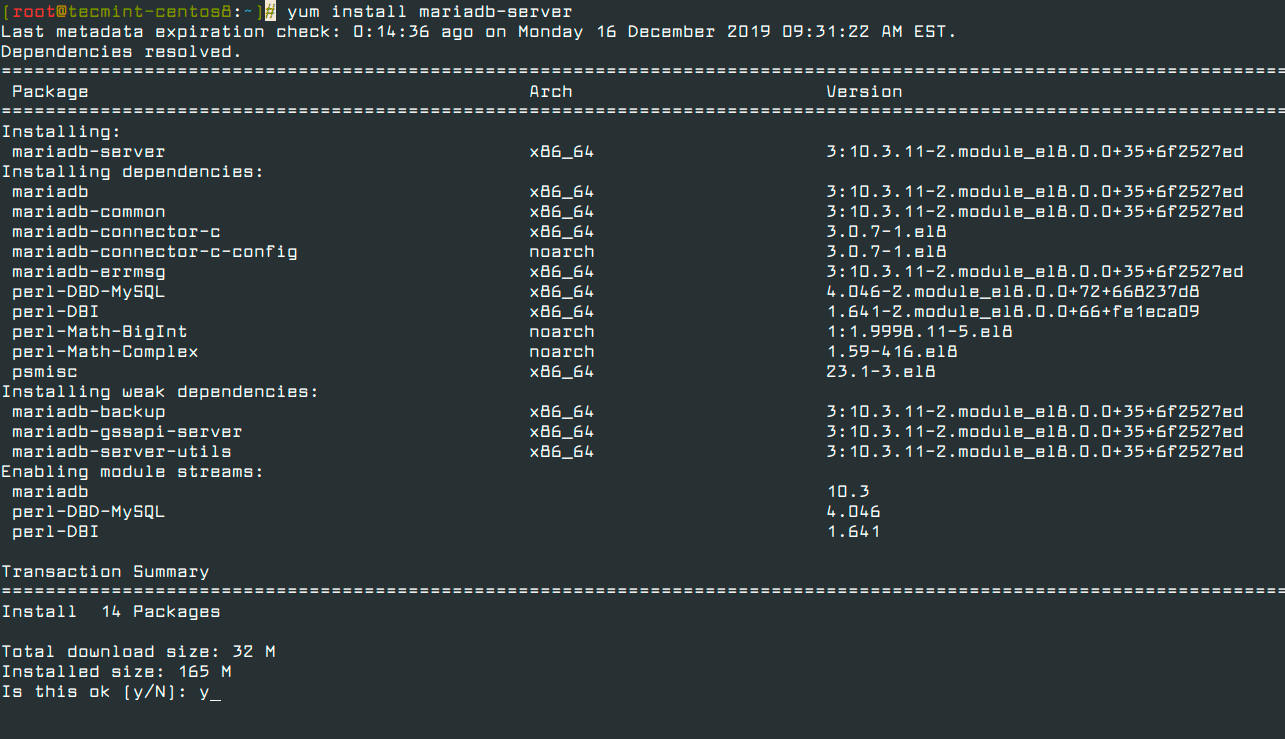
Установите серверные и клиентские пакеты MariaDB с помощью , как и другие пакеты CentOS:
Yum может предложить вам импортировать GPG-ключ MariaDB:
Введите и нажмите .
-
После завершения установки включите MariaDB для запуска при загрузке и запустите службу:
-
Чтобы проверить установку, проверьте статус службы MariaDB, набрав:
-
Последний шаг — запустить скрипт который будет выполнять несколько задач, связанных с безопасностью:
Сценарий предложит вам установить пароль пользователя root, удалить анонимного пользователя, ограничить доступ пользователя root к локальному компьютеру и удалить тестовую базу данных.
Все шаги подробно объяснены, и на все вопросы рекомендуется ответить (да).
Securing MariaDB
This open-source database management system does not have secure settings by default. To ensure your data is safe, run its installation script to configure the security options.
1. Start by typing the following command to initiate running the security script:
2. Next, you will be presented with the following options:
- Set root password? [Y/n] – type y (for yes) and hit Enter create a root password for your database
- Remove anonymous users? [Y/n] – type y and hit Enter
- Disallow root login remotely? [Y/n] – type y and hit Enter
- Remove test database and access to it? [Y/n] – type y and hit Enter
- Reload privilege tables now? [Y/n] – type y and hit Enter
The output informs you that the MariaDB installation is now secure:
![]()
Read our article on How to Create a MariaDB User and Grant Privileges.
1: Добавление репозитория MariaDB
Примечание: Данный раздел нужно выполнить на всех серверах кластера.
Сначала нужно добавить соответствующие репозитории пакетов MariaDB на каждый из трех серверов, чтобы затем установить правильную версию MariaDB. После обновления репозиториев на всех трех серверах вы сможете перейти к установке MariaDB.
Стоит отметить, что MariaDB возникла в качестве замены MySQL, поэтому во многих конфигурационных файлах и скриптах запуска вы увидите mysql, а не mariadb. Для согласованности кода мы будем использовать mysql.
Мы собираемся установить версию MariaDB 10.4. Поскольку эта версия не включена в стандартные репозитории CentOS, сначала нужно добавить на три ваших сервера внешний репозиторий, поддерживаемый проектом MariaDB.
Примечание: Официальному репозиторию от MariaDB можно доверять, но далеко не все внешние репозитории так же надежны. Обязательно устанавливайте пакеты только из надежных источников.
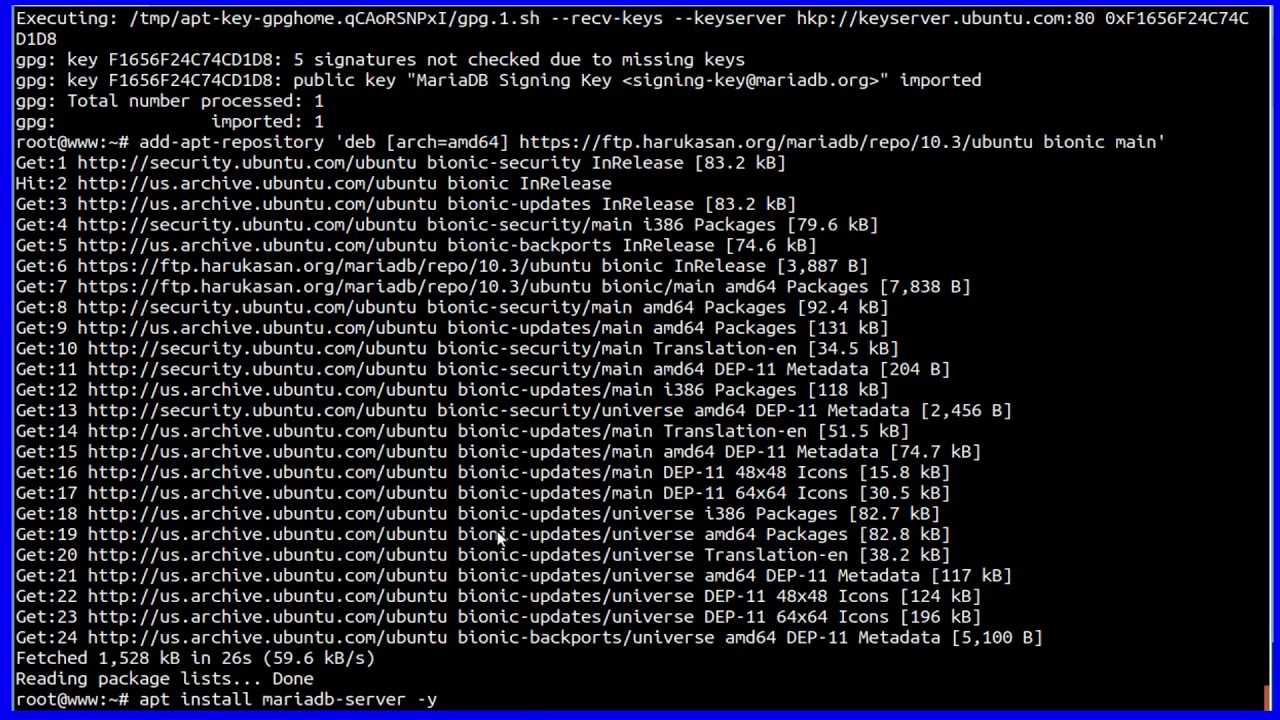
Сначала добавьте ключ репозитория MariaDB. Создайте файл для него:
Добавьте в файл следующие строки:
Нажмите клавишу esc, чтобы вернуться в обычный режим, затем введите: wq, чтобы сохранить и выйти из файла.
Активируйте репозиторий:
Команда makecache кэширует метаданные репозитория, чтобы менеджер пакетов мог установить MariaDB с помощью файлов –disablerepo и –enablerepo, направляющих команду на файл репозитория mariadb, который вы только что создали.
Вы получите такой вывод:
Не забудьте повторить эти действия на остальных серверах кластера.
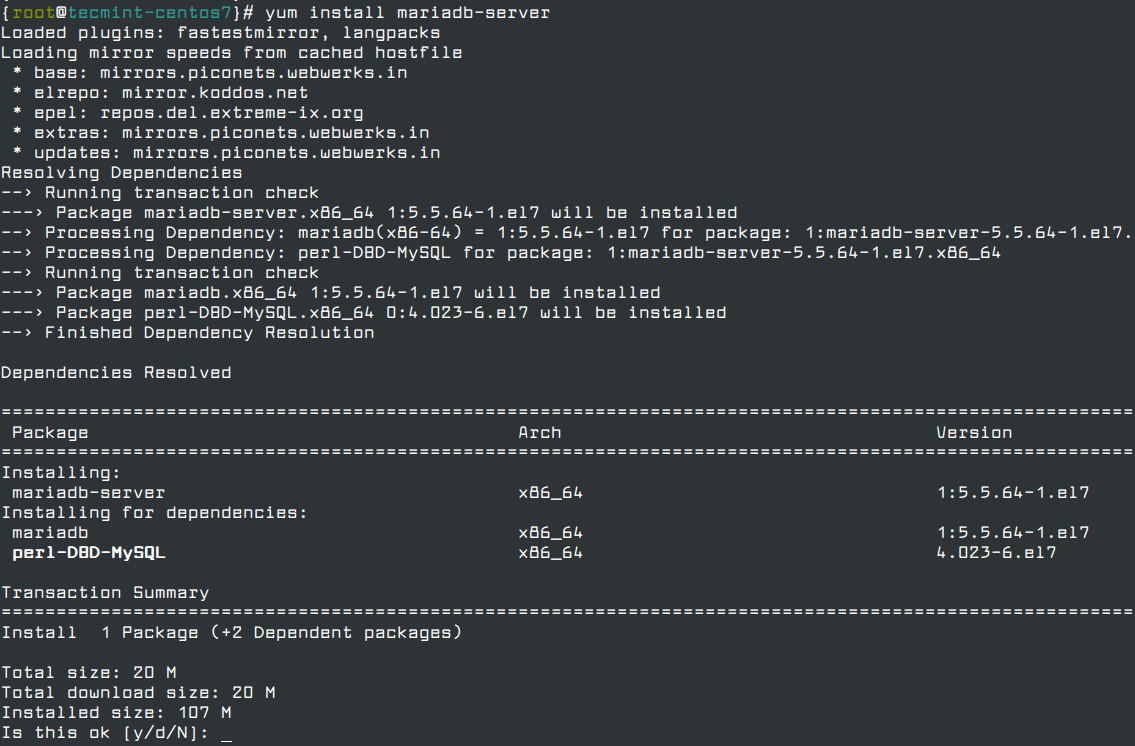
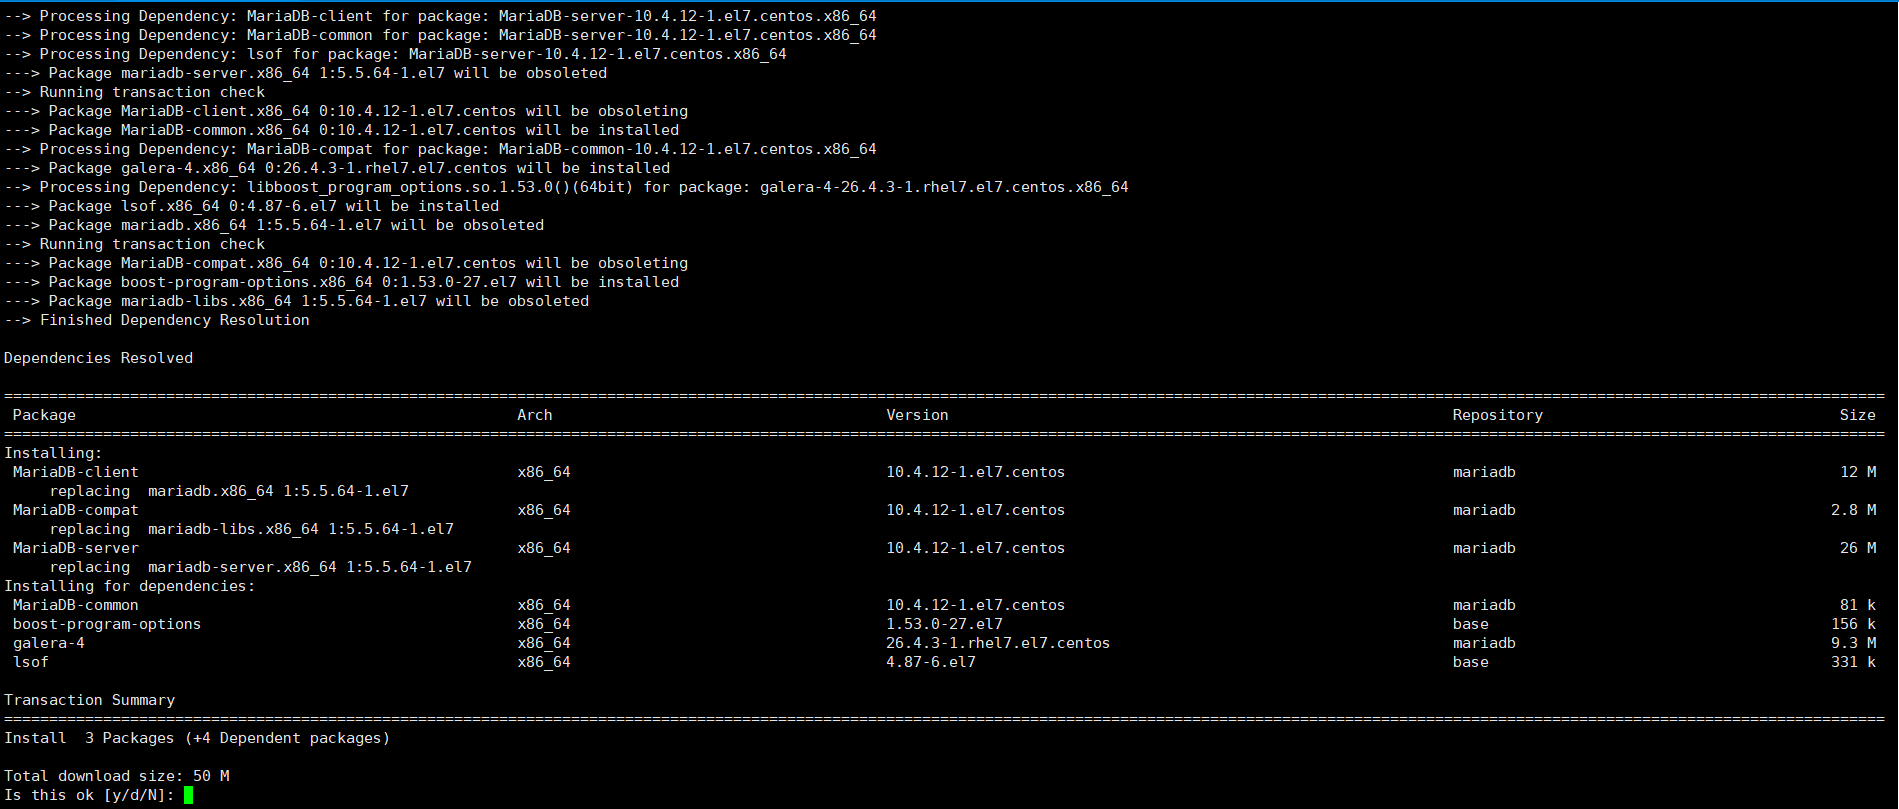
Chapter 3. 3. UPGRADE TO MARIADB 10.3 AND VERIFY SUCCESS
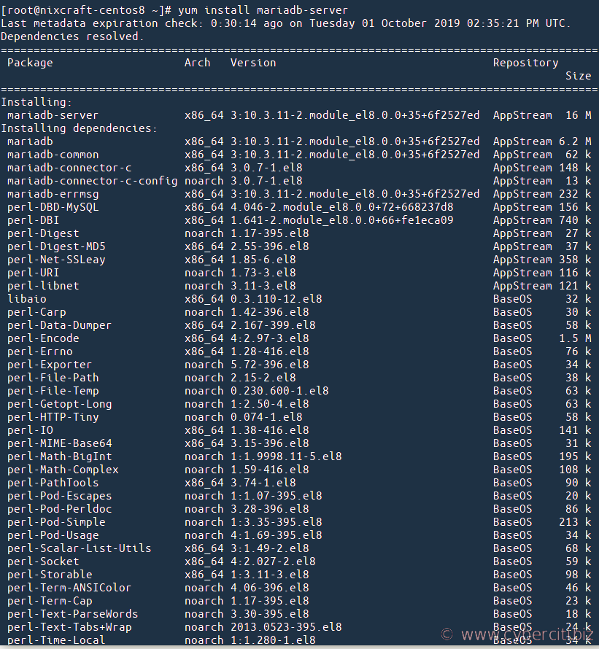
Run the following command to upgrade to MariaDB 10.3:
yum install MariaDB-server MariaDB-client
| 1 | yum install MariaDB-server MariaDB-client |
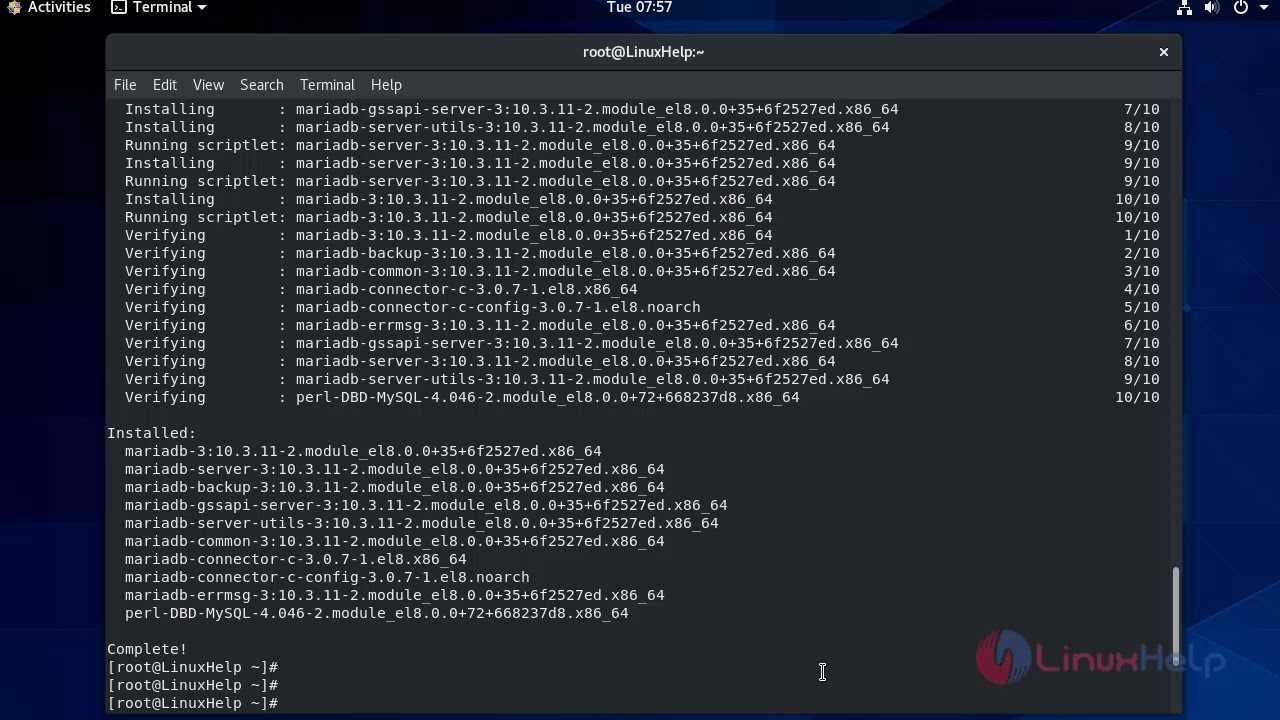
Output should look something like this:
==========================================================================================================================================================================================================================
Package Архитектура Версия Репозиторий Размер
==========================================================================================================================================================================================================================
Установка:
MariaDB-client x86_64 10.3.15-1.el7.centos mariadb 11 M
замена mariadb.x86_64 1:5.5.60-1.el7_5
MariaDB-compat x86_64 10.3.15-1.el7.centos mariadb 2.8 M
замена mariadb-libs.x86_64 1:5.5.60-1.el7_5
MariaDB-server x86_64 10.3.15-1.el7.centos mariadb 24 M
замена mariadb-server.x86_64 1:5.5.60-1.el7_5
Установка зависимостей:
MariaDB-common x86_64 10.3.15-1.el7.centos mariadb 78 k
boost-program-options x86_64 1.53.0-27.el7 base 156 k
galera x86_64 25.3.26-1.rhel7.el7.centos mariadb 8.1 M
|
1 2 3 4 5 6 7 8 9 10 11 12 13 14 |
========================================================================================================================================================================================================================== PackageАрхитектураВерсияРепозиторийРазмер ========================================================================================================================================================================================================================== Установка MariaDB-client x86_6410.3.15-1.el7.centosmariadb11M заменаmariadb.x86_6415.5.60-1.el7_5 MariaDB-compat x86_6410.3.15-1.el7.centosmariadb2.8M заменаmariadb-libs.x86_6415.5.60-1.el7_5 MariaDB-server x86_6410.3.15-1.el7.centosmariadb24M заменаmariadb-server.x86_6415.5.60-1.el7_5 Установказависимостей MariaDB-common x86_6410.3.15-1.el7.centosmariadb78k boost-program-options x86_641.53.0-27.el7base156k galera x86_6425.3.26-1.rhel7.el7.centosmariadb8.1M |
Once yum does it’s thing, restart the MariaDB daemon:
systemctl restart mariadb
| 1 | systemctl restart mariadb |
Then verify that the service has started and the installation is complete:
Job for mariadb.service failed because the control process exited with error code. See «systemctl status mariadb.service» and «journalctl -xe» for details.
| 1 | Job formariadb.servicefailed because the control process exited with error code.See»systemctl status mariadb.service»and»journalctl -xe»fordetails. |
The fix for the startup problem is in the article
You should see output similar to the following:
Welcome to the MariaDB monitor. Commands end with ; or \g.
Your MariaDB connection id is 11
Server version: 10.3.15-MariaDB MariaDB Server
Copyright (c) 2000, 2018, Oracle, MariaDB Corporation Ab and others.
Reading history-file /root/.mysql_history
Type ‘help;’ or ‘\h’ for help. Type ‘\c’ to clear the current input statement.
|
1 2 3 4 5 6 7 8 |
Welcome tothe MariaDB monitor.Commands endwith;or\g. Your MariaDB connection idis11 Server version10.3.15-MariaDB MariaDB Server Copyright(c)2000,2018,Oracle,MariaDB Corporation Ab andothers. Reading history-fileroot.mysql_history Type’help;’or’\h’forhelp.Type’\c’toclearthe current input statement. |
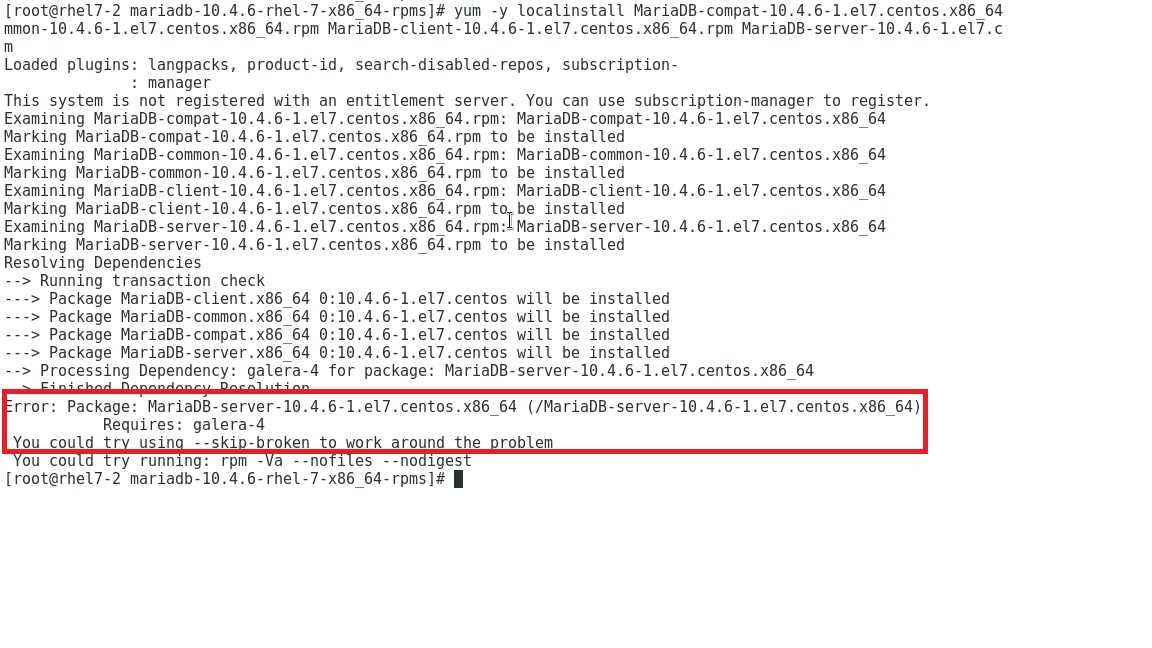
Uninstall the Old Version
When upgrading to a new major release of MariaDB Community Server, it is necessary to remove the existing installation of MariaDB Community Server, before installing the new version of MariaDB Community Server. Otherwise, the package manager will refuse to install the new version of MariaDB Community Server.
Stop the MariaDB Server Process
Before the old version can be uninstalled, we first need to stop the current MariaDB Server process.
-
Set the innodb_fast_shutdown system variable to :
SET GLOBAL innodb_fast_shutdown = 1;
-
Use XA RECOVER to confirm that there are no external XA transactions in a prepared state:
XA RECOVER;
Commit or rollback any open XA transactions before stopping the node for upgrade.
-
Stop the server process using the command:
$ sudo systemctl stop mariadb
Uninstall via YUM (RHEL/CentOS)
-
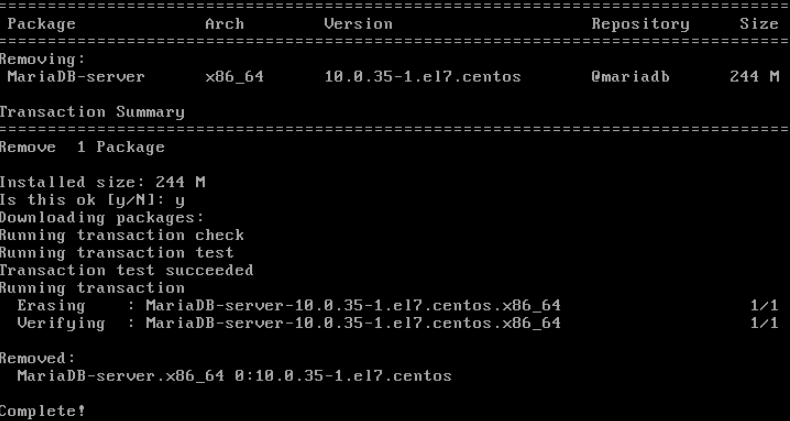
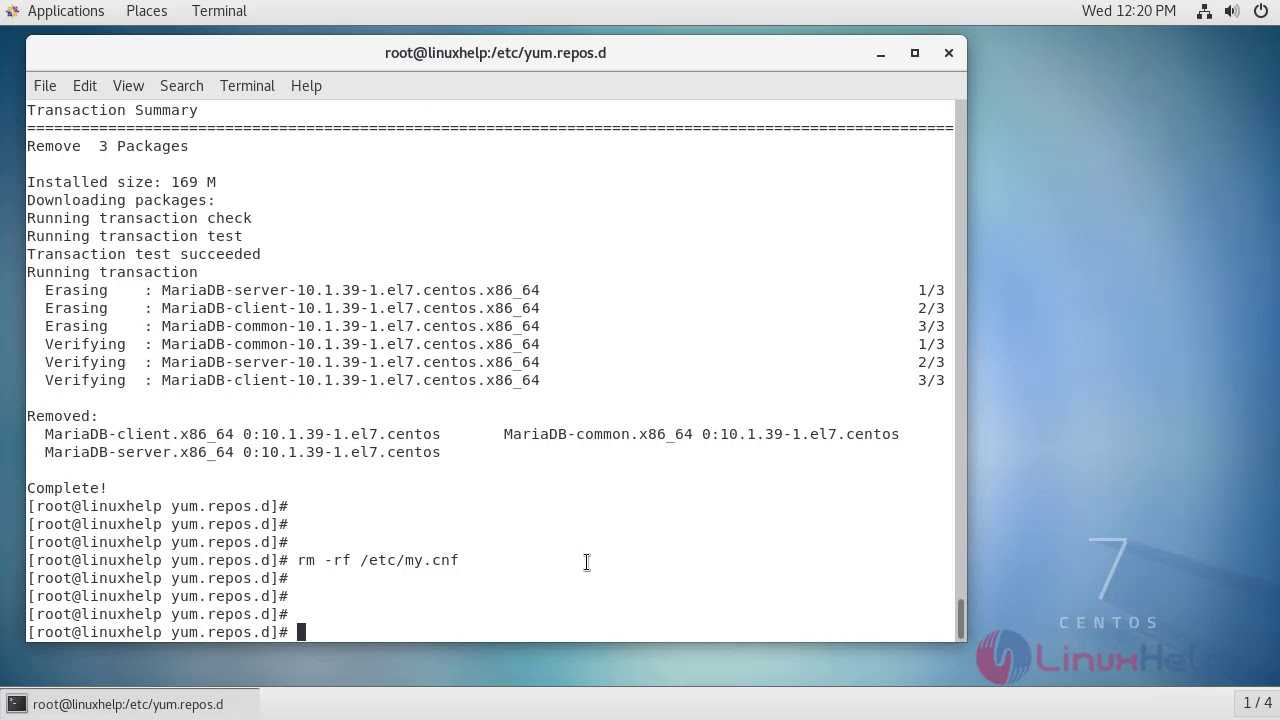
Uninstall all of the MariaDB Community Server packages. Note that a wildcard character is used to ensure that all MariaDB Community Server packages are uninstalled:
$ sudo yum remove "MariaDB-*"
Be sure to check that this wildcard does not unintentionally refer to any of your custom applications:
-
Uninstall the Galera package as well.
The name of the package depends on the specific version of MariaDB Community Server.
When upgrading from MariaDB Community Server 10.4 or later, the package is called :
$ sudo yum remove galera-4
When upgrading from MariaDB Community Server 10.3 or earlier, the package is called :
$ sudo yum remove galera
-
Before proceeding, verify that all MariaDB Community Server packages are uninstalled. The following command should not return any results:
$ rpm --query --all | grep -i -E "mariadb|galera"
Устранение неполадок
Поведение некоторых команд
Вывод команды
|
1 |
service mysql status ERROR!MariaDB isnotrunning
|
|
1 |
ERROR!MariaDB isnotrunning |
При этом systemctl status mariadb.service
|
1 |
systemctl status mariadb.service ●mariadb.service-MariaDB10.2.22database server Loadedloaded(/usr/lib/systemd/system/mariadb.service;enabled;vendor presetdisabled) Drop-In/etc/systemd/system/mariadb.service.d └─migrated-from-my.cnf-settings.conf Activeactive(running)sinceСр2019-03-06175212MSK;18minago |
Ошибки в логе
|
1 |
WarningWSREPlast inactive check more than PT1.5Sago(PT3.50162S),skipping check NoteWSREPview((empty)) ERRORWSREPfailed toopen gcomm backend connection110failed toreach primary view mysqld6291at gcomm/src/pc.cppconnect()158 ERRORWSREPgcs/src/gcs_core.cppgcs_core_open()209Failed toopen backend connection ERRORWSREPgcs/src/gcs.cppgcs_open()1458Failed toopen channel’galera_cluster’at ERRORWSREPgcs connect failedConnection timed out ERRORWSREPwsrepconnect(gcomm//100.201.203.54,100.201.203.55) failed: 7 mysqld62912019-03-06134838140455129581760ERRORAborting systemd1mariadb.servicemain process exited,code=exited,status=1/FAILURE systemd1Failed tostart MariaDB10.2.22database server. |
то выполняем команду
|
1 |
sudo/usr/bin/galera_new_cluster
|
Если в процессе работы получили ошибку
|
1 |
ERRORWSREPfailed toopen gcomm backend connection131invalid UUID00000000(FATAL)at gcomm/src/pc.cppPC()271
|
Выполняем
|
1 |
mv/var/lib/mysql/grastate.dat/var/lib/mysql/grastate.dat.bak
|
И перезагружаем сервис:
|
1 |
systemctl restart mariadb.service
|
Step 1 – Add MariaDB Yum Repository
First add MariaDB yum repository in our system. Create a new repo file /etc/yum.repos.d/mariadb.repo in your system and add below code as per your operating system and architecture.
For CentOS/RHEL – 7
name = MariaDB
baseurl = http://yum.mariadb.org/10.4/rhel7-amd64
gpgkey=https://yum.mariadb.org/RPM-GPG-KEY-MariaDB
gpgcheck=1
For CentOS/RHEL – 6
name = MariaDB
baseurl = http://yum.mariadb.org/10.4/rhel6-amd64
gpgkey=https://yum.mariadb.org/RPM-GPG-KEY-MariaDB
gpgcheck=1
For Fedora – 30/29/28
Please change the version (red highlighted) in the below setting as per the version of Fedora you used. Click here to view all available repositories.
name = MariaDB
baseurl = http://yum.mariadb.org/10.4/fedora30-amd64
gpgkey=https://yum.mariadb.org/RPM-GPG-KEY-MariaDB
gpgcheck=1
Updating the MariaDB YUM repository to a New Major Release
MariaDB’s repository can be updated to a new major release. How this is done depends on how you originally configured the repository.
Updating the Major Release with the MariaDB Package Repository Setup Script
If you configured to install from MariaDB Corporation’s MariaDB Package Repository by using the MariaDB Package Repository setup script, then you can update the major release that the repository uses by running the script again.
Updating the Major Release with the MariaDB Repository Configuration Tool
If you configured to install from MariaDB Foundation’s MariaDB Repository by using the MariaDB Repository Configuration Tool, then you can update the major release that the repository uses by updating the repository configuration file in-place. For example, if you wanted to change the repository from MariaDB 10.2 to MariaDB 10.3, and if the repository configuration file was at , then you could execute the following:
sudo sed -i 's/10.2/10.3/' /etc/yum.repos.d/MariaDB.repo
After that, the repository should refer to MariaDB 10.3.
If the repository is pinned to a specific minor release, then the above command can result in an invalid repository configuration. In that case, the recommended options are:
- Edit the repository file manually.
- Or delete the repository file, and then install the repository of the new version with the more robust MariaDB Package Repository setup script.
Testing
When MariaDB Community Server is up and running on your system, you should test that it is working and there weren’t any issues during startup.
-
Connect to the server using MariaDB Client using the user account:
$ sudo mysql
Welcome to the MariaDB monitor.  Commands end with ; or \g.
Your MariaDB connection id is 9
Server version: 10.3.32-MariaDB MariaDB Server

Copyright (c) 2000, 2018, Oracle, MariaDB Corporation Ab and others.

Type 'help;' or '\h' for help. Type '\c' to clear the current input statement.

MariaDB >
The version of the server can be verified by checking the client’s initial output.
-
You can also verify the server version by checking the value of the version system variable with the SHOW GLOBAL STATUS statement:
SHOW GLOBAL VARIABLES LIKE 'version';
+---------------+-----------------+
| Variable_name | Value           |
+---------------+-----------------+
| version       | 10.3.32-MariaDB |
+---------------+-----------------+
-
You can also verify the server version by calling the VERSION() function:
SELECT VERSION();
+-----------------+
| VERSION()       |
+-----------------+
| 10.3.32-MariaDB |
+-----------------+
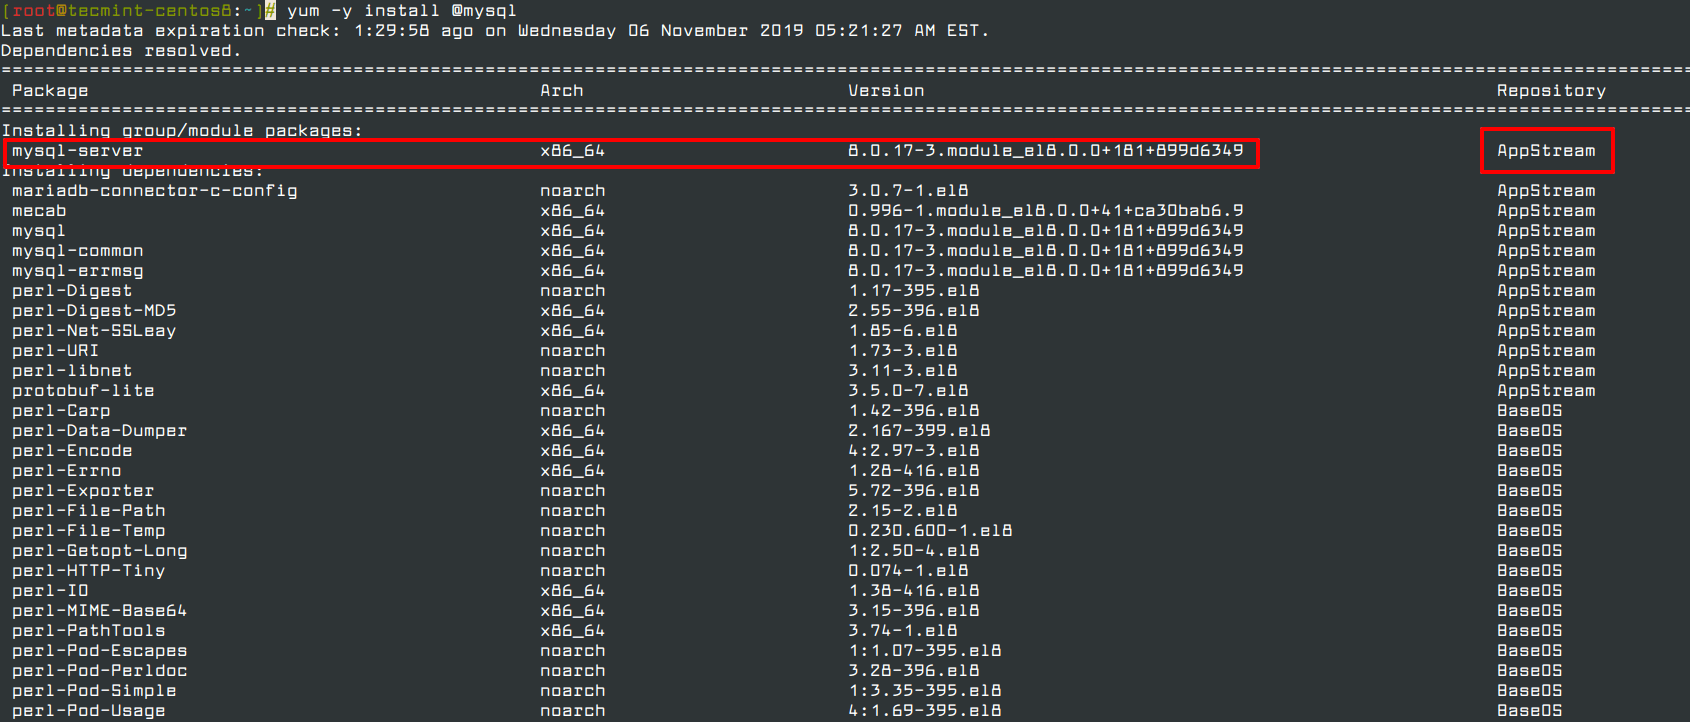
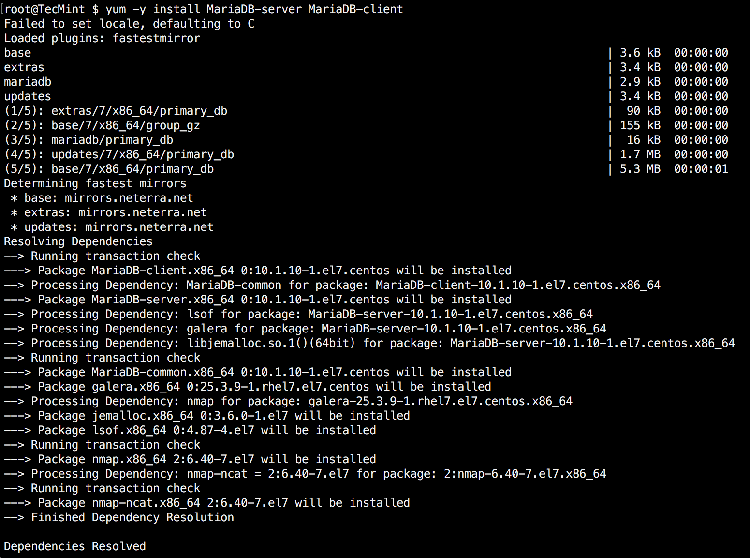
Установка MySQL в CentOS 7
Как я уже писал ранее, сейчас все большее распространение получает форк mysql — mariadb. Она имеет полную совместимость с mysql, так что можно смело пользоваться. Я предпочитаю использовать именно ее.
Устанавливаем mariadb на CentOS 7:
# yum install -y mariadb mariadb-server
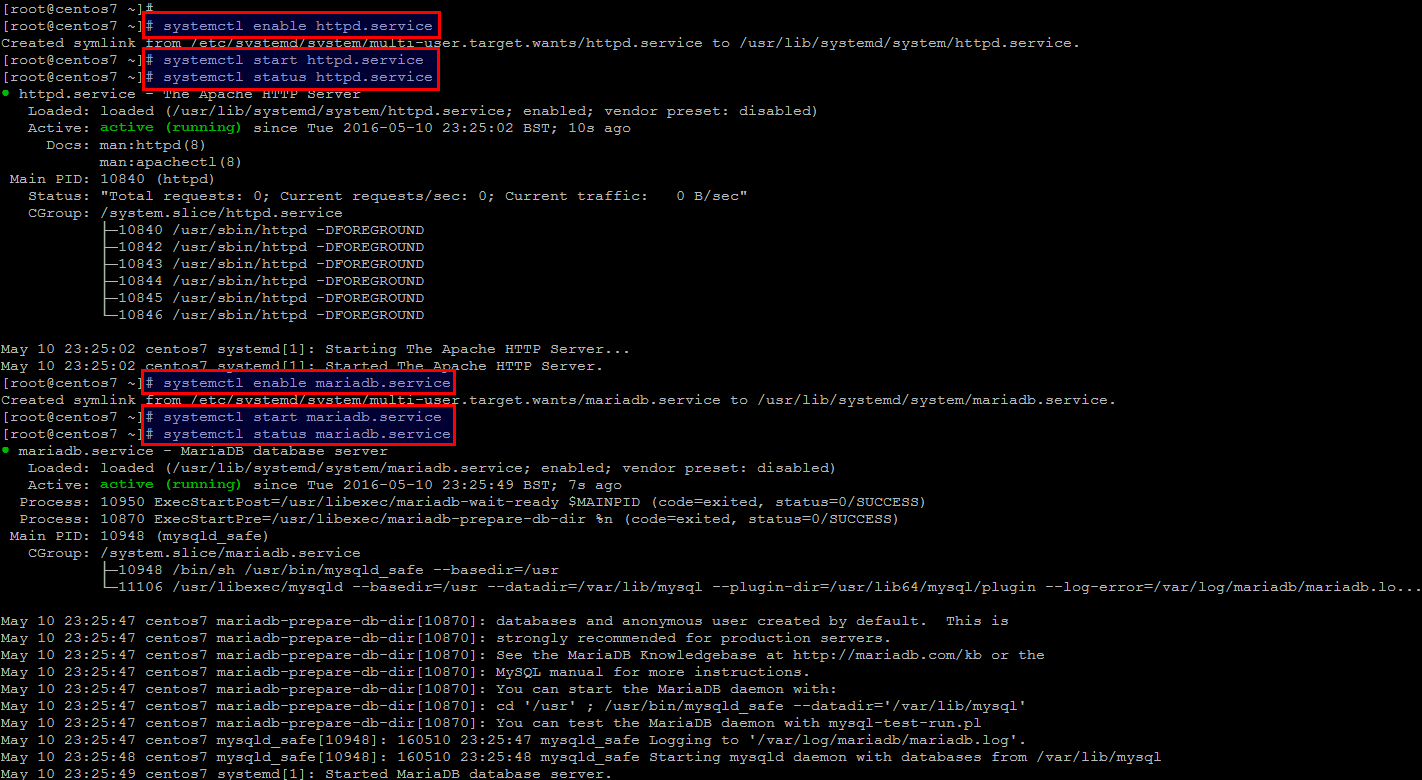
Добавляем mariadb в автозапуск:
# systemctl enable mariadb.service
Запускаем mariadb:
# systemctl start mariadb
Проверяем, запустилась или нет:
# netstat -tulnp | grep mysqld
tcp        0      0 0.0.0.0:3306            0.0.0.0:*               LISTEN      22276/mysqld
Обращаю внимание, что она даже в системе отображается как сервис mysqld. Теперь запускаем стандартный скрипт настройки безопасности:
# /usr/bin/mysql_secure_installation
Не буду приводить весь вывод работы этого скрипта, там все достаточно просто и понятно. Сначала задаем пароль для root (текущий пароль после установки пустой), потом удаляем анонимных пользователей, отключаем возможность подключаться root удаленно, удаляем тестового пользователя и базу.
Файл настроек mysql/mariadb лежит в /etc/my.cnf. Для обычной работы достаточно настроек по-умолчанию. Но если вы решите изменить их, не забудьте перезапустить службу баз данных.
Перезапуск mariadb/mysql в CentOS 7:
# systemctl restart mariadb
На этом все. Базовый функционал web сервера на CentOS 7 настроен.
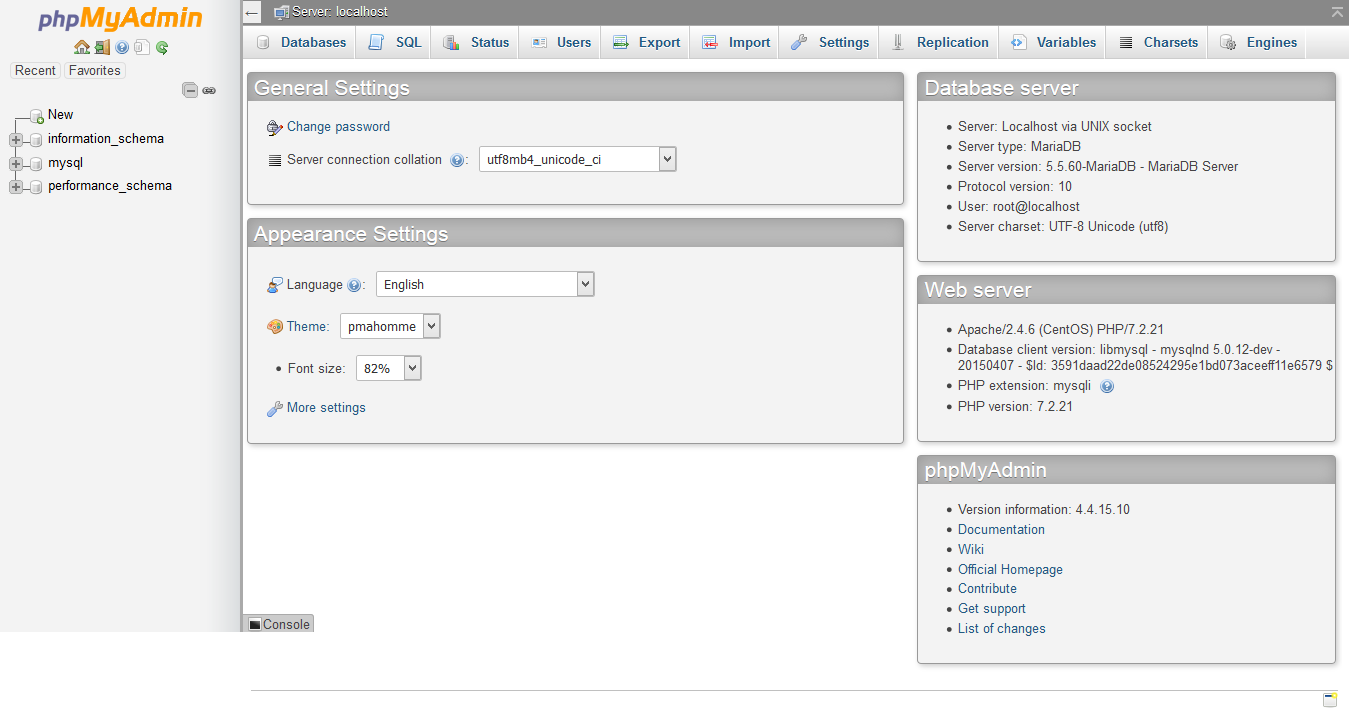
Если вам нужен phpmyadmin воспользуйтесь моим подробным руководством по установке и настройке phpmyadmin на centos 7.
Буду рад замечаниям и комментариям по теме статьи. Напоминаю, что данная статья является частью единого цикла статьей про сервер Centos.
Онлайн курс по Linux
Если у вас есть желание научиться строить и поддерживать высокодоступные и надежные системы, рекомендую познакомиться с онлайн-курсом «Administrator Linux. Professional» в OTUS. Курс не для новичков, для поступления нужны базовые знания по сетям и установке Linux на виртуалку. Обучение длится 5 месяцев, после чего успешные выпускники курса смогут пройти собеседования у партнеров.
Что даст вам этот курс:
- Знание архитектуры Linux.
- Освоение современных методов и инструментов анализа и обработки данных.
- Умение подбирать конфигурацию под необходимые задачи, управлять процессами и обеспечивать безопасность системы.
- Владение основными рабочими инструментами системного администратора.
- Понимание особенностей развертывания, настройки и обслуживания сетей, построенных на базе Linux.
- Способность быстро решать возникающие проблемы и обеспечивать стабильную и бесперебойную работу системы.
Проверьте себя на вступительном тесте и смотрите подробнее программу по .
Шаг 2 — Защита сервера MariaDB
MariaDB имеет скрипт безопасности для изменения некоторых наименее защищенных опций, используемых по умолчанию, например, удаленного входа с помощью root и шаблонов пользователей. Используйте эту команду для запуска скрипта безопасности:
Скрипт имеет подробное описание каждого шага. На первом шаге от вас потребуется ввести пароль root, который не был установлен, нажмите , следуя рекомендациям. Далее вам будет предложено задать пароль root
Обратите внимание, что он необходим для пользователя root базы данных, а не для пользователя root вашего сервера CentOS
Нажмите , а затем , чтобы задать пароль для пользователя root базы данных, а затем следуйте указаниям.
После установки пароля следует принять все предлагаемые варианты повышения уровня безопасности, нажимая , а затем . В результате вы удалите ряд анонимных пользователей, отключите возможность удаленного входа пользователя root и перезагрузите таблицы привилегий.
После защиты установки необходимо проверить ее работу, подключившись к базе данных.
Ротация логов MariaDB
Откроем необходимый файл и сделаем необходимые изменения:
vim /etc/logrotate.d/mysql
= часть вывода с необходимыми изменениями =
/var/lib/mysql/*log {
        # create 600 mysql mysql
        notifempty
        daily
        size 5M
        rotate 7
        missingok
        compress
    postrotate
        # just if mysqld is really running
        if test -x /usr/bin/mysqladmin && \
           /usr/bin/mysqladmin ping &>/dev/null
        then
           /usr/bin/mysqladmin --local flush-error-log \
              flush-engine-log flush-general-log flush-slow-log
        fi
    endscript
}
Мы указали что надо ротировать все логи и хранить 7 дней при условии что размер файла 5 Mегабайт.
Сохраним и применим изменения без перезагрузки:
logrotate /etc/logrotate.conf
Проверим правильность выполнив тестирование (опция -d):
logrotate -d /etc/logrotate.d/mysql
= вывод команды =
reading config file /etc/logrotate.d/mysql
Allocating hash table for state file, size 15360 B

Handling 1 logs

rotating pattern: /var/lib/mysql/*log  5242880 bytes (7 rotations)
empty log files are not rotated, old logs are removed
considering log /var/lib/mysql/mysql_error.log
  log does not need rotating (log size is below the 'size' threshold)
considering log /var/lib/mysql/slow_queries.log
  log does not need rotating (log size is below the 'size' threshold)
considering log /var/lib/mysql/tc.log
  log does not need rotating (log size is below the 'size' threshold)
Все логи не имеют необходимого размера для выполнения ротации.


