Before you begin
Here are some principles to consider before you create a dashboard.
A dashboard should tell a story or answer a question
What story are you trying to tell with your dashboard? Try to create a logical progression of data, such as large to small or general to specific. What is the goal for this dashboard? (Hint: If the dashboard doesn’t have a goal, then ask yourself if you really need the dashboard.)
Keep your graphs simple and focused on answering the question that you are asking. For example, if your question is “which servers are in trouble?”, then maybe you don’t need to show all the server data. Just show data for the ones in trouble.
Dashboards should reduce cognitive load, not add to it
Cognitive load is basically how hard you need to think about something in order to figure it out. Make your dashboard easy to interpret. Other users and future you (when you’re trying to figure out what broke at 2AM) will appreciate it.
Ask yourself:
- Can I tell what exactly each graph represents? Is it obvious, or do I have to think about it?
- If I show this to someone else, how long will it take them to figure it out? Will they get lost?
Have a monitoring strategy
It’s easy to make new dashboards. It’s harder to optimize dashboard creation and adhere to a plan, but it’s worth it. This strategy should govern both your overall dashboard scheme and enforce consistency in individual dashboard design.
Refer to Common observability strategies and Dashboard management maturity levels for more information.
Write it down
Once you have a strategy or design guidelines, write them down to help maintain consistency over time. Check out this Wikimedia runbook example.
Functions
| Function | Description |
|---|---|
| AlertingSettings({ alertmanagerDataSources, options, onOptionsChange, }) | |
| AsyncMultiSelect(props) | |
| AsyncSelect(props) | |
| BracesPlugin() | |
| buildScaleKey(config) | |
| calculateFontSize(text, width, height, lineHeight, maxSize) | (BETA) |
| ClearPlugin() | |
| ClipboardPlugin() | |
| convertOldAngularValueMapping(panel) | |
| EmotionPerfTest() | |
| EventsCanvas({ id, events, renderEventMarker, mapEventToXYCoords, config }) | |
| FadeTransition(props) | |
| FileDropzone({ options, children, readAs, onLoad, fileListRenderer }) | |
| FileDropzoneDefaultChildren({ primaryText, secondaryText, }) | |
| FileListItem({ file: customFile, removeFile }) | |
| Form({ defaultValues, onSubmit, validateOnMount, validateFieldsOnMount, children, validateOn, maxWidth, …htmlProps }) | |
| getFieldTypeIcon(field) | Get the icon for a given field type |
| getScrollbarWidth() | |
| getTagColor(index) | |
| getTagColorsFromName(name) | Returns tag badge background and border colors based on hashed tag name. |
| getTextColorForBackground(color) | |
| IndentationPlugin() | |
| measureText(text, fontSize) | (BETA) |
| Modal(props) | |
| MultiSelect(props) | |
| NewlinePlugin() | |
| Portal(props) | |
| preparePlotFrame(frames, dimFields) | |
| RadioButtonGroup({ options, value, onChange, disabled, disabledOptions, size, className, fullWidth, autoFocus, }) | |
| resetSelectStyles() | |
| RunnerPlugin({ handler }) | |
| Segment({ options, value, onChange, Component, className, allowCustomValue, allowEmptyValue, placeholder, disabled, inputMinWidth, inputPlaceholder, onExpandedChange, autofocus, …rest }) | |
| SegmentAsync({ value, onChange, loadOptions, reloadOptionsOnChange, Component, className, allowCustomValue, allowEmptyValue, disabled, placeholder, inputMinWidth, inputPlaceholder, autofocus, onExpandedChange, noOptionMessageHandler, …rest }) | |
| SegmentInput({ value: initialValue, onChange, Component, className, placeholder, inputPlaceholder, disabled, autofocus, onExpandedChange, …rest }) | |
| Select(props) | |
| SelectionShortcutsPlugin() | |
| sharedSingleStatMigrationHandler(panel) | |
| sharedSingleStatPanelChangedHandler(panel, prevPluginId, prevOptions) | |
| SlatePrism(optsParam, prismLanguages) | A Slate plugin to highlight code syntax. |
| SlideOutTransition(props) | |
| stylesFactory(stylesCreator) | |
| SuggestionsPlugin({ onTypeahead, cleanText, onWillApplySuggestion, portalOrigin, }) | |
| TabbedContainer(props) | |
| useStyles(getStyles) | |
| useStyles2(getStyles) | |
| useTheme() | |
| useTheme2() | |
| ValuePicker({ label, icon, options, onChange, variant, minWidth, size, isFullWidth, menuPlacement, }) | |
| VizLegend({ items, displayMode, sortBy: sortKey, seriesVisibilityChangeBehavior, sortDesc, onLabelClick, onToggleSort, placement, className, itemRenderer, readonly, }) | |
| withErrorBoundary(Component, errorBoundaryProps) | HOC for wrapping a component in an error boundary. |
Импорт и экспорт Data Sources в Grafana
По умолчанию, через веб интерфейс графаны не получится экспортировать Data Sources. Я не понимаю, почему разработчики пожадничали с подобной кнопкой, по аналогии с Dashboards. Большой проблемы в этом нет, так как их можно выгрузить в json через curl. Я это делаю вот так:
# curl -H "Content-Type: application/json" -s "https://gr.serveradmin.ru/api/datasources" -u admin:password
На выходе будет неудобочитаемая лапша. Машине все равно, но хочется и человеческий глаз порадовать, чтобы можно было хоть что-то разобрать. Для этого можно воспользоваться утилитой jq.
# dnf install epel-release && dnf install jq
или
# apt install jq
Преобразуем вывод с ее помощью:
# curl -H "Content-Type: application/json" -s "https://gr.serveradmin.ru/api/datasources" -u admin:password | jq .
![]()
Другое дело. Можно посмотреть, отредактировать или какие-то Data Sources удалить.
Итак, забрали Data Sources со старой версии, теперь импортируем в новую. Опять с помощью curl.
curl -X POST -H "Content-Type: application/json" --data '{
    "id": 3,
    "orgId": 1,
    "name": "Zabbix",
    "type": "alexanderzobnin-zabbix-datasource",
    "typeLogoUrl": "public/plugins/alexanderzobnin-zabbix-datasource/img/icn-zabbix-datasource.svg",
    "access": "proxy",
    "url": "https://zabbix.firma.ru/zabbix/api_jsonrpc.php",
    "password": "",
    "user": "",
    "database": "",
    "basicAuth": false,
    "isDefault": false,
    "jsonData": {
      "addThresholds": false,
      "alerting": false,
      "alertingMinSeverity": 3,
      "dbConnectionDatasourceId": null,
      "dbConnectionEnable": false,
      "disableReadOnlyUsersAck": false,
      "password": "pass_secret",
      "trends": true,
      "username": "grafana",
      "zabbixVersion": 5
    },
    "readOnly": false
  }' "http://grafana.site.ru/api/datasources" -u admin:password
То есть просто через POST запрос передаем данные через ключ —data.
Undetstand Prometheus Metrics
Before moving forward, we need to have basic understanding on how metrics look like from the perspective of exporters and Prometheus. We are going to show this idea by using the node_exporter we previously deployed in a previous chapter.
Exporter Metrics
Metrics collected by an exporter (node_exporter in this chapter) are as below:
![]()
Let’s explain the metrics (counter, gauge, etc., refer to Metrics Types) with node_disk_io_time_seconds_total as an example:
- Each metric has a name, in this example, its name is node_disk_io_time_seconds_total;
- An metric may have some labels associated with it to distinguish its instances. In this example, node_disk_io_time_seconds_total has only one label “device”. Based on the label values, instances can be differentiated easily — this is important for data filter;
- Metrics will be collected from exporters but won’t be saved on exporters.
Identifier (id) vs unique identifier (uid)
The identifier (id) of a dashboard is an auto-incrementing numeric value and is only unique per Grafana install.
The unique identifier (uid) of a dashboard can be used for uniquely identify a dashboard between multiple Grafana installs.
It’s automatically generated if not provided when creating a dashboard. The uid allows having consistent URLs for accessing
dashboards and when syncing dashboards between multiple Grafana installs, see
for more information. This means that changing the title of a dashboard will not break any bookmarked links to that dashboard.
The uid can have a maximum length of 40 characters.
Time series queries
If you set Format as to Time series, then the query must have a column named time that returns either a SQL datetime or any numeric datatype representing Unix epoch in seconds. In addition, result sets of time series queries must be sorted by time for panels to properly visualize the result.
A time series query result is returned in a . Any column except time or of type string transforms into value fields in the data frame query result. Any string column transforms into field labels in the data frame query result.
You can optionally customize the default series name formatting using instructions in .
Example with column:
Data frame result:
Example using the fill parameter in the $__timeGroup macro to convert null values to be zero instead:
Given the data frame result in the following example and using the graph panel, you will get two series named value 10.0.1.1 and value 10.0.1.2. To render the series with a name of 10.0.1.1 and 10.0.1.2 , use a value of .
Data frame result:
Example with multiple columns:
Data frame result:
Currently, there is no support for a dynamic group by time based on time range and panel width.
This is something we plan to add.
Открываем и настраиваем портал
Проверяем работу портала
После установки графаны открываем браузер и переходим по адресу http://<IP-адрес сервера>:3000.
Для авторизации используем логин и пароль: admin / admin.
Система может потребовать задать новый пароль — вводим его дважды.
Добавляем плагин для работы с Zabbix
Установка плагина для подключения к Zabbix выполняется командой:
grafana-cli plugins install alexanderzobnin-zabbix-app
После окончания установки мы должны увидеть:
Installed alexanderzobnin-zabbix-app successfully
Перезагружаем сервер графаны:
systemctl restart grafana-server
Переходим к веб-интерфейсу и открываем управление плагинами:
В открывшемся списке находим Zabbix и переходим к нему:
Активируем его, кликнув по Enable:
![]()
Добавляем источник данных
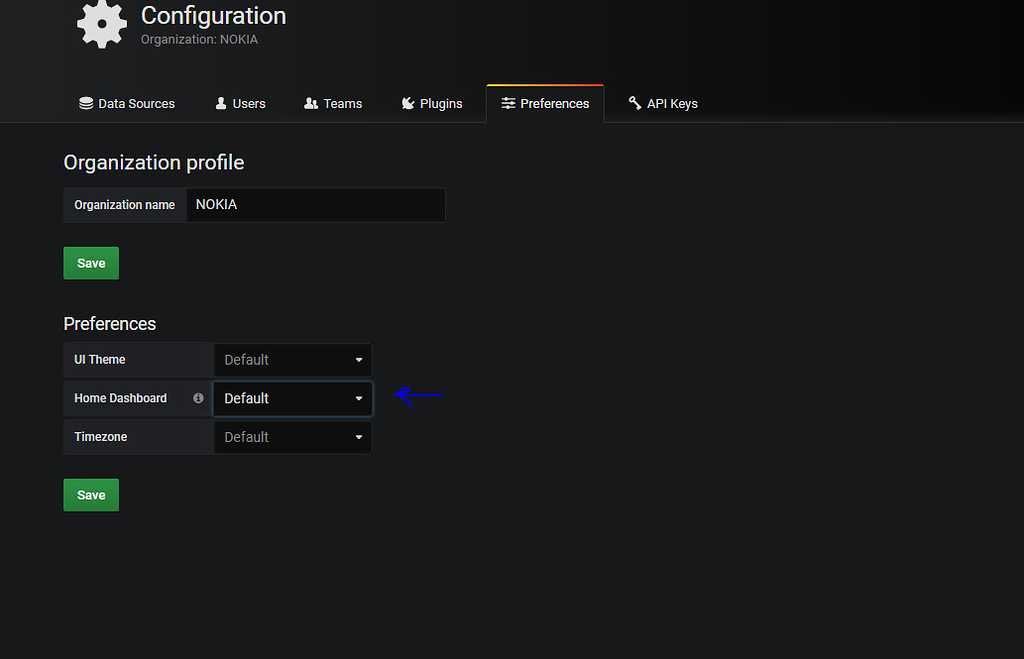
Переходим в раздел Configuration — Data Sources:
Кликаем по Add data source:
![]()
Выбираем Zabbix в качестве источника данных:
![]()
На открывшейся странице в разделе «HTTP», поле URL вводим http://<путь до zabbix>/api_jsonrpc.php, например:
![]()
Ниже, в разделе «Zabbix API details», вводим логин и пароль для учетной записи с правами выполнения запросов API, а также выбираем версию нашего сервера Zabbix:
![]()
* по умолчанию, в Zabbix создается учетная запись с правами администратора Admin с паролем zabbix. Однако, эту запись лучше использовать для проверки, а для целей интеграции лучше создать нового пользователя.


Нажимаем на Save & Test. Готово.
Создаем график на основе метрики в Zabbix
Переходим в раздел Create — Dashboard:
Выбираем Add Query:
![]()
Заполняем поля для получения данных с Zabbix:
![]()
* где:
- Query — источник данных. Выбираем Zabbix.
- Query Mode — тип данных. Оставляем Metrics.
- Group — группа серверов в Zabbix. Выбираем нужную нам группу.
- Host — имя сервера, для которого будем вытаскивать данные.
- Application — данные для какого компонента будем собирать. В данном примере, процессора.
- Item — какой именно тип информации нас интересует. На скриншоте выше выбрано время простоя процессора.
При желании, можно настроить графики в разделе Visualization:
![]()
После сохраняем данные:
В открывшемся всплывающем окне задаем имя дашборду и нажимаем Save. Готово.
Customize the Dashboard Using Prometheus Query Editor
To edit a specific Grafana panel:
1. Click the panel’s title to open a drop-down menu.
2. In the menu, click Edit.
![]()
3. The edit window appears. Customize panels by introducing new queries or modifying the current ones. The querying is performed using Prometheus query language.
![]()
4. The following metrics are not featured in Grafana’s premade Prometheus dashboard, but are useful for monitoring Prometheus:
- – Monitors memory chunks Prometheus stores in memory.
- – Monitors memory series Prometheus stores in memory.
- – Measures the ingestion rate for the samples.
- – Measures the amount of time between target scrapes.
- – Monitors the per-second rate of all Prometheus storage chunk operations.
4.2 Уведомление по электронной почте
4.2.1 Конфигурация сервера STMP
Чтобы иметь возможность отправлять уведомления по электронной почте, вам сначала необходимо настроить почтовый сервер и другую информацию в файле конфигурации grafana.ini:
4.2.2 Отправка электронной почты
Настроить каналы уведомлений по электронной почте
Настроить каналы уведомлений по электронной почте
Отправить тест
Отправить тест
Установите условия тревоги
Grafana — это мощный инструмент мониторинга визуализации данных с красивым уровнем представления. В этой статье в основном рассказывается об установке и общих положениях Grafana на основе источников данных MySQL. Он также поддерживает другие источники данных, такие как ElasticSearch, InfluxDB и т. Д. Читать большеОфициальный веб-сайт
Parts of the panel editor
This section describes the parts of the panel editor screen and a bit about fields, options, or tasks associated with each part. Some sections in this page link to pages where sections or tasks are documented more fully.
Header
The header section lists the name of the dashboard that the panel is in and some dashboard commands. You can also click the Go back arrow to return to the dashboard.
![]()
On the right side of the header are the following options:
- Dashboard settings (gear) icon — Click to access the dashboard settings.
- Discard — Discards all changes you have made to the panel since you last saved the dashboard.
- Save — Saves the dashboard, including all changes you have made in the panel editor.
- Apply — Applies changes you made and then closes the panel editor, returning you to the dashboard. You will have to save the dashboard to persist the applied changes.
Visualization preview
The visualization preview section contains viewing options, time range controls, the visualization preview, and (if applicable) the panel title, axes, and legend.
![]()
- Table view — Convert any visualization to a table so that you can see the data. Useful for troubleshooting.
- Fill — The visualization preview will fill the available space in the preview part. If you change the width of the side pane or height of the bottom pane the visualization will adapt to fill whatever space is available.
- Fit — The visualization preview will fill the available space in but preserve the aspect ratio of the panel.
- Exact — The visualization preview will have the exact size as the size on the dashboard. If not enough space is available, the visualization will scale down preserving the aspect ratio.
- Time range controls — For more information, refer to Time range controls.
Data section (bottom pane)
The section contains tabs where you enter queries, transform your data, and create alert rules (if applicable).
![]()
- Query tab — Select your data source and enter queries here. For more information, refer to Queries.
- Transform tab — Apply data transformations. For more information, refer to Transformations.
- Alert tab — Write alert rules. For more information, refer to Create alerts.
Panel display options (side pane)
The section contains tabs where you configure almost every aspect of your data Visualization. Not all options are available for each visualization.
The data model used in Grafana, namely the data frame, is a columnar-oriented table structure that unifies both time series and table query results. Each column within this structure is called a field. A field can represent a single time series or table column.
Field options allow you to change how the data is displayed in your visualizations. Options and overrides that you apply do not change the data, however they change how Grafana displays the data.
Field options
When you change an option, it is applied to all fields, meaning all series or columns. For example, if you change the unit to percentage, then all fields with numeric values are displayed in percentages.
Установка и запуск на Ubuntu / Debian
Установка
Добавляем репозиторий командой:
add-apt-repository «deb https://packages.grafana.com/oss/deb stable main»
Устанавливаем ключ для проверки подлинности репозитория графаны:
wget -q -O — https://packages.grafana.com/gpg.key | apt-key add —
Обновляем список портов:
apt-get update
Выполняем установку:
apt-get install grafana
… и отвечаем Y на запрос.
Настройка брандмауэра
По умолчанию, в Ubuntu брандмауэр не блокирует соединения. Но если в нашей системе он используется, необходимо добавить порт одной из команд:
а) при использовании iptables:
iptables -A INPUT -p tcp —dport 3000 -j ACCEPT
netfilter-persistent save
* если при вводе второй команды система выдаст ошибку, устанавливаем необходимый пакет командой apt-get install iptables-persistent.
б) при использовании ufw:
ufw allow 3000/tcp
ufw reload
Kubernetes dashboards
Since we have already covered a lot in previous parts, it’s a good idea to sum up what we have now. With that, we can create our own custom Grafana dashboards.
Kubernetes has many user dashboards of its own that track our resources. With the cluster created and Prometheus integration out of the way, it’s good to explore them.
![]()
Kubernetes dashboards look like this
As you can see, it is quite a long list of datasets. We don’t want to get you bored with descriptions of every dashboard, metric, and all the panels provided. Let’s focus on “Kubernetes / Compute Resources / Namespace (Pods)”.
This dashboard version logs information about CPU, memory, and network usage. These pieces of information reveal if the last optimization helped or if the deployment added some particularly “heavy” scripts.
3.4 переменные шаблона
Когда данные появляются в таблице, их необходимо отфильтровать по условиям фильтра. Grafana предоставляет переменные шаблона для настраиваемых полей фильтра. Тип: определение типа переменной Запрос. Этот тип переменной позволяет вам написать запрос к источнику данных, который обычно возвращает имена метрик, значения тегов или ключи. Например, запрос, который возвращает список имен серверов, идентификаторов датчиков или центров обработки данных. interval: значение интервала. Эта переменная может представлять промежуток времени. Не задавайте жестко группу по интервалу гистограммы времени или даты, используйте этот тип переменной.
Источник данных: этот тип позволяет быстро изменить источник данных для всей панели мониторинга. Это полезно, если существует несколько экземпляров источников данных в разных средах. Пользовательский: используйте список, разделенный запятыми, для определения параметров переменных вручную. Константа: определение скрытой константы. Полезные информационные панели с метрическими префиксами путей, которыми вы хотите поделиться. Во время экспорта панели мониторинга важными параметрами будут постоянные переменные. Специальные фильтры: особый тип переменных, только для определенных источников данных, в настоящее время InfluxDB и Elasticsearch. Он позволяет добавлять фильтры «ключ-значение», которые будут автоматически добавляться ко всем запросам метрик с использованием указанного источника данных.
В приведенной выше таблице и графике используются интервал и запрос соответственно для определения переменных для фильтрации, и они не будут повторяться.
Новое поле ввода
Templating
This feature is currently available in the nightly builds and will be included in the 5.0.0 release.
Instead of hard-coding things like server, application and sensor name in your metric queries you can use variables in their place. Variables are shown as dropdown select boxes at the top of the dashboard. These dropdowns make it easy to change the data being displayed in your dashboard.
Check out the Templating documentation for an introduction to the templating feature and the different types of template variables.
Query Variable
If you add a template variable of the type , you can write a MySQL query that can
return things like measurement names, key names or key values that are shown as a dropdown select box.
For example, you can have a variable that contains all values for the column in a table if you specify a query like this in the templating variable Query setting.
A query can return multiple columns and Grafana will automatically create a list from them. For example, the query below will return a list with values from and .
To use time range dependent macros like in your query the refresh mode of the template variable needs to be set to On Time Range Change.
Another option is a query that can create a key/value variable. The query should return two columns that are named and . The column value should be unique (if it is not unique then the first value is used). The options in the dropdown will have a text and value that allows you to have a friendly name as text and an id as the value. An example query with as the text and as the value:
You can also create nested variables. For example if you had another variable named . Then you could have
the hosts variable only show hosts from the current selected region with a query like this (if is a multi-value variable then use the comparison operator rather than to match against multiple values):
Using to filter results in Query Variable
Using in the query field will filter the query result based on what the user types in the dropdown select box.
When nothing has been entered by the user the default value for is .
The example below shows how to use as part of the query field to enable searching for while the user types in the dropdown select box.
Query
Using Variables in Queries
From Grafana 4.3.0 to 4.6.0, template variables are always quoted automatically so if it is a string value do not wrap them in quotes in where clauses.
From Grafana 4.7.0, template variable values are only quoted when the template variable is a .
If the variable is a multi-value variable then use the comparison operator rather than to match against multiple values.
There are two syntaxes:
Example with a template variable named :
Example with a template variable named :
Disabling Quoting for Multi-value Variables
Grafana automatically creates a quoted, comma-separated string for multi-value variables. For example: if and are selected then it will be formatted as: . Do disable quoting, use the csv formatting option for variables:
Read more about variable formatting options in the documentation.
Как нарисовать граф на 1С Промо
Описывается реализация на языке запросов 1С метода расположения вершин графа на плоскости, основанного на использовании электромеханической аналогии. При этом вершины графа представляются одноименными электрическими зарядами, дуги — пружинками. Силы взаимодействия вершин в этой системе переводят их из случайного начального в нужное конечное положение. Приведена обработка рисования графов «ГрафОграф», реализующая данный подход, показывающая также динамику процесса. Граф можно задать списком ребер вручную, выбрать из нескольких предопределенных примеров или сформировать по данным информационной базы.
1 стартмани
Установка MYSQL/MariaDB в Unix/Linux
Я тоже не буду приводить подробности по установке, а приведу чтиво:
Вот может еще пригодится:
Сейчас, я создаю пользователя, базу и пароль:
# mysql -uroot -p
Создаем базу и пользователя с паролем:
> create database grafana character set utf8 collate utf8_bin;
> grant all privileges on grafana.* to 'grafana'@'127.0.0.1' IDENTIFIED BY 'Your_passwd_user_grafana';
> flush privileges;
Заходим в графана веб панель. Открываем:
Data Sources -> Add data source -> MYSQL и вводим свои данные. У меня выглядит вот так:
добавляем data source для grafana
PS: Нам говорят что данный плагин находится в тестовом виде и его не особо стоит пока-что юзать.
Нажимаем на «Add», потом на «Save & Test» и у вас будет уже mysql. Открываем когфиг:
# vim /etc/grafana/grafana.ini
И приводим к виду:
type = mysql
host = 127.0.0.1:3306
name = grafana
user = grafana
password = Your_passwd_user_grafana
Перезапускаем grafana-server:
# service grafana-server restart
После чего, в созданной БД, будут созданы таблицы для работы с графаной.
PS: Это довольно хороший способ хранить хранить, т.к легко можно создать бэкап и ничего не потерять.

Как по мне — очень хорошее решение. Идем далее….