Replacement for MySQL
Until MariaDB 5.5, MariaDB versions functioned as a «drop-in replacement» for the equivalent MySQL version, with some limitations. From MariaDB 10.0, it is usually still very easy to upgrade from MySQL.
- MariaDB’s data files are generally binary compatible with those from the equivalent MySQL version.
- All filenames and paths are generally the same.
- Data and table definition files (.frm) files are binary compatible.
- See note below for an incompatibility with views!
- MariaDB’s client protocol is binary compatible with MySQL’s client protocol.
- All client APIs and structs are identical.
- All ports and sockets are generally the same.
- All MySQL connectors (PHP, Perl, Python, Java, .NET, MyODBC, Ruby, MySQL C
connector etc) work unchanged with MariaDB. - There are some installation issues with PHP5
that you should be aware of (a bug in how the old PHP5 client checks library
compatibility).
This means that for many cases, you can just uninstall MySQL and install MariaDB and you are good to go. There is not generally any need to convert any data files.
However, you must still run mysql_upgrade to finish the upgrade. This is needed to ensure that your mysql privilege and event tables are updated with the new fields MariaDB uses.
That said, MariaDB has a lot of new options, extension, storage engines and bug fixes that are not in MySQL. You can find the feature set for the different MariaDB
versions on the What is in the different MariaDB Releases page.
Drop-in Compatibility of Specific MariaDB Versions
MariaDB 10.2, MariaDB 10.3, and MariaDB 10.4 function as limited drop-in replacements for MySQL 5.7, as far as InnoDB is concerned. However, the implementation differences continue to grow in each new MariaDB version.
MariaDB 10.0 and MariaDB 10.1 function as limited drop-in replacements for MySQL 5.6, as far as InnoDB is concerned. However, there are some implementation differences in some features.
MariaDB 5.5 functions as a drop-in replacement for MySQL 5.5.
MariaDB 5.1, MariaDB 5.2, and MariaDB 5.3 function as drop-in replacements for MySQL 5.1.
Installing System Tables
Installing System Tables From a Source Tree
If you have just compiled MariaDB from source, and if you want to use from your source tree, then that can be done without having to actually install MariaDB. This is very useful if you want to test your changes to MariaDB without disturbing any existing installations of MariaDB.
To do so, you would have to provide the option. For example:
./scripts/mysql_install_db --srcdir=. --datadir=path-to-temporary-data-dir
Installing System Tables From a Binary Tarball
If you install a binary tarball package in a non standard path, like your home directory, and if you already have a MariaDB / MySQL package installed, then you may get conflicts
with the default . This often results in permissions
errors.
One possible solution is to use the option, so that it does not read any option files. For example:
./scripts/mysql_install_db --no-defaults --basedir=. --datadir=data
Another possible solution is to use the option, so that you can specify your own option file. For example:
./scripts/mysql_install_db --defaults-file=~/.my.cnf
User Accounts Created by Default
MariaDB starting with 10.4
In MariaDB 10.4 and later, sets by default. When this is set, the default user account is created with the ability to use two authentication plugins:
- First, it is configured to try to use the authentication plugin. This allows the the user to login without a password via the local Unix socket file defined by the system variable, as long as the login is attempted from a process owned by the operating system user account.
- Second, if authentication fails with the authentication plugin, then it is configured to try to use the authentication plugin.
The definition of the default user account is:
CREATE USER 'root'@'localhost' IDENTIFIED VIA unix_socket OR mysql_native_password USING 'invalid';
GRANT ALL PRIVILEGES ON *.* TO 'root'@'localhost' WITH GRANT OPTION;
GRANT PROXY ON ''@'%' TO 'root'@'localhost' WITH GRANT OPTION;
Since sets by default, the following additional user accounts are not created by default:
However, an additional user account that is defined by the option is created. If this option is not set, then the value defaults to the value of the option. On most systems, the option will use the value of by default, so this additional user account would be called .
The definition of this user account is similar to the user account:
CREATE USER 'mysql'@'localhost' IDENTIFIED VIA unix_socket OR mysql_native_password USING 'invalid';
GRANT ALL PRIVILEGES ON *.* TO 'mysql'@'localhost' WITH GRANT OPTION;
An invalid password is initially set for both of these user accounts. This means that before a password can be used to authenticate as either of these user accounts, the accounts must first be given a valid password by executing the statement.
For example, here is an example of setting the password for the user account immediately after installation:
$ sudo yum install MariaDB-server
$ sudo systemctl start mariadb
$ sudo mysql
...
MariaDB> SET PASSWORD = PASSWORD('XH4VmT3_jt');
You may notice in the above example that the command-line client is executed via . This allows the user account to successfully authenticate via the authentication plugin.
MariaDB until 10.3
In MariaDB 10.3 and before, sets by default. When this is set, the following default accounts are created with no password:
The definition of the default user account is:
CREATE USER 'root'@'localhost';
GRANT ALL PRIVILEGES ON *.* TO 'root'@'localhost' WITH GRANT OPTION;
GRANT PROXY ON ''@'%' TO 'root'@'localhost' WITH GRANT OPTION;
The definition of the other default accounts is similar.
A password should be set for these user accounts immediately after installation. This can be done either by executing the statement or by running .
For example, here is an example of setting the password for the user account immediately after installation:
$ sudo yum install MariaDB-server
$ sudo systemctl start mariadb
$ mysql -u root
...
MariaDB> SET PASSWORD = PASSWORD('XH4VmT3_jt');
Since sets by default, the option is ignored by default.
Решение проблемы
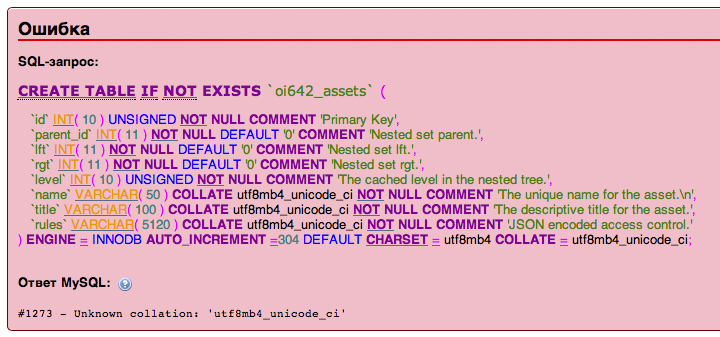
Воспользовался стандартным родным консольным менеджером БД, который так и называется mysql, он же полностью MySQL monitor. Зашёл под нужным пользователем БД, выбрал базу, вывел список таблиц базы и оказалось в этом списке действительно есть та самая несуществующая таблица, которая была указана в тексте сообщения об ошибке. Так же при попытке создать таблицу с таким именем получаешь сообщение об ошибке, что такая таблица уже существует. Решил посмотреть что же есть в этой таблице. Получил сообщение об ошибке, что такой таблицы не существует, что не удивительно, ведь её и не должно существовать, но СУБД MySQL считает, что она есть и выводит её в общем списке таблиц. Решил удалить эту таблицу и тоже получил сообщение, что такой таблицы нет и удалять нечего. После этого вновь запросил список всех таблиц базы данных и о чудо, это несуществующей таблицы в списке больше нет.

![Mysql - коллекция ошибок и фиксов [rtfm.wiki]](https://myeditor.ru/wp-content/uploads/a/5/9/a59697d38ab2bdf248e8e6524985b292.jpeg)

![Error: [1146] table 'zabbix.users' doesn't exist · issue #842 · zabbix/zabbix-docker · github](https://myeditor.ru/wp-content/uploads/8/d/c/8dcf777fb04fffad5a3f7eb2bd2199a4.jpeg)
![Mysql - коллекция ошибок и фиксов [rtfm.wiki]](https://myeditor.ru/wp-content/uploads/6/6/e/66e86e7b90155f8a4806b37723977c52.png)


![[error] fatal error: can't open and lock privilege tables: table 'mysql.user' doesn't exist · issue #27 · yobasystems/alpine-mariadb · github](https://myeditor.ru/wp-content/uploads/8/c/5/8c5c46e5cb864acd22c51a3e1f8e445e.png)
Таким образом, что бы решить проблему «Got error: 1146: Table `table_name` doesn’t exist when using LOCK TABLES» при работе с БД надо пользоваться родным консольным менеджером БД MySQL monitor (mysql). Попытайтесь сперва создать таблицу с таким именем и получите сообщеине об ошибке, что такая таблица уже есть в БД. Попытайтесь удалить эту таблицу и получите сообщение, что её и так нет. Во время одного из этих действий СУБД MySQL ещё раз проверит базу и убедится, что такой таблицы нет и вычеркнет её из мета информации БД, т.е. забудет про эту несуществующую таблицу, не будет выводить её в списке всех таблиц и не будет выводить эту ошикбу. Скорее всего проверка целостности базы происходит при попытке удаления этой несуществующей таблицы, поэтому пробовать создавать её и не нужно. Так же, возможно, пользоваться консольным MySQL monitor тоже не обязательно и можно послать SQL-запрос СУБД на удаление этой таблицы откуда удобно, просто в MySQL monitor эта таблица сперва отображается в общем списке а в остальных менеджерах баз данных не показывается. В общем точно не знаю что в моём алгоритме действий лишнее, а что необходимое, я лишь говорю как я решил эту проблему. Задача нетривиальная и попытаться воссоздать эту ошибку с целостностью базы ещё раз для учебных целей оказалось не просто. У меня был лишь один проход решения проблемы, поэтому, что точно её решило я не знаю.
Для тех кто всё ещё не понял, скажу кратко. Просто воспользуйетесь консольным MySQL monitor и через него попробуйте удалить эту несуществующую таблицу. При запросе удаления СУБД MySQL проверит базу, поймёт, что такой таблицы действительно нет и всё будет в порядке. Проблема решена, вот и всё.
На всякий случай прикладываю список консольных команд и SQL-запросов, которые я использовал в ходе решения этой проблемы. Хотел их писать сразу по ходу изложения, но решил, что это не нужно для тех кто и так знает, а для остальных (забывчивых) напишу список ниже, названия файлов, пользователей, таблиц и баз, естественно взяты для примера, подставляйте свои.
Для начала консольная команды.
Попытка сделать дамп базы через утилиту mysqldump:
mysqldump --user=root -p db_name > db_name.sql
Пакетная проверка и восстановление всех таблиц базы данных через родную утилиту mysqlcheck:
mysqlcheck --user=USER --password=PASSWORD --auto-repair --check --all-databases
Вход в консольный менеджер баз данных MySQL monitor с указанием данных:
mysql --user=USER --password=PASSWORD
Далее работает непосрдественно с БД, поэтому теперь пойдут SQL-запросы.
Просмотр всех доступных для пользователя (для просмотра) баз данных:
SHOW DATABASES;
Выбор необходимой рабочей базы данных для работы с ней:
USE <db_title>;
Просмотр всех доступных для пользователя таблиц выбранной базы данных:
SHOW TABLES;
Просмотр содержимого указанной таблицы (с лимитом записей/строк):
SELECT * FROM table_title LIMIT 100;
Удаление таблицы из базы данных:
DROP TABLE table_title;
Следует понимать, что несуществующая таблица, это ошибка структуры базы данных, т.е. надо копать в эту сторону, восстанавливать структуру БД, а не таблиц.
На этом все, всем спасибо за внимание
How to fix “ERROR 1146 (42S02) at line 1: Table ‘mysql.global_priv’ doesn’t exist”
I searched in the “usual places” for an obvious fix. This seemed like it might be some kind of local Linux CentOS7 user permissions issue, at first. I went of on a few side quests and peered down the rabbit hole of Linux User permissions for MySQL packages… but I stopped myself. Anytime you see an “error on line 1” it is likely due to some kind of configuration problem, otherwise a “permission denied” or “no such user” error would be more likely.
So after I got my head right, I then tried to completely uninstall all of MariaDB, just to start from scratch (IMPORTANT: DON’T do this unless you have used mysqldump for your existing data as a back up!!)
sudo systemctl stop mariadb
sudo yum remove mariadb
|
1 |
sudo systemctl stop mariadb sudo yum remove mariadb |
After removing MariaDB, completely we need to start over. Just to be sure, we can reboot with:
sudo reboot now
| 1 | sudo reboot now |
After going through the entire installation process for a 2nd time, just as before (minus adding the MariaDB repo since that was done once already), I ran into the exact same issue again:
Change the root password? [Y/n] Y
ERROR 1146 (42S02) at line 1: Table ‘mysql.global_priv’ doesn’t exist
|
1 |
Change the root password?[Y/n] Y ERROR1146(42S02)at line1Table’mysql.global_priv’doesn’texist |
FAIL.
After spending awhile longer trying to understand what went wrong, I attempted the following successful “fix” to the error:
sudo mysql_upgrade
| 1 | sudo mysql_upgrade |
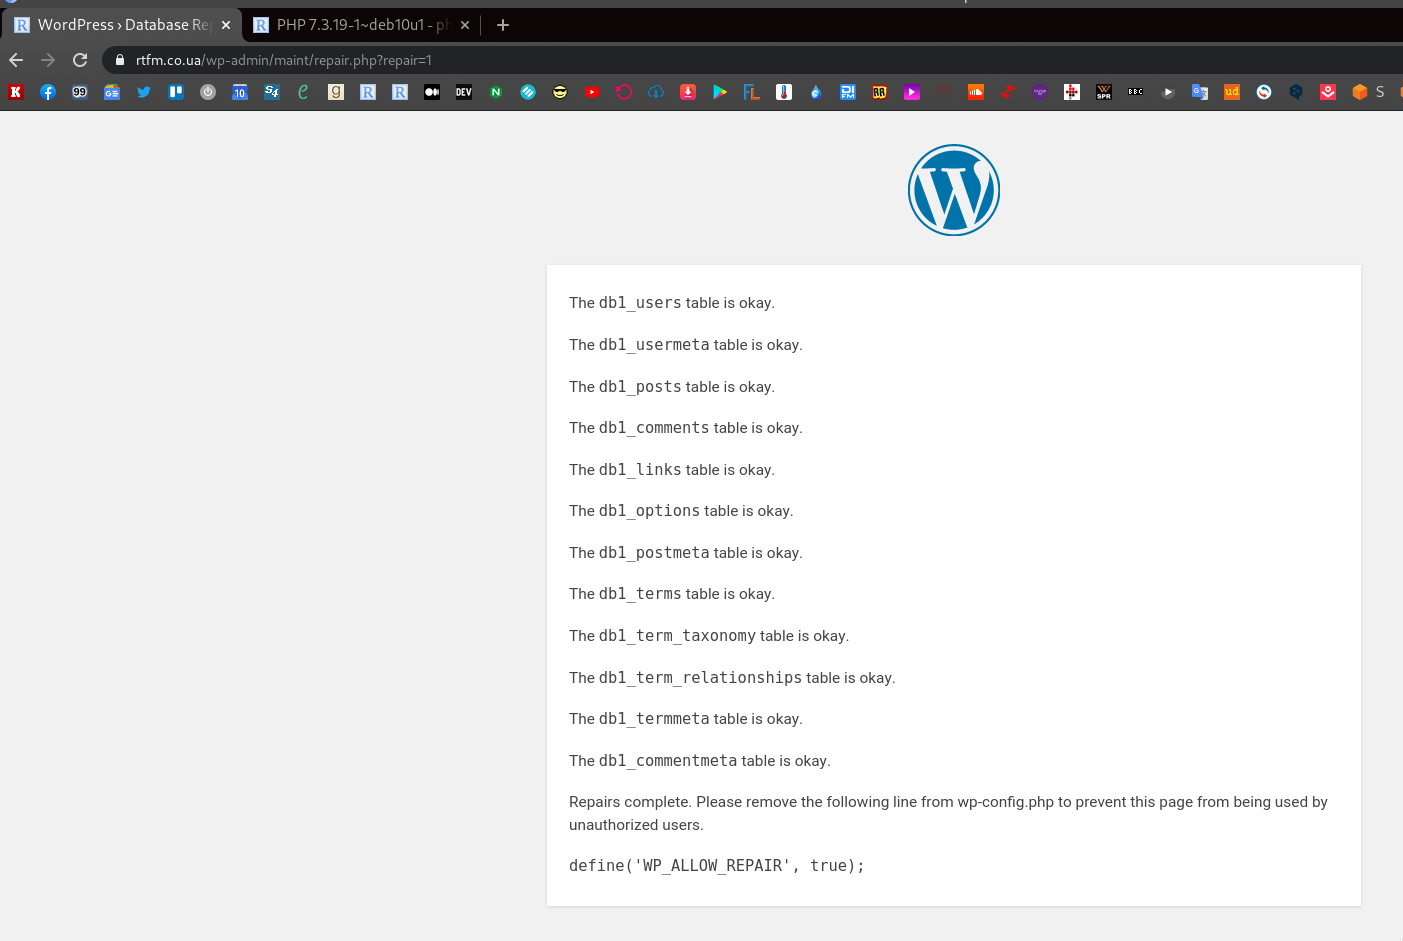
And I noticed this about 30% through the mysql_upgrade process:
………..
mysql.time_zone_name OK
mysql.time_zone_transition OK
mysql.time_zone_transition_type OK
mysql.user OK
Upgrading from a version before MariaDB-10.1
Phase 2/7: Installing used storage engines
Checking for tables with unknown storage engine
Phase 3/7: Fixing views
Phase 4/7: Running ‘mysql_fix_privilege_tables’
Phase 5/7: Fixing table and database names
Phase 6/7: Checking and upgrading tables
Processing databases
information_schema
………..
![[error] fatal error: can't open and lock privilege tables: table 'mysql.user' doesn't exist · issue #27 · yobasystems/alpine-mariadb · github](https://myeditor.ru/wp-content/uploads/6/f/b/6fbab7199ab8793fb3cae5567e2a7bbf.jpeg)

![Error: [1146] table 'zabbix.users' doesn't exist · issue #842 · zabbix/zabbix-docker · github](https://myeditor.ru/wp-content/uploads/e/e/0/ee0dda8727226597c3096f3c9bf0cf3a.png)


|
1 |
……….. mysql.time_zone_name OK mysql.time_zone_transition OK mysql.time_zone_transition_type OK mysql.user OK Upgrading fromaversion before MariaDB-10.1 Phase27Installing used storage engines Checking fortables with unknown storage engine Phase37Fixing views Phase47Running’mysql_fix_privilege_tables’ Phase57Fixing table anddatabase names Phase67Checking andupgrading tables Processing databases information_schema ……….. |
…. and after that: Ka-ching!
sudo mysql_secure_installation
……….
Enable unix_socket authentication? [Y/n] Y
Enabled successfully!
Reloading privilege tables..
… Success!
|
1 |
sudo mysql_secure_installation ………. Enable unix_socket authentication?YnY Enabled successfully! Reloading privilege tables.. …Success! |
My MySQL client tools and CLI access to the newly updated and clean installed MariaDB worked flawlessly.
I haven’t had to run the mysql_update command to solve a problem with setting MySQL/MariaDB to start & run in many years, but the error message and missing table issue was pretty obscure. Bonus tip: if you get “error access denied” during
</p>
<!— /wp:paragraph —>
<!— wp:urvanov-syntax-highlighter/code-block —>
<div class=»wp-block-urvanov-syntax-highlighter-code-block»><pre class=»lang:default decode:true «>sudo mysql_update
|
1 |
<p> <!—wpparagraph—> <!—wpurvanov-syntax-highlightercode-block—> <div class=»wp-block-urvanov-syntax-highlighter-code-block»><pre class=»lang:default decode:true «>sudo mysql_update |
Troubleshooting Issues
Checking the Error Log
If fails, you should examine the error log in the
data directory, which is the directory specified with option. This should provide a clue about what went wrong.
Testing With mysqld
You can also test that this is not a general fault of MariaDB Server by trying to start the process. The option will tell it to ignore the system tables. Enabling the general query log can help you determine what queries are being run on the server. For example:
mysqld --skip-grant-tables --general-log
At this point, you can use the client to connect to the database and look at the system tables. For example:
$ /usr/local/mysql/bin/mysql -u root mysql
MariaDB > show tables
Using mysql_install_db
To invoke , use the following syntax:
$ mysql_install_db options
Because the MariaDB server, , needs to access the data directory
when it runs later, you should either run from the same
account that will be used for running or run it as root and use the
option to indicate the user name that will run
as. It might be necessary to specify other options such as
or if
does not use the correct locations for the installation
directory or data directory. For example:
$ scripts/mysql_install_db --user=mysql \
   --basedir=/opt/mysql/mysql \
   --datadir=/opt/mysql/mysql/data
Options
supports the following options:
| Option | Description |
|---|---|
| If set to , it creates a account that authenticates with the authentication plugin and that has no initial password set, which can be insecure. If set to , it creates a account that authenticates with the authentication plugin. Set to by default from MariaDB 10.4 (see Authentication from MariaDB 10.4), or by default in earlier versions. Available since MariaDB 10.1. | |
| Used with . It specifies the name of the second account to create with privileges in addition to , as well as of the system account allowed to access it. Defaults to the value of . | |
| The path to the MariaDB installation directory. | |
| If using with out-of-directory builds, you will need to set this to the location of the build directory where built files reside. | |
| For internal use. Used when building the MariaDB system tables on a different host than the target. | |
| , | The path to the MariaDB data directory. |
| Read this file after the global files are read. Must be given as the first option. | |
| Only read default options from the given file name Must be given as the first option. | |
| In addition to the given groups, read also groups with this suffix. From MariaDB 10.1.31, MariaDB 10.2.13 and MariaDB 10.3.5. | |
| Causes to run even if DNS does not work. In that case, grant table entries that normally use host names will use IP addresses. | |
| Don’t read default options from any option file. Must be given as the first option. | |
| Print the program argument list and exit. Must be given as the first option. | |
| For internal use. This option is used by RPM files during the MariaDB installation process. | |
| Do not create the anonymous user. | |
| Uses IP addresses rather than host names when creating grant table entries. This option can be useful if your DNS does not work. | |
| Don’t install the test database. | |
| For internal use. The path to the MariaDB source directory. This option uses the compiled binaries and support files within the source tree, useful for if you don’t want to install MariaDB yet and just want to create the system tables. The directory under which looks for support files such as the error message file and the file for populating the help tables. | |
| The login user name to use for running . Files and directories created by will be owned by this user. You must be to use this option. By default, runs using your current login name and files and directories that it creates will be owned by you. | |
| Verbose mode. Print more information about what the program does. | |
| For internal use. This option is used for creating Windows distributions. |
Option Files
In addition to reading options from the command-line, can also read options from option files. If an unknown option is provided to in an option file, then it is ignored.
The following options relate to how MariaDB command-line tools handles option files. They must be given as the first argument on the command-line:
| Option | Description |
|---|---|
| Print the program argument list and exit. | |
| Don’t read default options from any option file. | |
| Only read default options from the given file #. | |
| Read this file after the global files are read. | |
| In addition to the default option groups, also read option groups with this suffix. |
Option Groups
reads options from the following from option files:
| Group | Description |
|---|---|
| Options read by , which includes both MariaDB Server and MySQL Server. |
also reads options from the following server from option files:
| Group | Description |
|---|---|
| Options read by , which includes both MariaDB Server and MySQL Server. | |
| Options read by MariaDB Server. | |
| Options read by a specific version of , which includes both MariaDB Server and MySQL Server. For example, . | |
| Options read by MariaDB Server. | |
| Options read by a specific version of MariaDB Server. | |
| Options read by all MariaDB client programs and the MariaDB Server. This is useful for options like socket and port, which is common between the server and the clients. | |
| Options read by a galera-capable MariaDB Server. Available on systems compiled with Galera support. |
Replication Compatibility
Replication compatibility depends on:
- The MariaDB Server version
- The MySQL Server version
- The role of each server
Replication compatibility details are described below for each MySQL version that is still currently supported.
For replication compatibility details between MariaDB versions, see .
MySQL 5.7
MariaDB Server 10.2 and later can replicate from a MySQL 5.7 primary server.
MariaDB Server does not support the MySQL implementation of Global Transaction IDs (GTIDs), so the MariaDB replica server must use the binary log file and position for replication. If GTID mode is enabled on the MySQL primary server, the MariaDB replica server will remove the MySQL GTID events and replace them with MariaDB GTID events.
Although MariaDB Server and MySQL 5.7 are compatible at the replication level, they may have some incompatibilities at the SQL (detailed below). Those differences can cause replication failures in some cases. To decrease the risk of compatibility issues, it is recommended to set to . When you want to replicate from MySQL 5.7 to MariaDB Server, it is recommended to test your application, so that any compatibility issues can be found and fixed.
MariaDB can’t make any claims about whether a MySQL 5.7 replica server can replicate from a MariaDB primary server.
MySQL 8.0
MariaDB Server cannot replicate from a MySQL 8.0 primary server, because MySQL 8.0 has a binary log format that is incompatible.
mysqldump: Got error: 1146: Table doesn‘t exist
Recently, while performing the database dump, some of our users notice the error:
In order to check, we go to MySQL:
Then we query for the tables:
Here, we can find the table. However, when we query for that particular table:
We get the same error:
We can try to repair it via:
However, the error may prevail:
The major causes of this can be:
- InnoDB tablespace might have been deleted and recreated but corresponding .frm files of InnoDB tables from the database directory were not removed, or .frm files were moved to another database
- Incorrect permissions and ownership on table’s files in MySQL data directory
- A corrupt table data.
How to fix it?
Moving ahead, let us see how our Support Techs fix this error in both Plesk and Directadmin.
Plesk
- Initially, we try to connect to the server using SSH
- Then we try to use parameter with to skip lock tables. For example,
- If it does not help, we check permissions and ownership on the table’s files in the MySQL data directory for the database that fails to dump. It should be for both owner and group:
- Find data dir location: RHEL/CentOS
Debian/Ubuntu
- Check permissions:
- Fix permissions:
- Find data dir location: RHEL/CentOS
- If it is still not possible, we try to repair the table in the error using the native MySQL repair tool:
NoteWe need to replace the with table name in the error message.
- If the issue still persists, most probably ibdata* file does not have the info about the table. However, the orphaned files still persist on the file system. We remove it:
- To verify that table is corrupt or not, we run:
If this command fails with the error, it means that does not have the information about the table and we need to remove the file.
- To do so, we browse to the database directory and move file:
# cd /var/lib/mysql/example_db/
# mv <TABLENAME>.frm /root/<TABLENAME>.frm
- To verify that table is corrupt or not, we run:
- If these options fail and we have no valid backups to restore, the only available option to save the database is to dump it with the innodb_force_recovery option
Directadmin
Suppose, we get the error for the User database and Table:
mysqldump error output: mysqldump: Got error: 1146: Table ‘user_db.table‘ doesn’t exist when using LOCK TABLES
- In this case, we check to see if there are any other data files, or if it’s just the .frm file:
If it’s just the table.frm file, then the rest of the data is likely lost. However, we may be able to rebuild the table.
-
- To do so, we need to read the .frm file. We need the mysqlfrm tool for that, eg: yum install mysql-utilities. Once we install it, we check if it can be read:
This can output the full CREATE TABLE syntax. We save this somewhere, until the end of the last ; character.
Note, we can either delete the “CHARACTER SET “, or change it to the correct charset.
- Then, we remove the broken table. To do so, we login to /phpMyAdmin and run the query:
- Finally, we run the CREATE TABLE query from above, to rebuild the table.